Configuring Okta in 4biz
This authentication method allows you to use the Okta features to authenticate users of your organization in a 4biz instance. This document explains the steps in configuring this method. To learn more about Okta, visit okta.com
Before getting started
The configuration of this solution is a multi-phase process;
The first step is the creation of an Okta account.
Procedure
1st Step: Create an Okta account:
- Click on "Try Okta" and then on "Sign up today";
- Enter the essential data (e-mail, name, and last name);
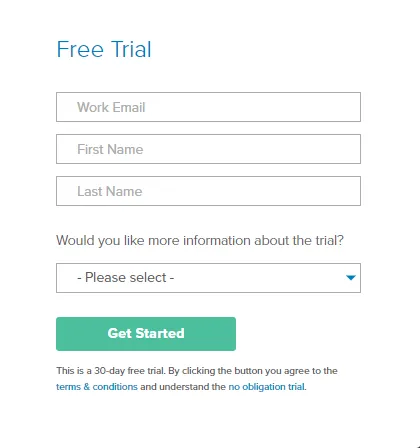
4. Click on "Get Started" to complete the operation. Then check the registered e-mail (which will send an access link), access the account with the temporary password sent, and change it for greater data security;
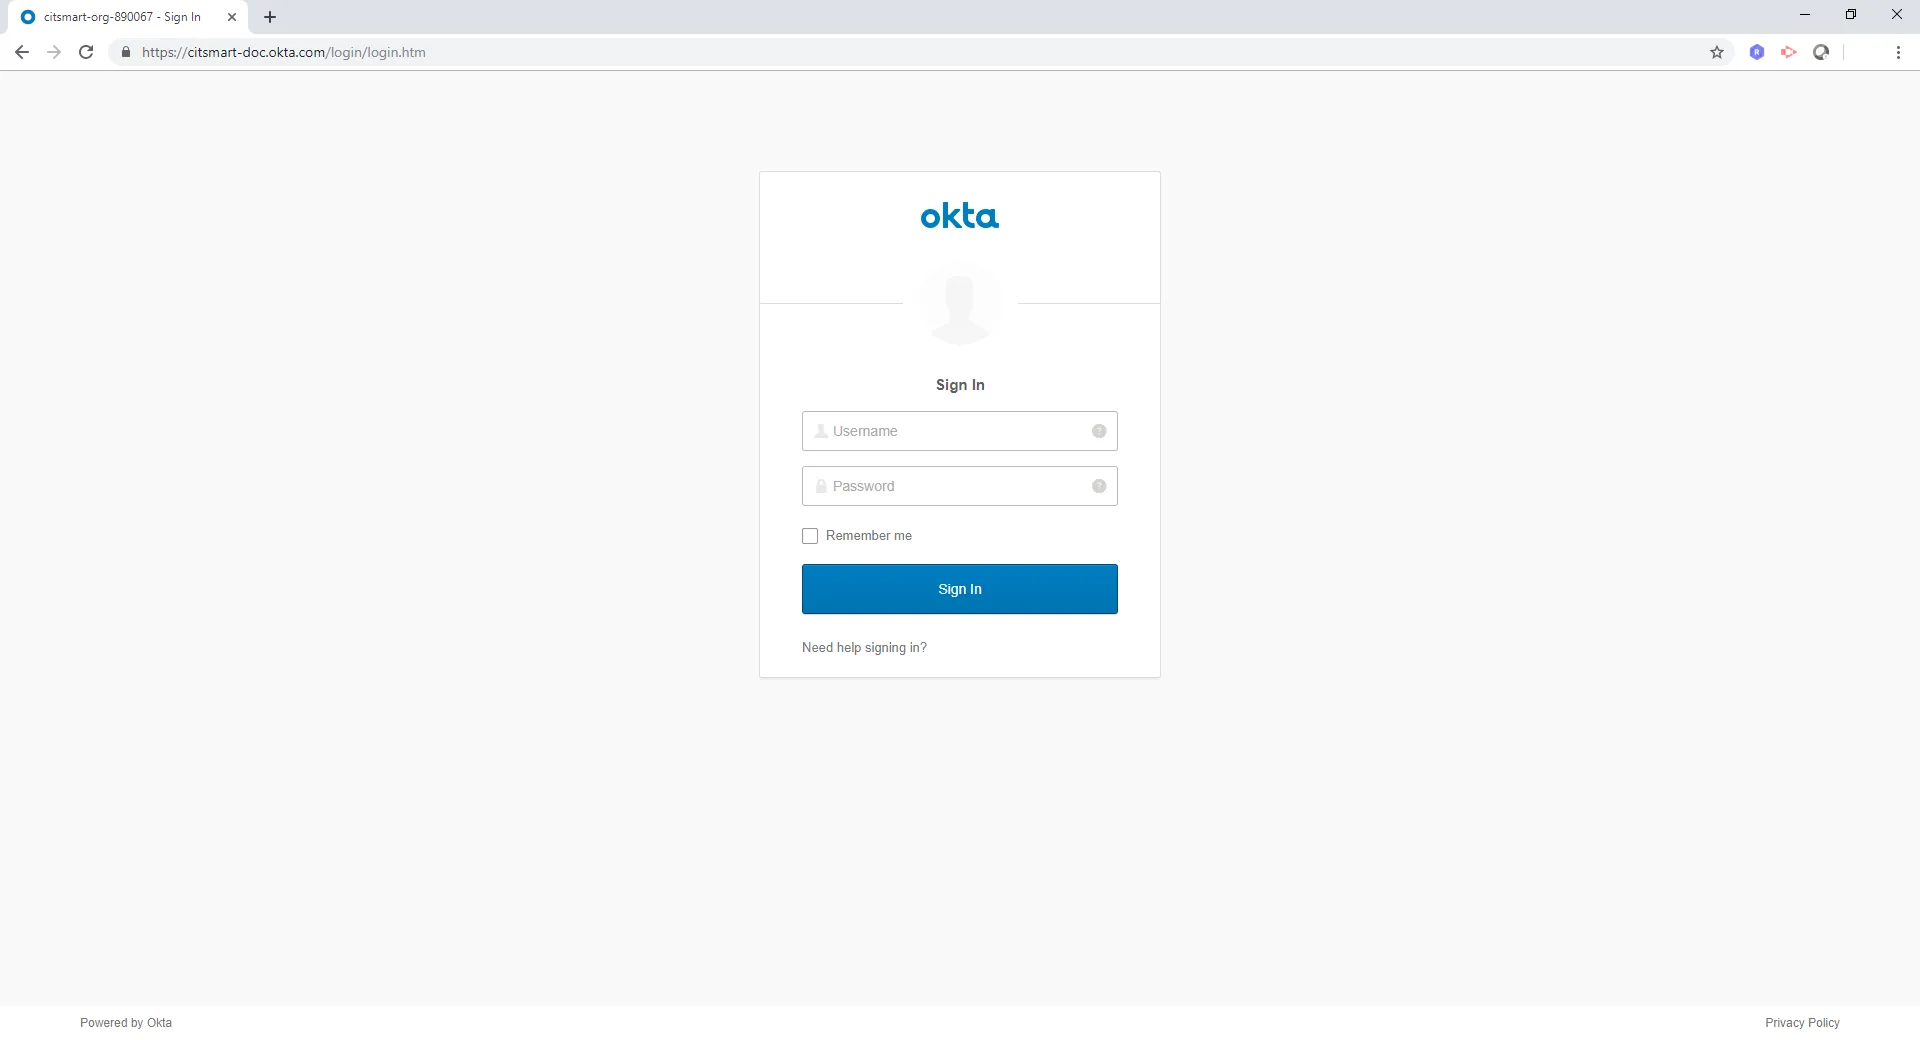
2nd Step: Created 4biz application within Okta:
- After completing the previous step, connect to Okta with your newly created account;
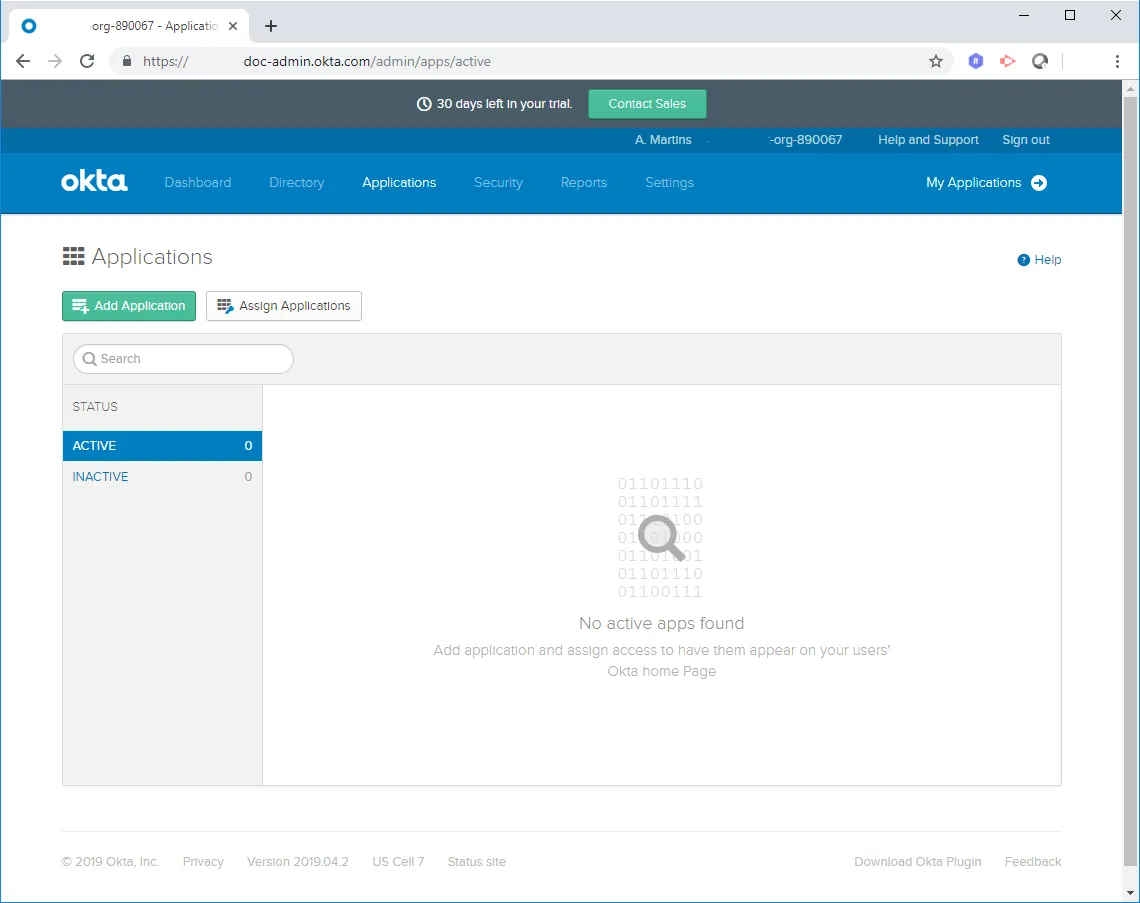
- Click on the "Applications" tab and then on "Add Application";
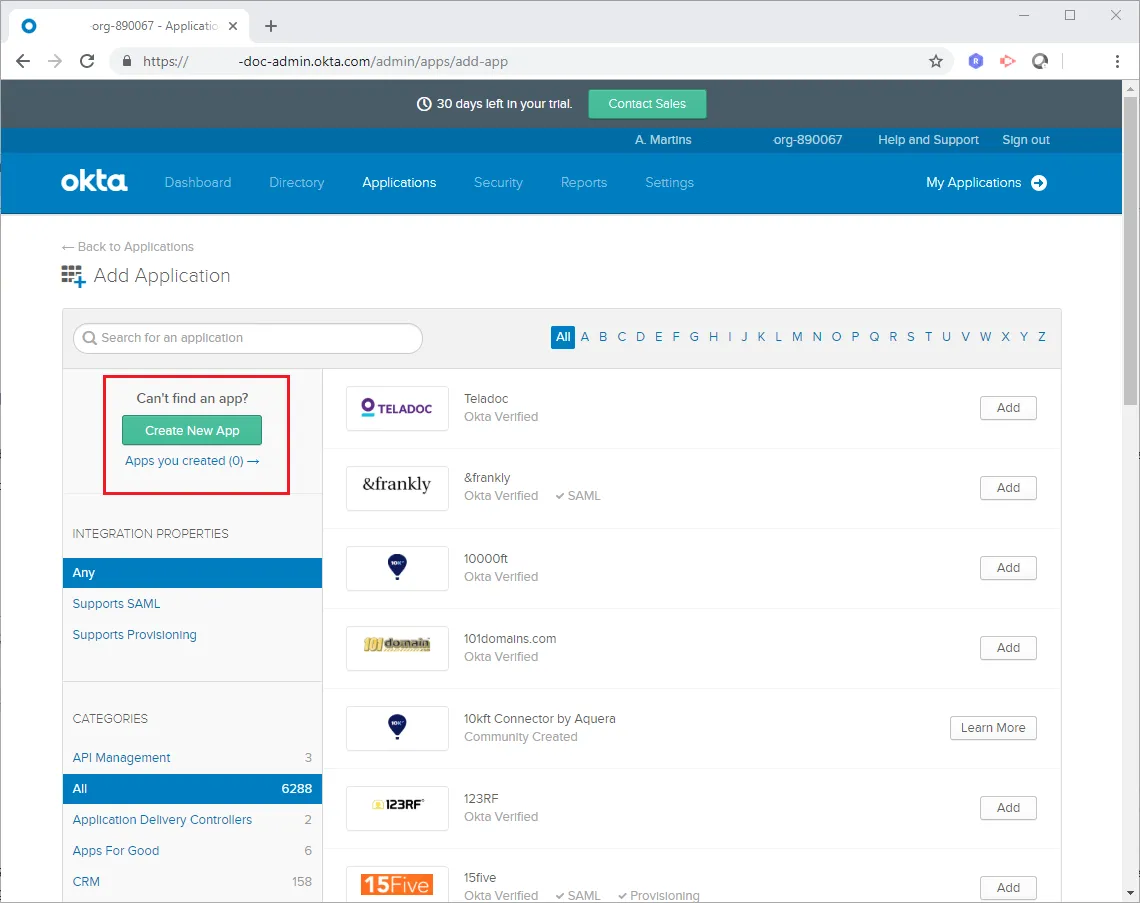
3. Click on "Create New App";
4. Select the option "SAML 2.0" and then click on "Create";
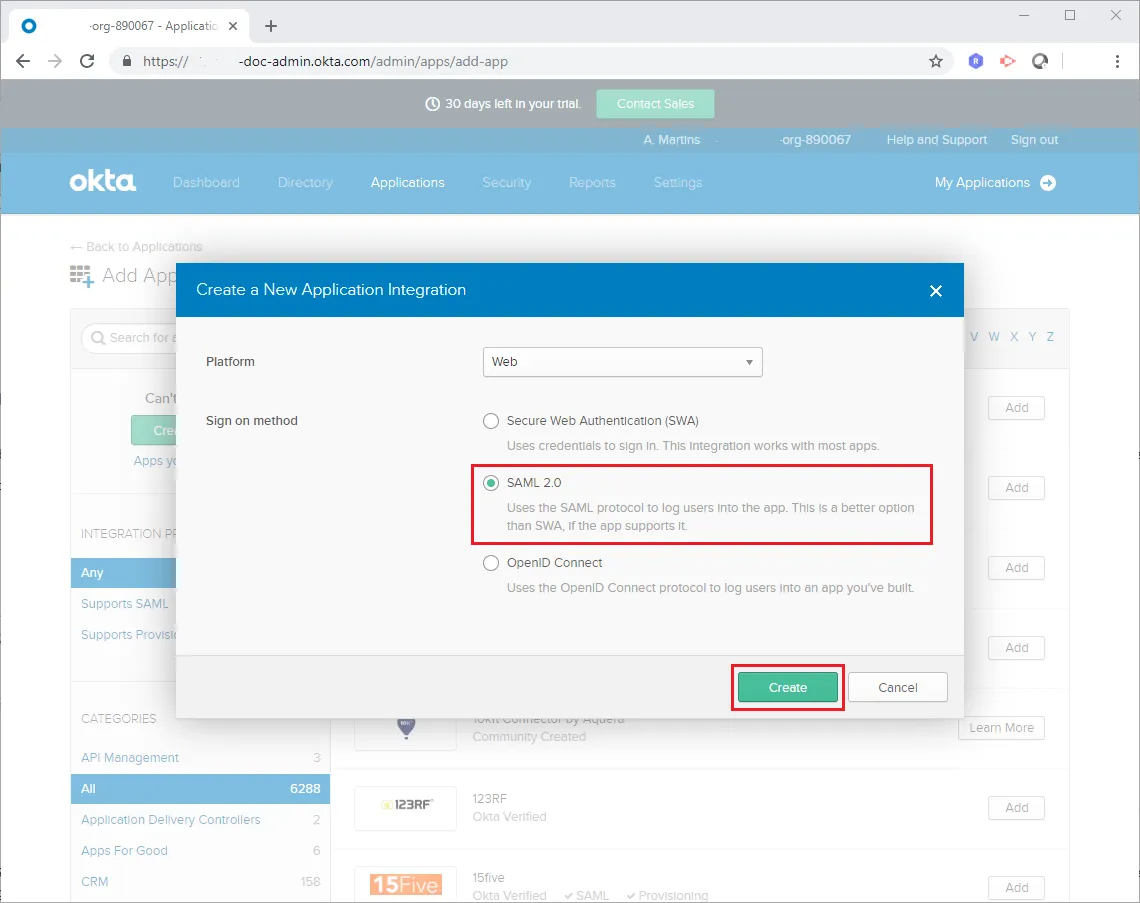
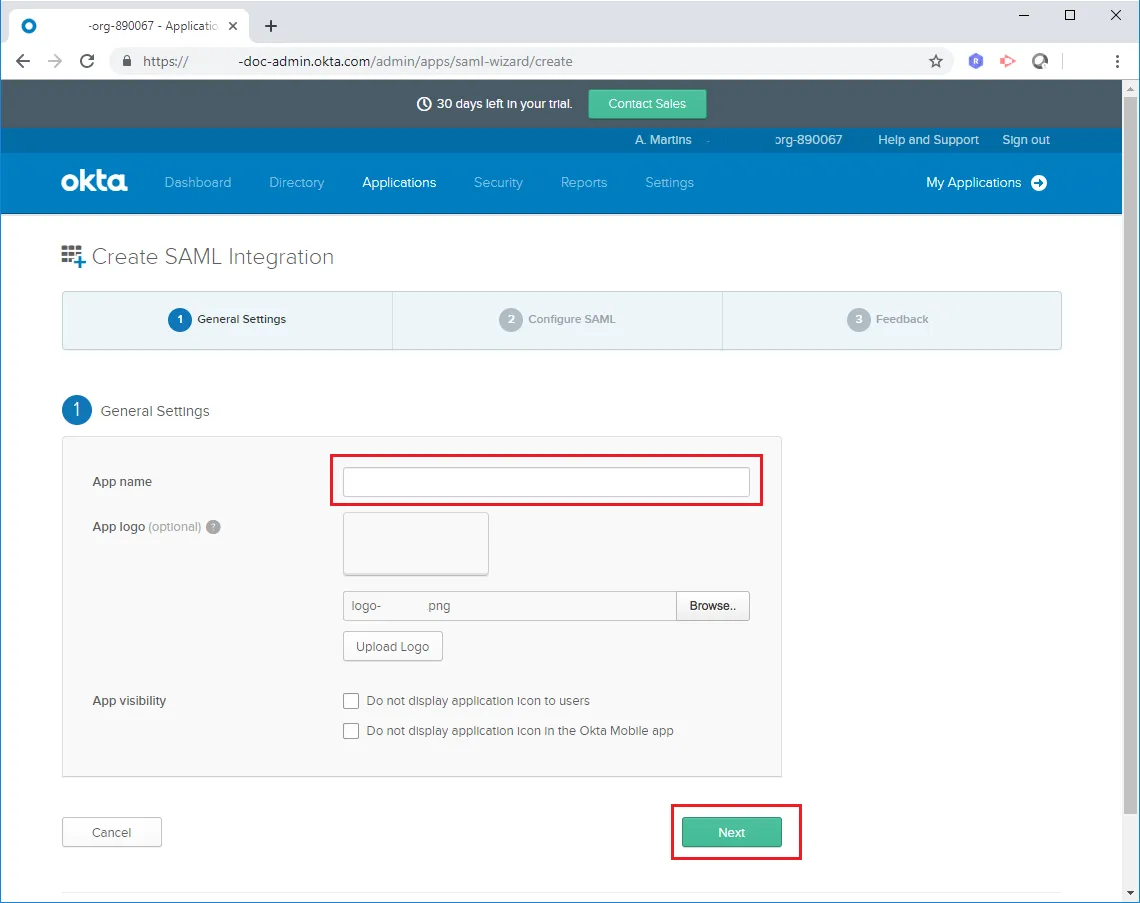
5. In the field "App Name", add the name of the application and soon after, it is necessary to click on "Next";
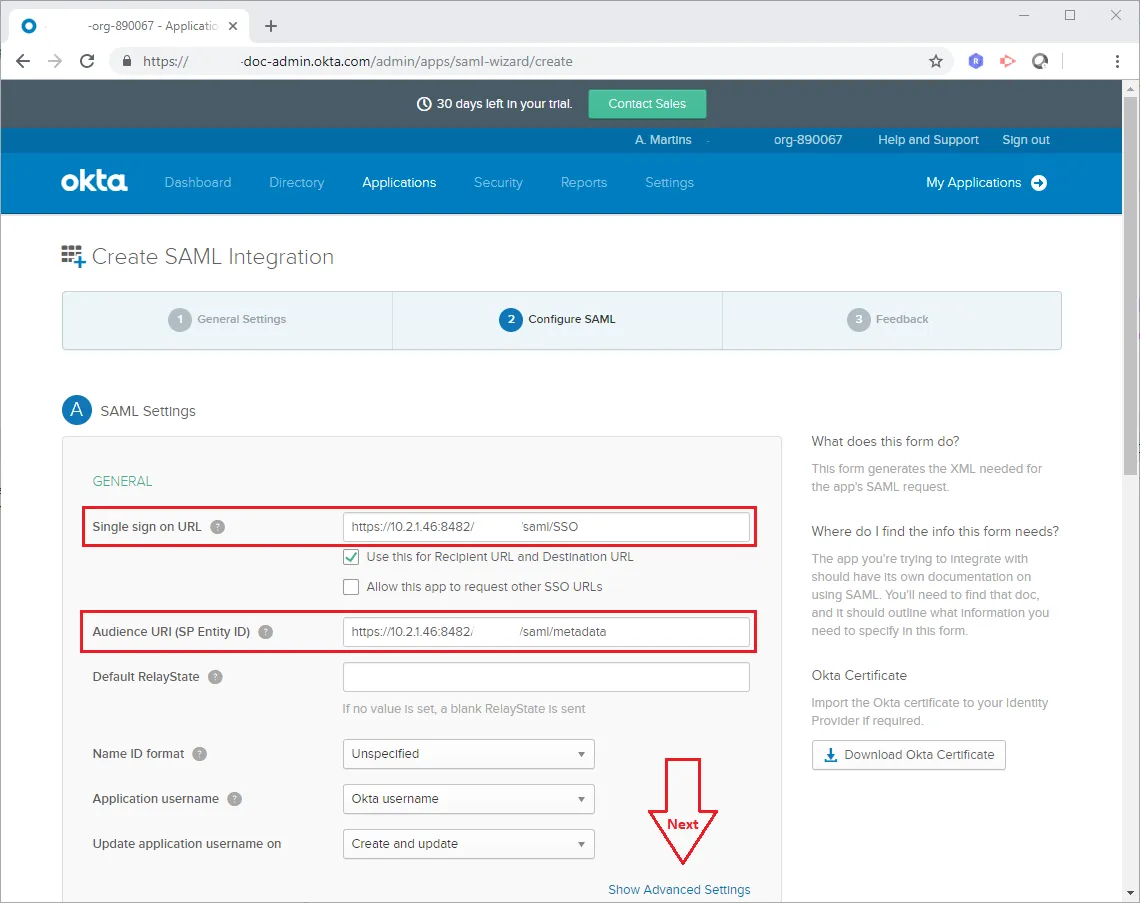
6. Configure the application path and then click on "Next";
⚠ Attention!
In the "Single sign on URL" and "Audience URI (SP Entity ID)" fields, the URL addresses on which the 4biz Application will be executed should be included.
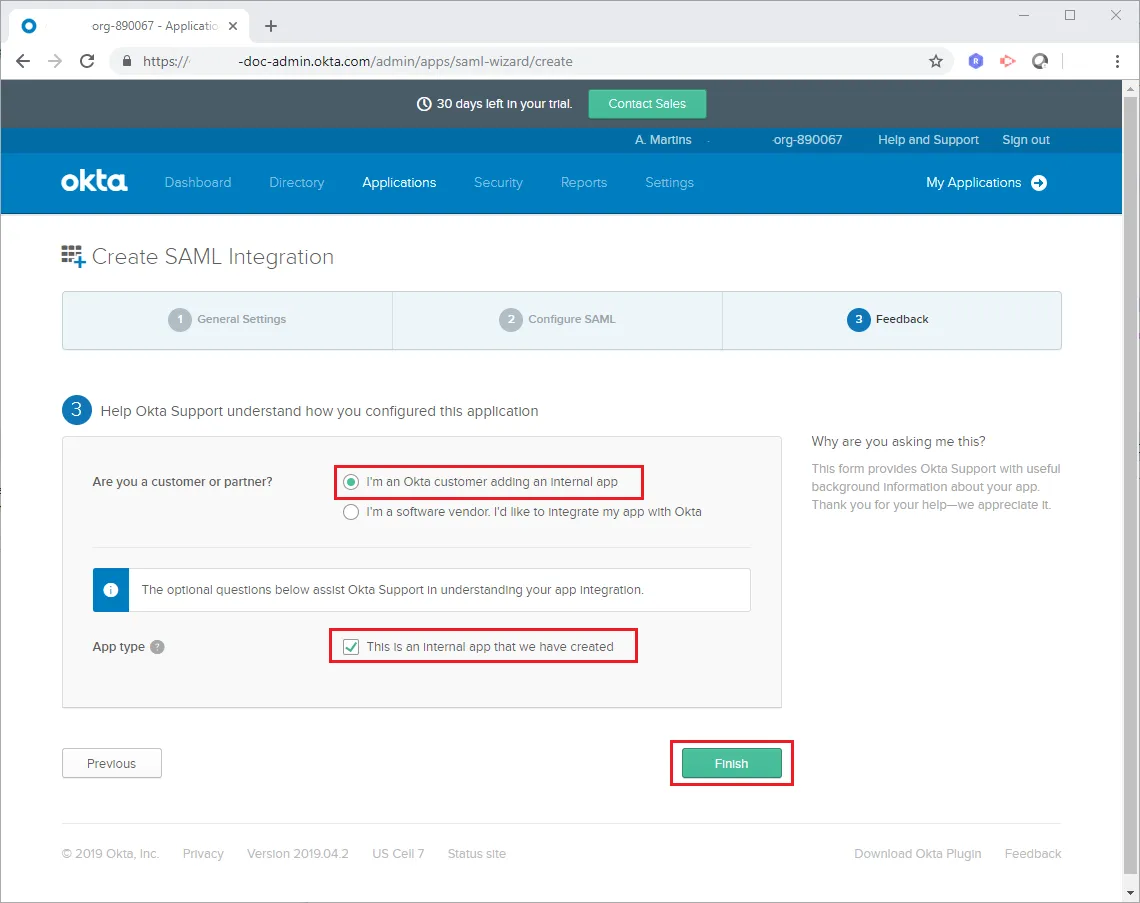
7. Select the options "I'm an Okta customer adding an internal app" and "This is an internal app that we have created". Then, click on "Finish".
3rd Step: Assign users to Okta's 4biz application:
- After completing the previous step, click on the "Applications > Applications" tab, then on "Assign Applications" and choose the filter called "People";
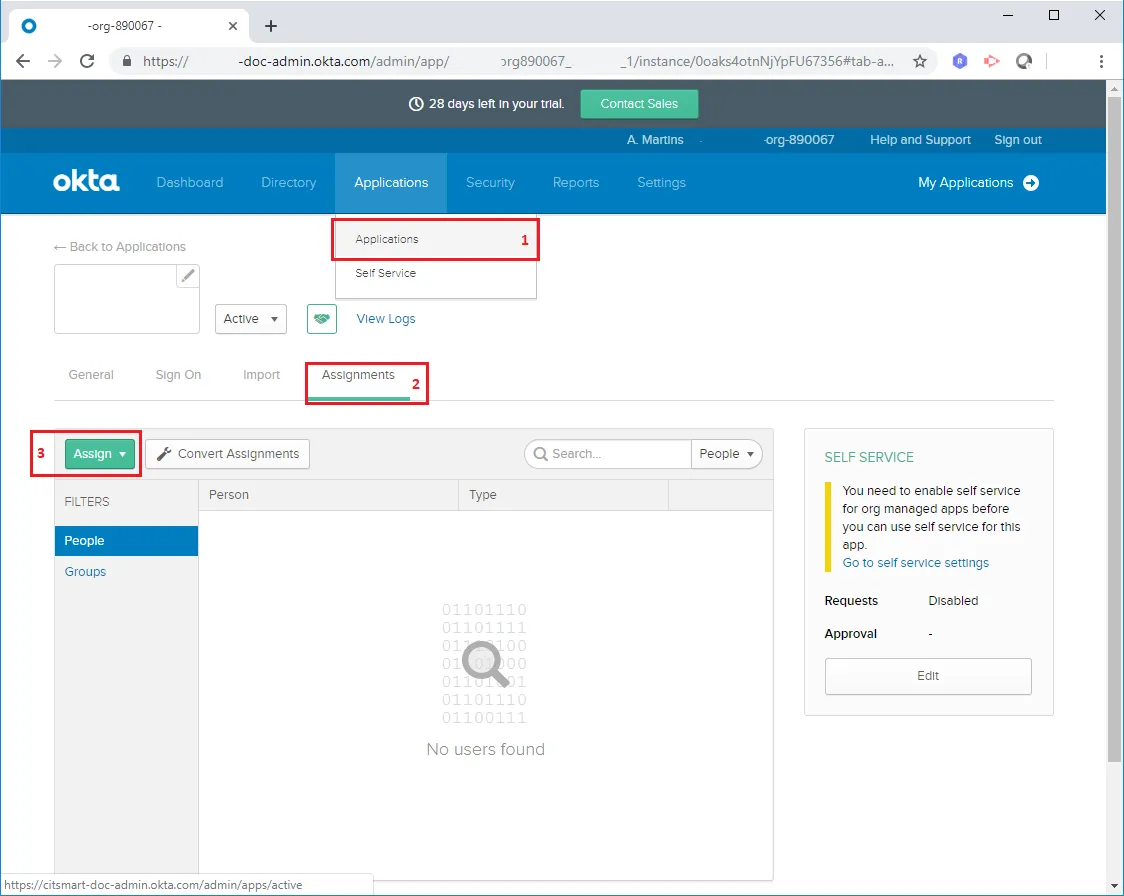
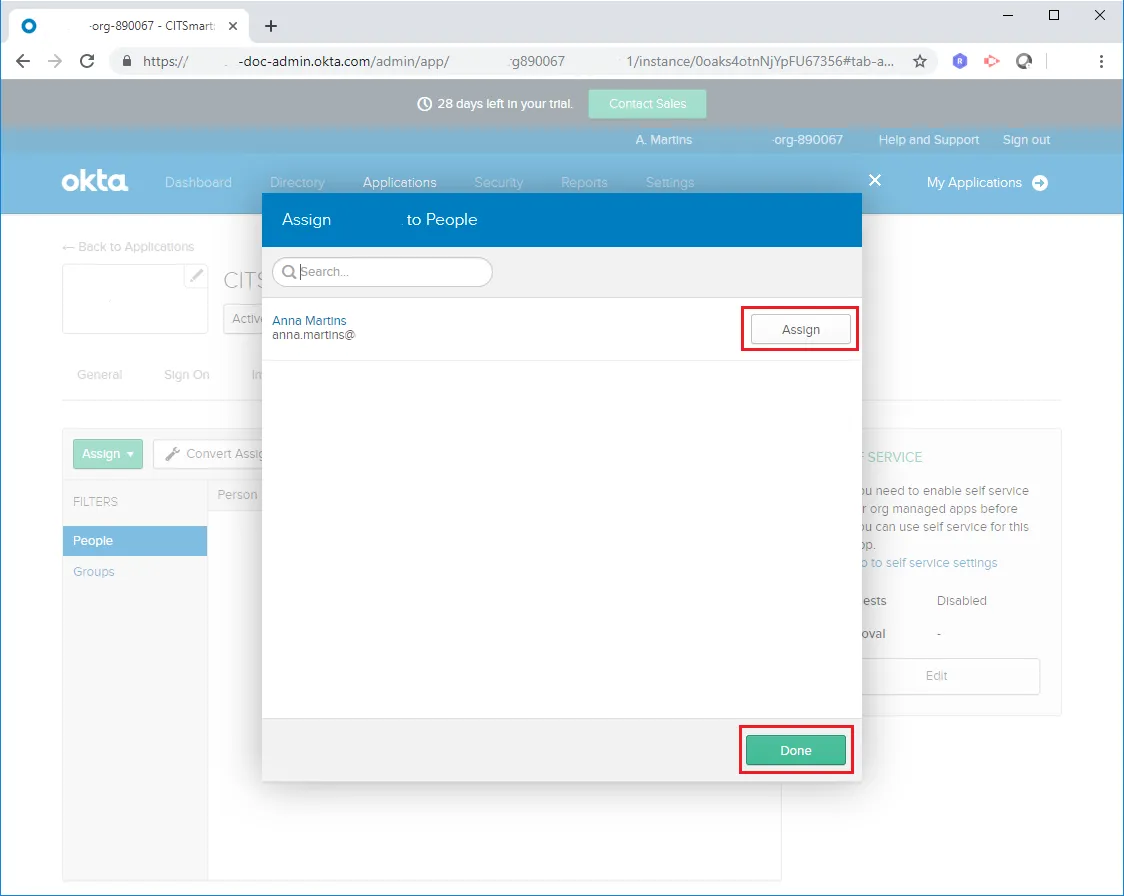
2. Then you can choose the user who will be allowed to access the application that is being created. Click on "Assign" and then, to finish, click on "Done";
4th Step: Include required information in the 4biz configured on Okta:
- You will need to configure some data in the WildFly directory. Access the directory, open the "/standalone/configuration" folder and change the file "4biz.cfg".
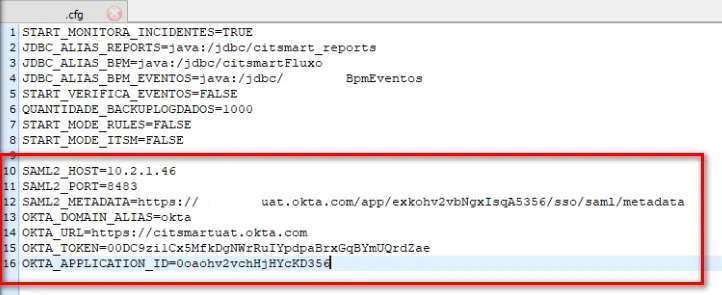
2. Accessed the file, you need to include this information in the file "4biz.cfg":
a) In the line, SAML2_HOST and SAML2_PORT, include the address and port of the 4biz application;
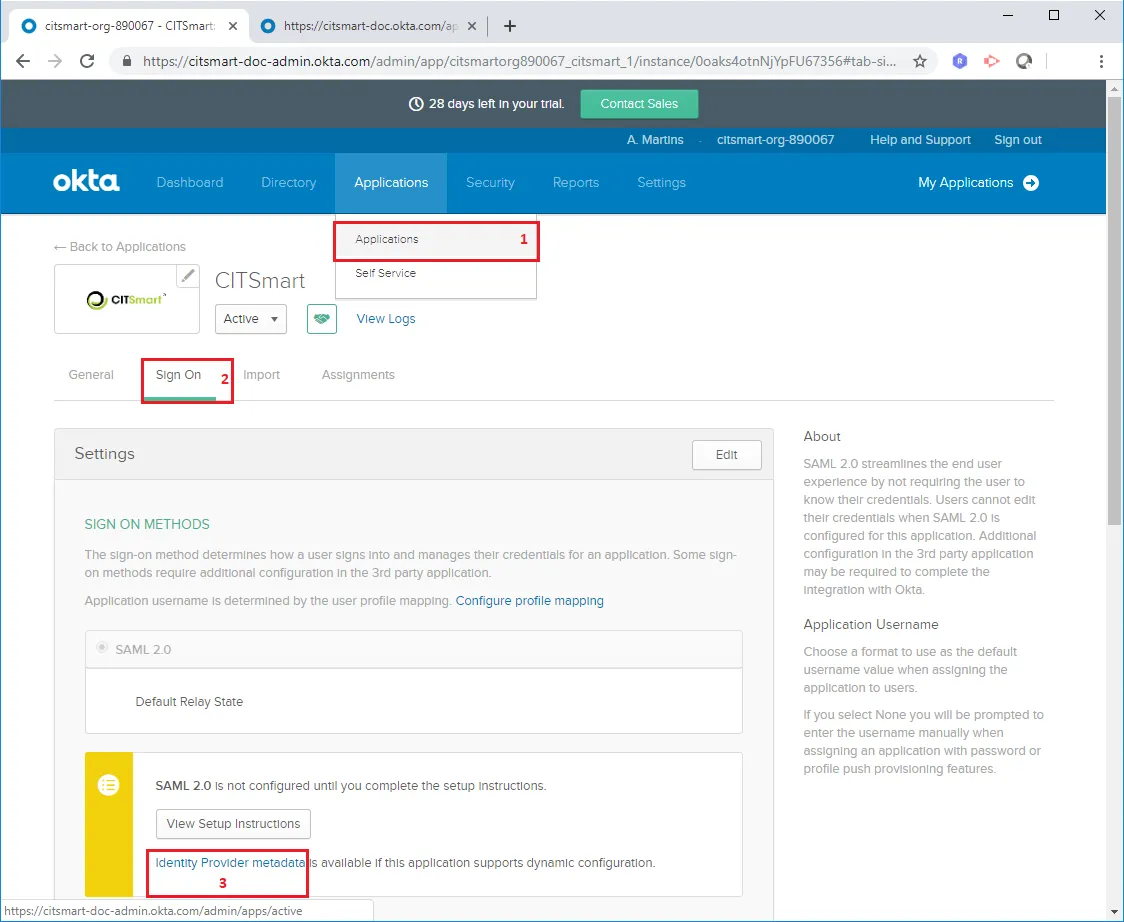
b) In the line, SAML2_METADATA, include the SAML metadata of the Okta. This data can be obtained by following the instructions below:
- Access the 4biz application in Okta, click the "Applications > Applications" tab, and then on "Sign On". When you click on the "Identity Provider metadata" option, a new tab will be available to the metadata, copy the URL of the browser and insert in the property SAML2_METADATA;
c) In the line, OKTA_URL, include the main URL in the Okta account.
d) In the line, OKTA_TOKEN, include the token to access through API. To get this token, follow these steps:
- Access the 4biz application in Okta, select the "Security > API" menu, and then click on "Create Token". Name the token and click on "Create Token". It will be presented the token value to be copied on the line quoted above.
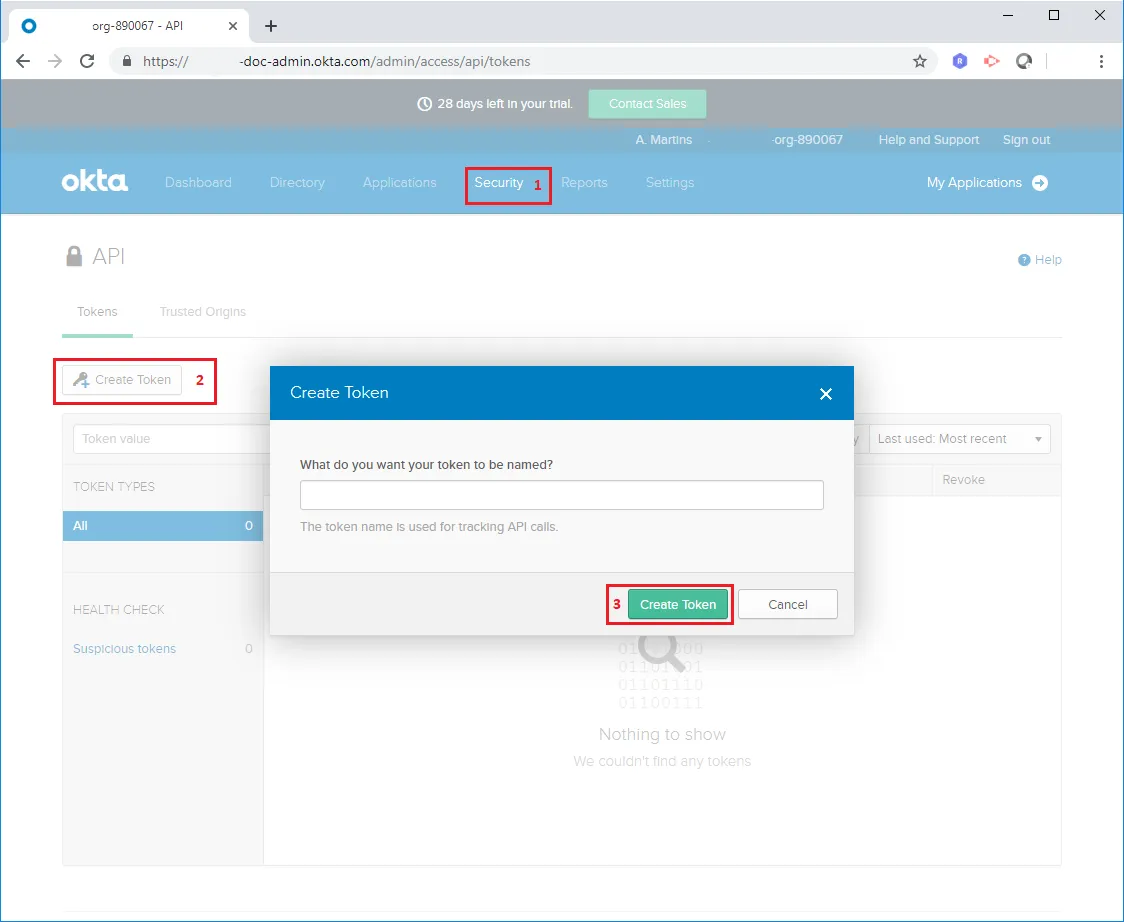
e) In the line, OKTA_DOMAIN_ALIAS, include the domain of users coming from Okta.
5th Step: Synchronize Okta user on 4biz:
- Within 4biz, access the "Okta Config" menu and register a new configuration by clicking on "New";
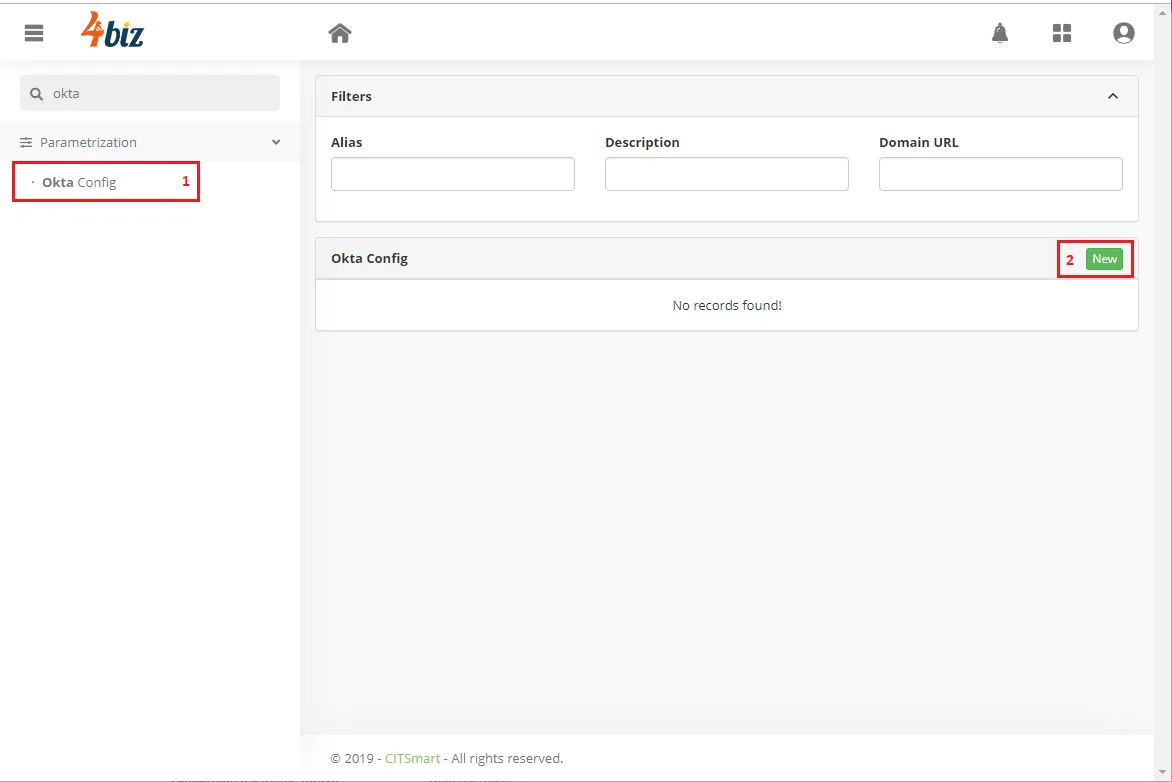
2. Complete the fields with the necessary information:
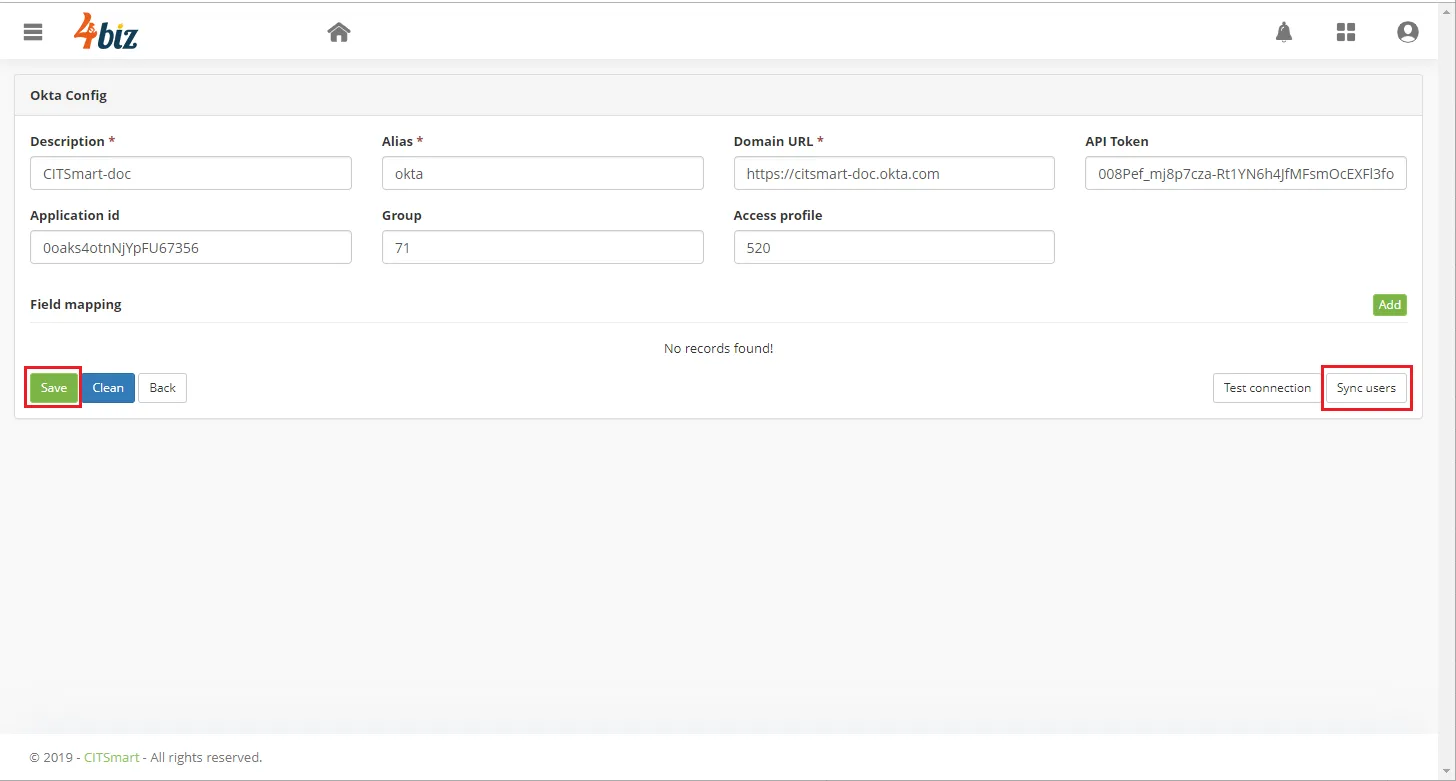
- Description: introduce a definition of this new setting Okta;
- URL domain: should include the same value (URL) that was entered in the line OKTA_URL in the "4biz.cfg" file;
- Token API: include the same value of the token inserted in the line OKTA_TOKEN in the file "4biz.cfg";
- Group: insert the ID of the group in which the synchronized and registered user will belong in 4biz;
- Access Profile: insert the profile ID in which the synchronized and registered user will belong in 4biz;
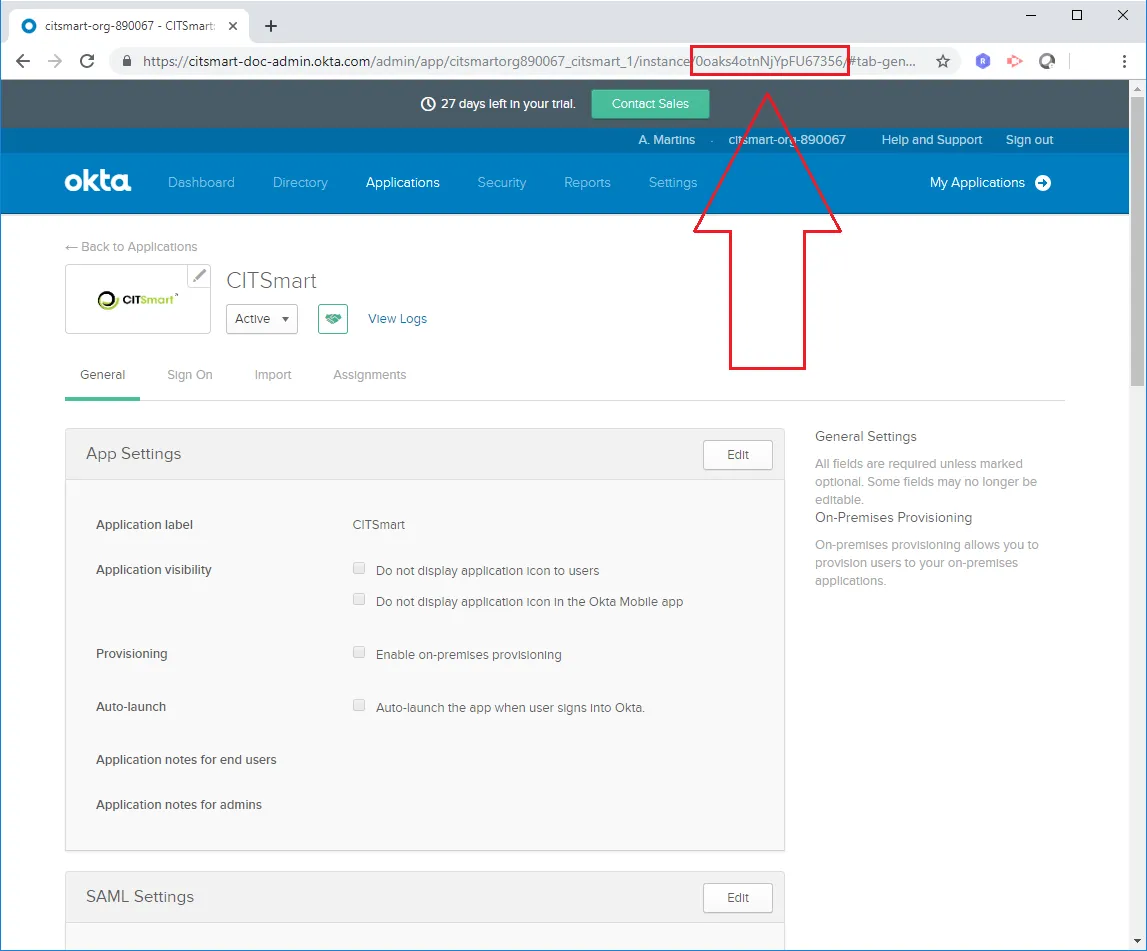
- Application ID: include the application ID. This information can be retrieved from the Okta URL, as shown below:
3. Click on "Save" and then on "Synchronize users" to perform the operation.
6th Step: Configure the Logout:
- Since Okta does not have a logout screen, in parameter 377 of 4biz, we can insert some page address to redirect the user to the end of the session;
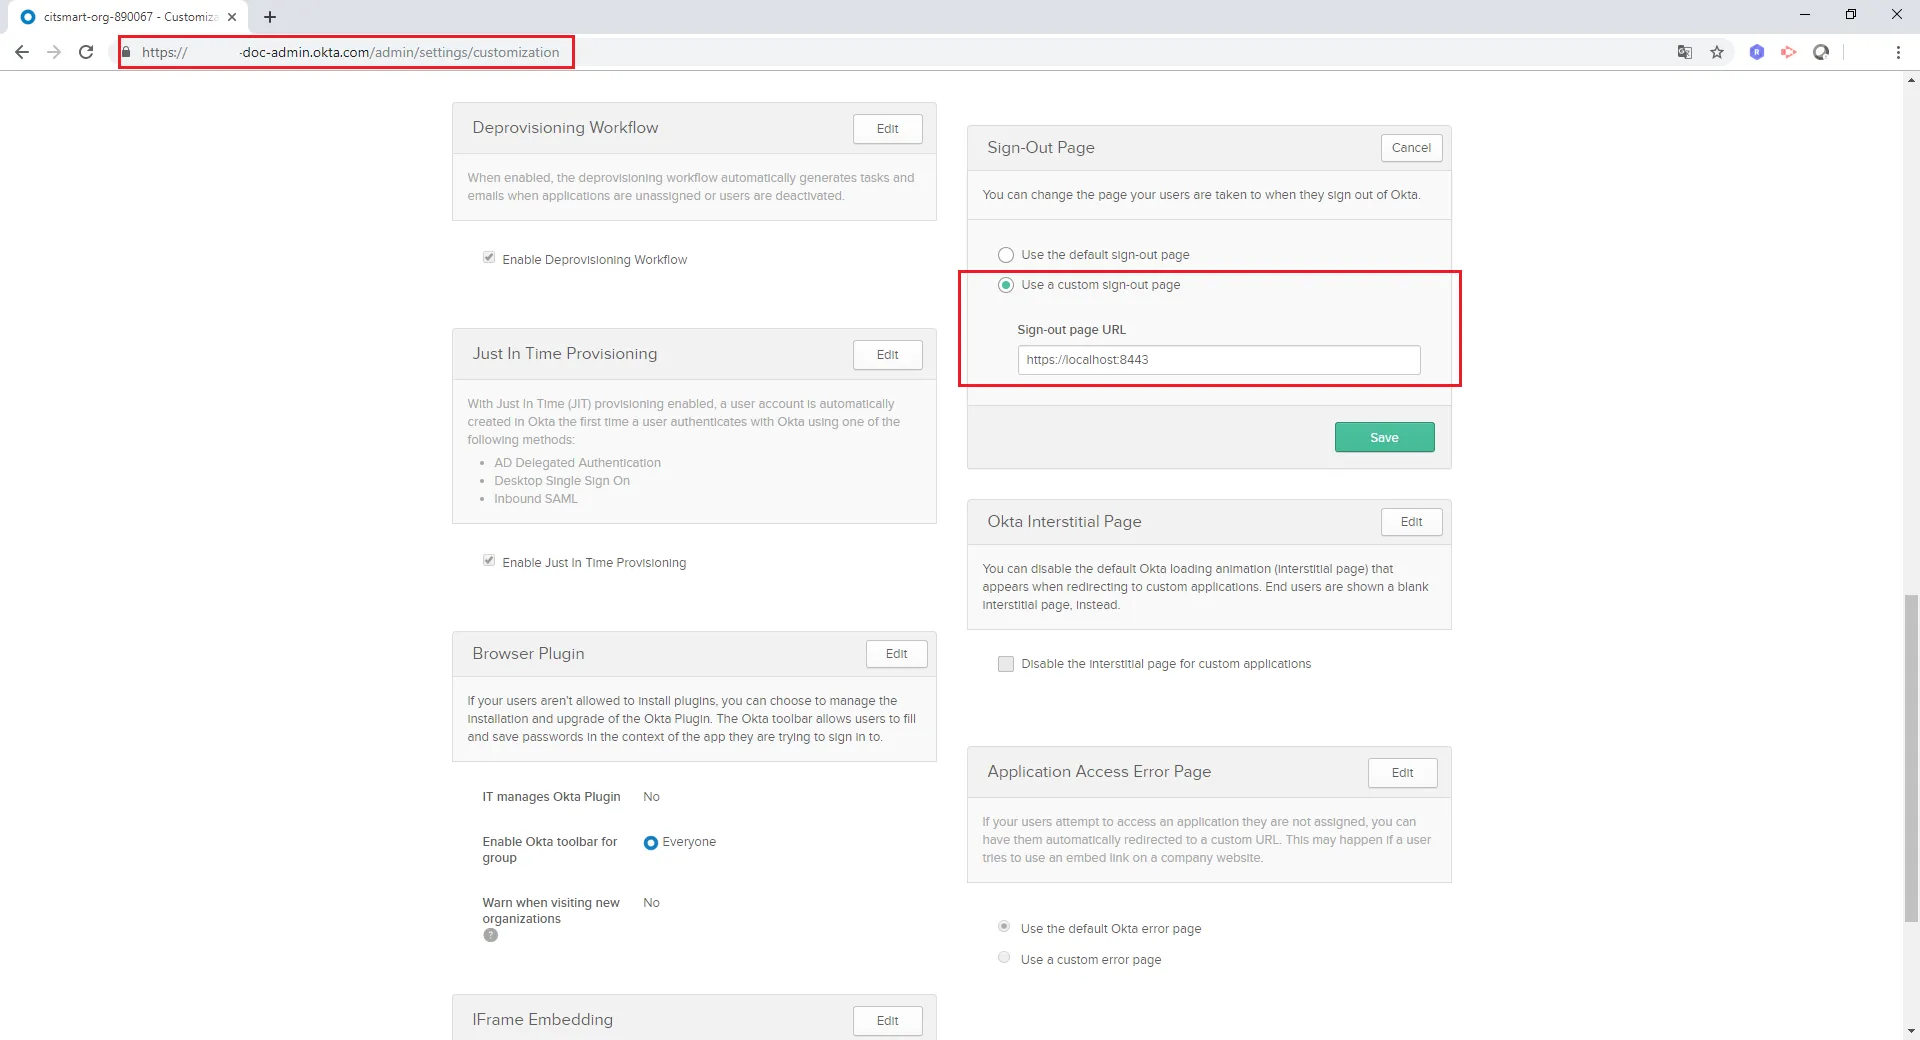
- Set up the logout link also at the address (Admin > Settings > Customization > Sign-Out-Page), then check the option "Use the custom sign-out page". Therefore, enter the URL (https://localhost:8443/4biz/saml/logout) with the appropriate adaptations (host and port), according to the image below:
🖊 Note: When logging out in 4biz, do not log out from the Okta, since users may have other applications in the Okta session. In contrast, if you do Okta logout, the user session in 4biz will be removed.
What to do next
Once the Okta integration with 4biz is complete, some 4biz parameters can be configured to better customize this integration. They are:
- The parameter 445 (Name of the Administrator group in Okta) allows you to choose the administrator group in the Okta solution. If the user belongs to this chosen group, he/she will have the access profile defined as administrator. If this is not the case, your access profile will be the default profile defined by parameter 39.