Answer a ticket
Answer a ticket
Administrator Attendant

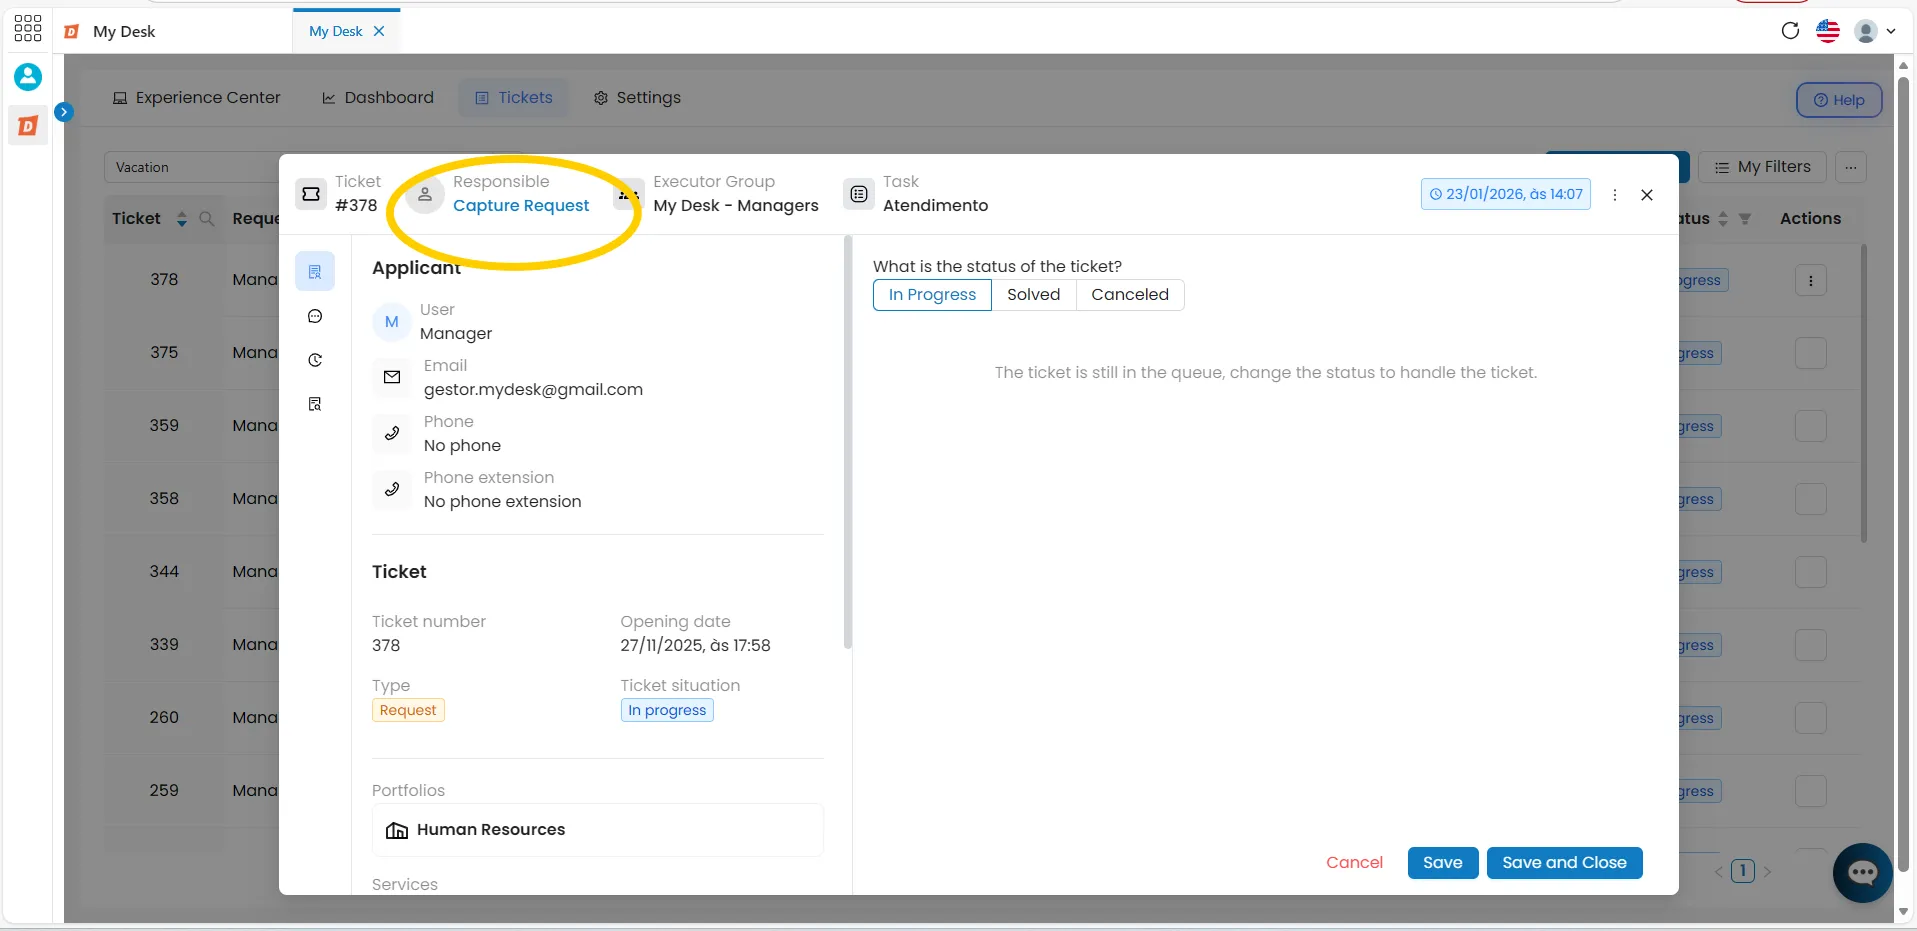
The first step to start handling a request is to Capture the Ticket.
The Capture Request button links the support agent to the ticket, notifying the requester that an agent is now working on their request.
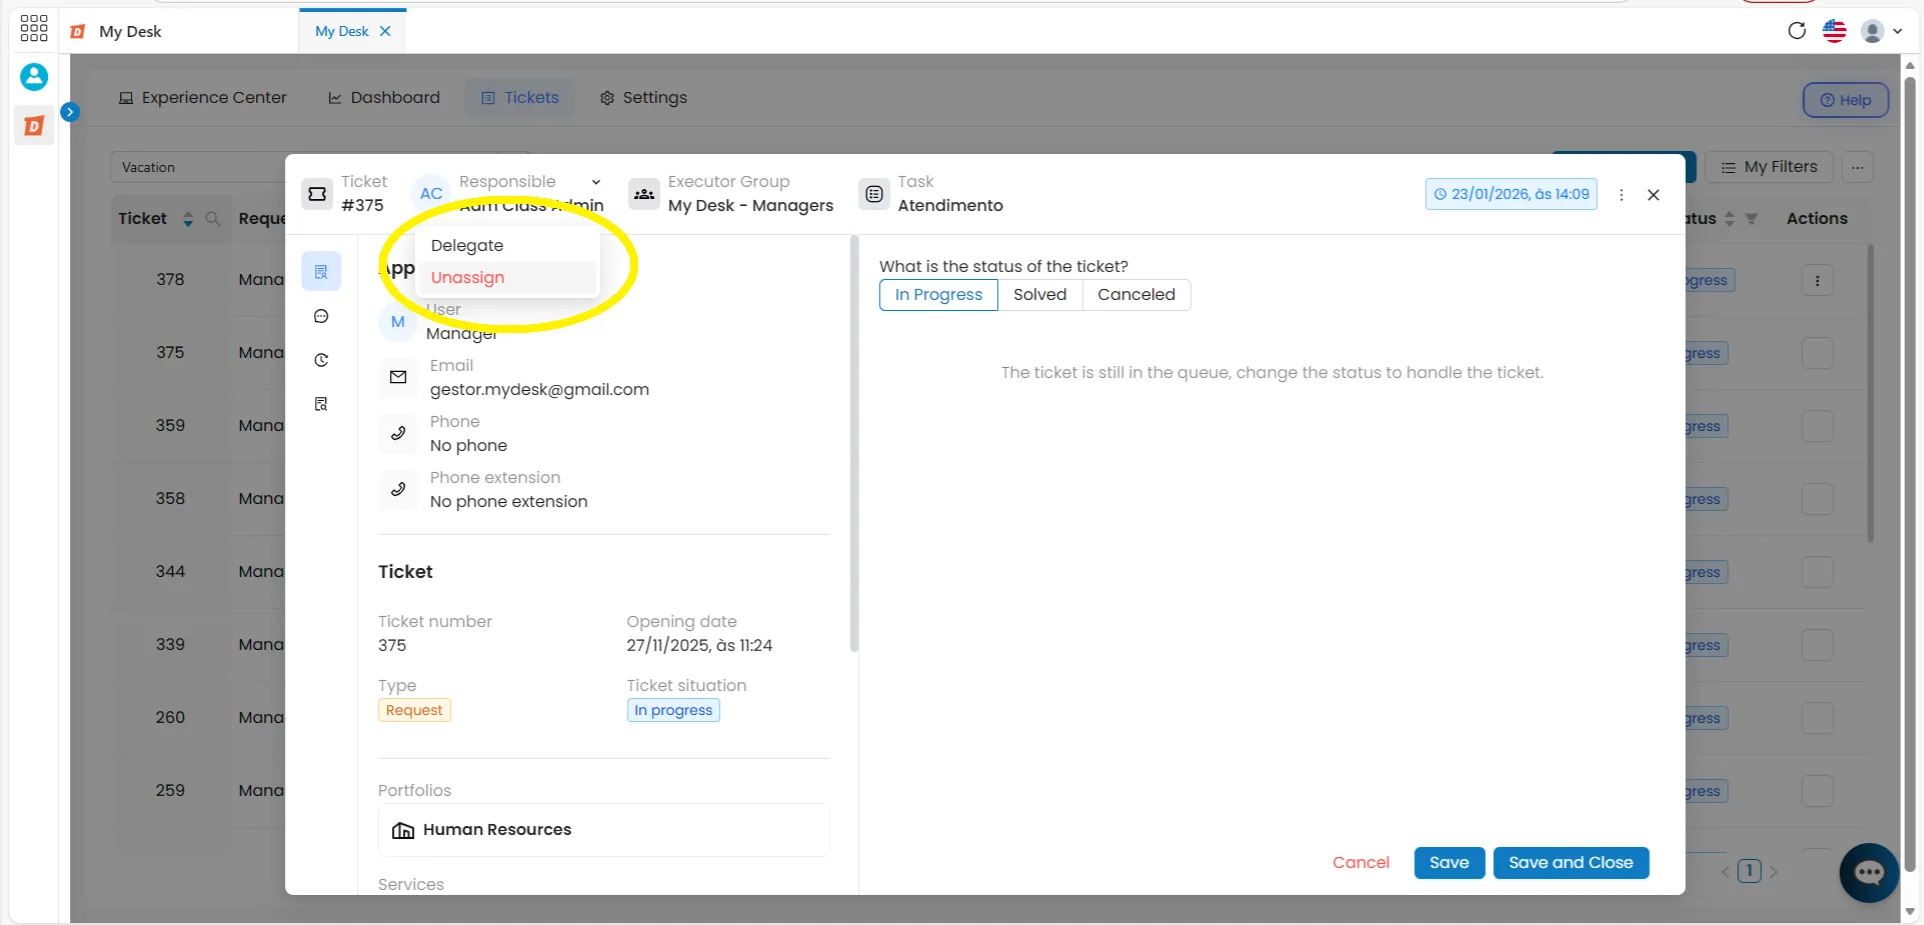
Once a ticket is captured, it is also possible to Unassign the Ticket, removing your name and returning the ticket to its original status without a direct assignee.
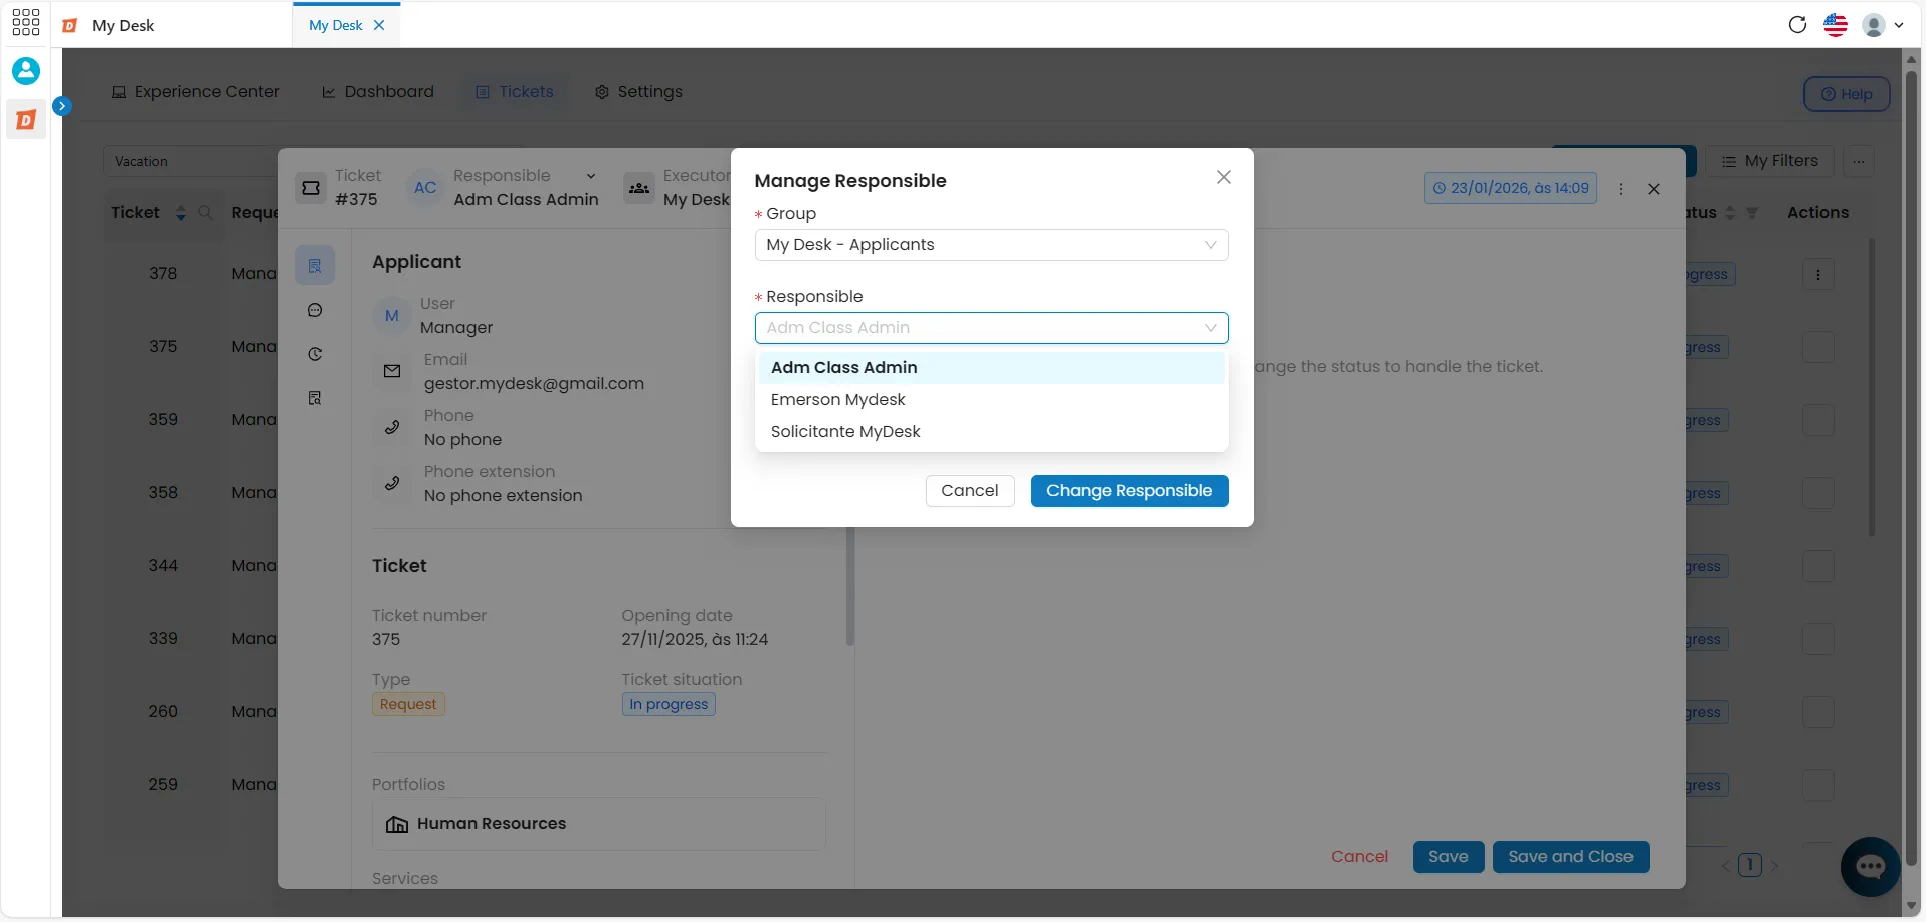
Additionally, you can Delegate a Ticket to another person for handling.
Capturing Ticket

How to Capture a Ticket, follow the steps below:
Click on the desired ticket
In the ticket list, click on the ticket you wish to assist with. A new window will open in the center of the screen.
Click on Capture request
The button is located in the upper left corner of the ticket window.
Confirm the capture
The following message will appear just above the button:
⚠️ Are you sure you want to capture the request?
Click OK to confirm. The following confirmation message will appear at the top of the screen:
✅ Ticket captured successfully.
Unassigning Ticket

To unassign a ticket, follow these steps:
Click on the desired ticket
In the list of tickets, click on the ticket. A new window will open in the center of the screen.
Click the Responsible button
In the window header, click on the name of the current person in charge.
Click on Unassign
The option appears in red. A confirmation message will appear below:
🔴 Are you sure you want to unassign the ticket?
Click the red Unassign button to confirm. The following message will appear at the top of the screen:
✅ Ticket successfully unassigned
Delegate Ticket

To delegate a ticket, follow these steps:
Click on the desired ticket
In the list of tickets, click on the ticket. A new window will open in the center of the screen.
Click the Responsible button
In the window header, click on the name of the current person in charge.
Click on Delegate
A small window will appear in the center of the screen — Manage Responsible Party.
Fill in the delegation details
Please fill in the fields below:
Click on Change Responsible Party
The ticket window will now display the name of the new person in charge. The following message will appear below:
✅ Successful delegate
Handling a Ticket
See below for a step-by-step guide on how to handle a support ticket:
Click on the ticket in the list
After the ticket is created, the ticket appears with the status "Attended".
Capture the ticket
Click on Capture request and confirm
Make the deal
See the description for what was requested and handle the ticket within the SLA.
Closing a Ticket

The information displayed on the ticket screen allows an agent to perform the requested task. After this task is completed, the ticket needs to be closed. When selecting the closing option, use the text field below to record the solution applied.
To respond to/close a ticket, follow the steps below:
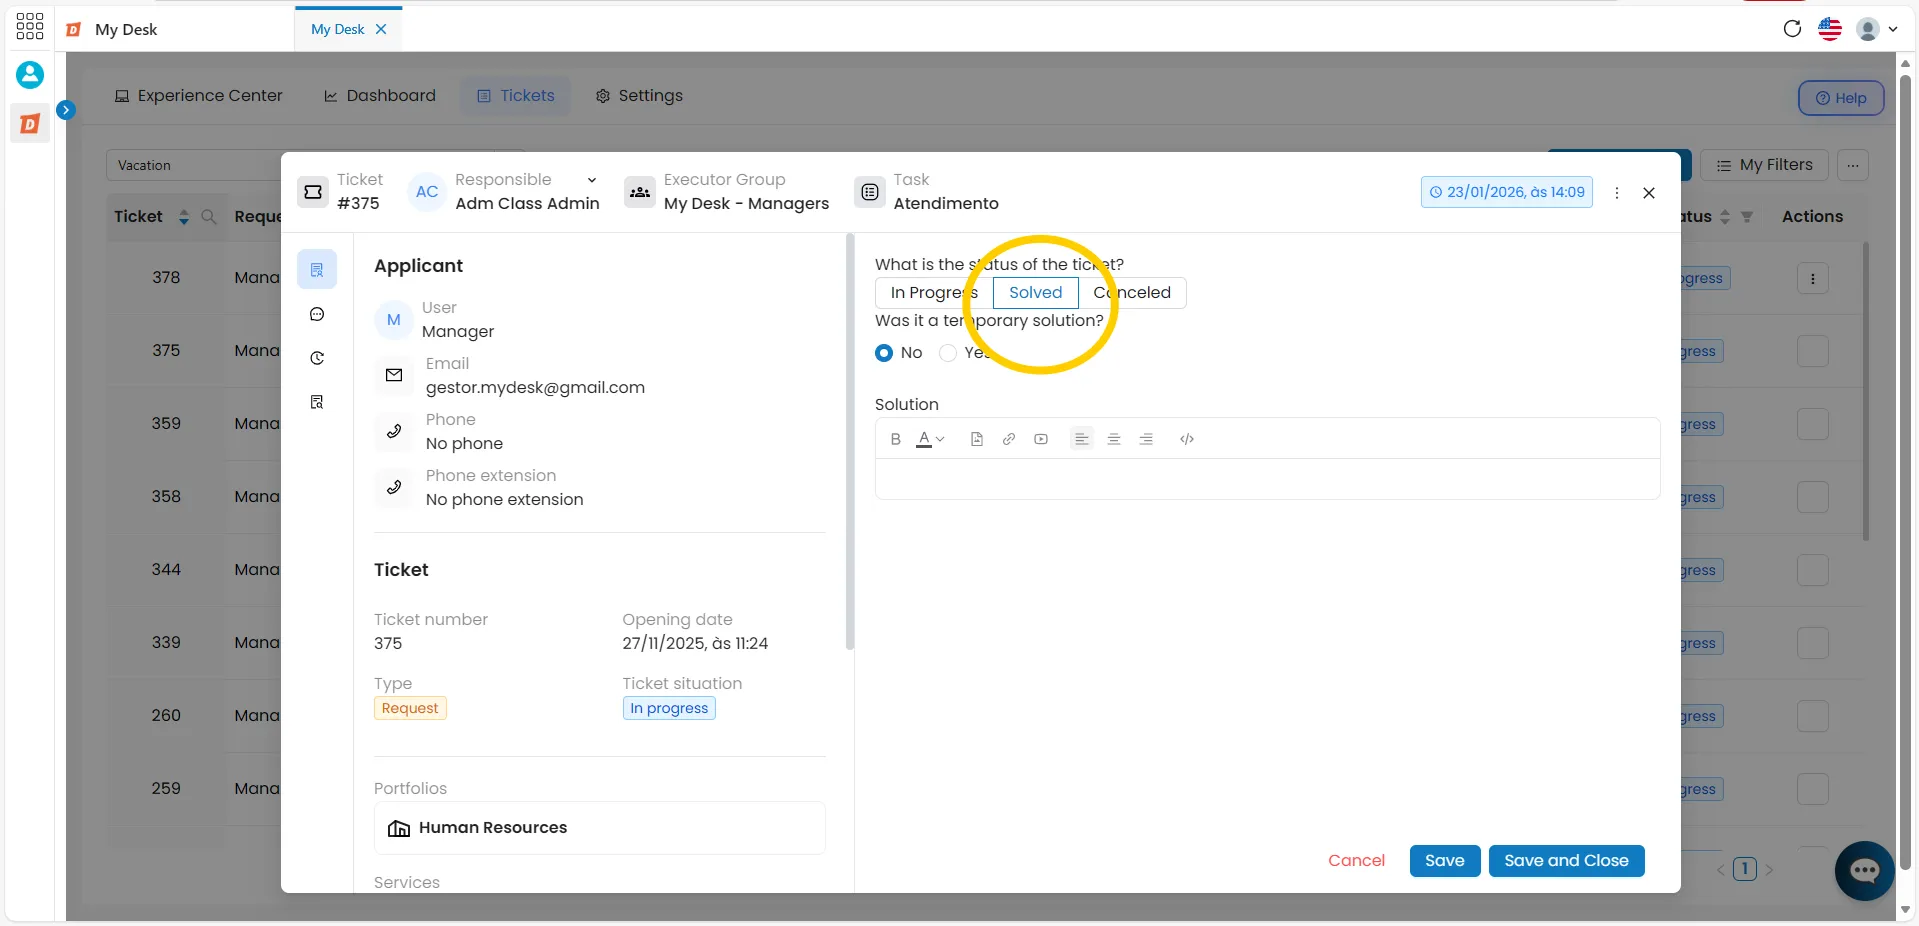
Click on the Resolved tab.
In the Ticket Status area, click Resolved.
Check if it was a temporary solution
Select Yes or No.
Describe the solution.
In the Solution field, write what was done to resolve the ticket.
Select the close button
See the available options below.
Cancel
Cancel the service request and return to the ticket list without saving any actions.
Save
Saves the edits and changes the status to Resolved, but keeps the ticket in the list.
Save and close
Saves, closes, and removes the ticket from the list, leaving it with a Closed status.
💡 Where is the closed ticket located?
After closure, the ticket is removed from the default list. To view it, use the Ticket Status filter and select Closed.
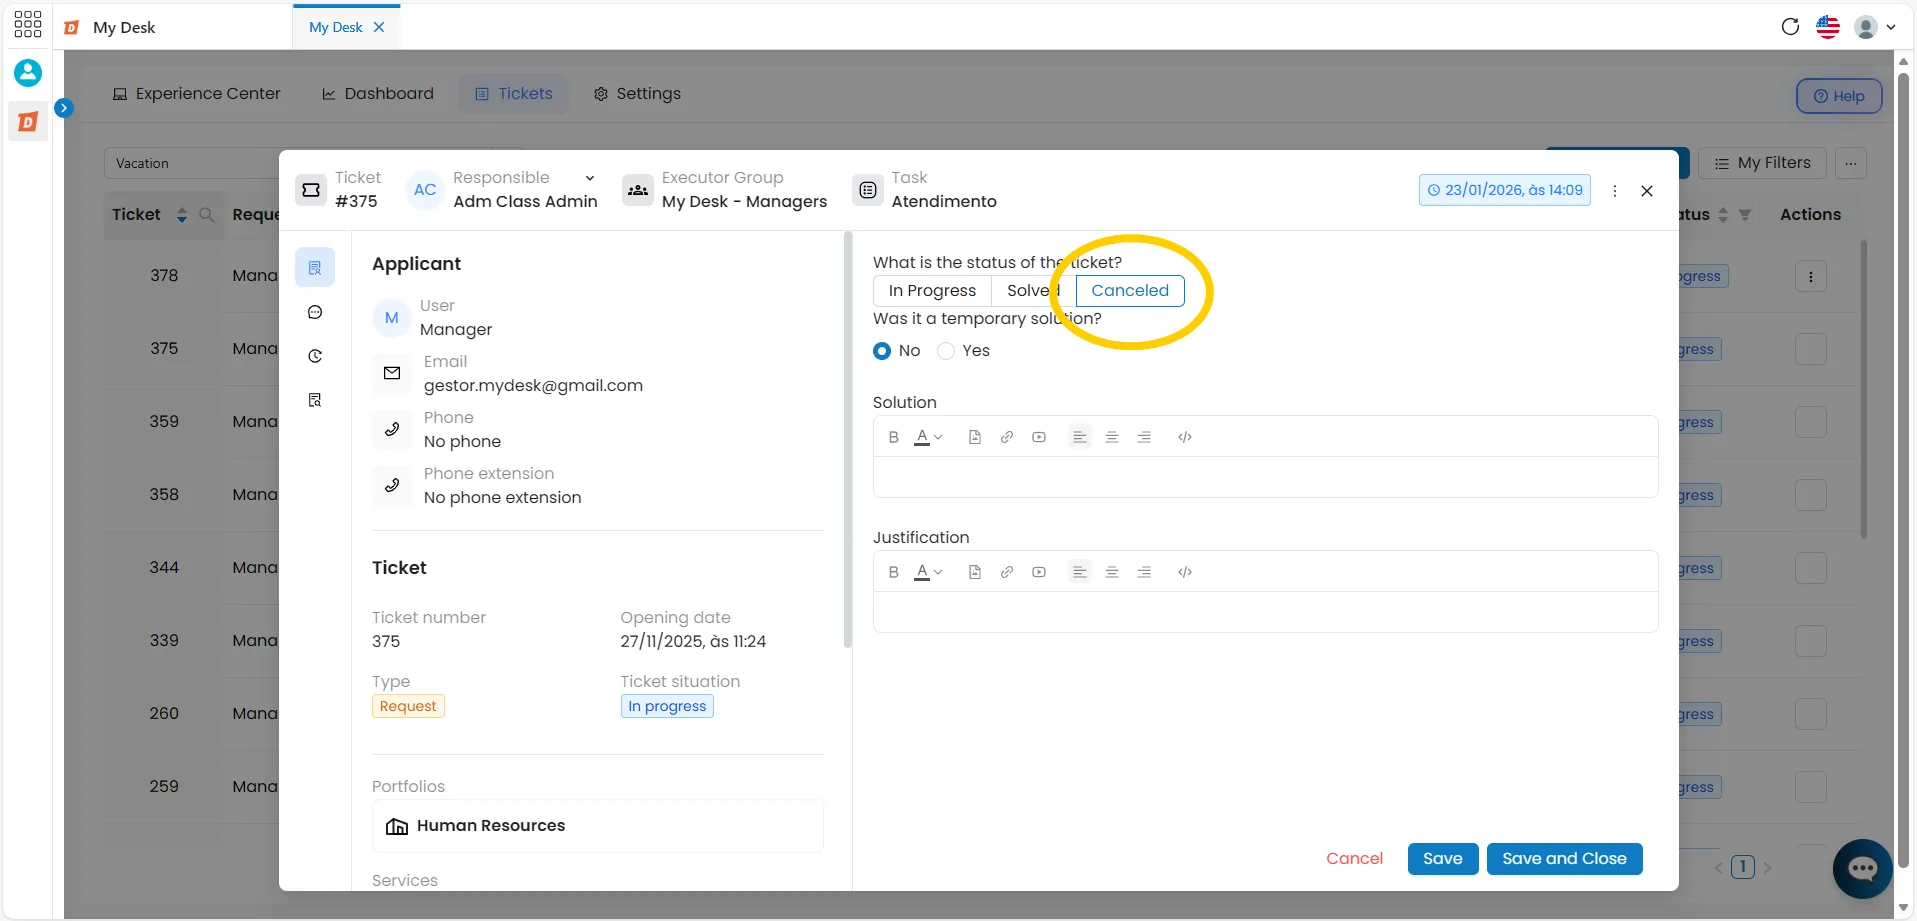
Canceling a Ticket

On some occasions, a support ticket may encounter problems before completion. In this case, the ticket may need to be canceled.
To cancel a ticket, follow the steps below:
Click on the Cancelled tab
In the Ticket Status area, click Cancelled.
Check if it was a temporary solution
Select Yes or No.
Describe the solution (if there is one).
In the Solution field, describe what was done, if applicable.
Please provide a justification.
In the Justification field, describe the reason for the cancellation.
Select the close button.
See the available options below.
Cancel
Returns to the ticket list without saving any actions.
Save
Saves edits made during the support session without closing the ticket.
Save and close
Saves and closes the ticket with a Cancelled status, removing it from the default list.
⚠️ Atention:
Cancelled tickets cannot be reopened. Please verify this before confirming the cancellation. To view them after cancellation, filter the list by Ticket Status → Cancelled.
Approving a Ticket
To see how to approve a ticket, go to the ApprovalsApprovals page.
For activities configured with an approval pattern, there are two possible workflows.
- Standard with Approval
Padrão com aprovação:
In this workflow, the service request is processed first. Only then is the ticket submitted for approval. The request is only closed after approval by at least one approver.
- Standard with Pre-Approval
Standard with pre-approval:
In this workflow, the ticket needs to be approved before service can begin. Without approval, the request will not enter the service queue.