SubTicket
Administrator Attendant
A subticket is a new ticket created from a main ticket to address specific or supplementary aspects of the original request. It maintains the link to the parent ticket and can be handled independently, with its own status, SLA, and assignee.
1 - Viewing a Subticket

There are two ways to open and view a subticket:

Directly on the list
Simply click on the subticket in the ticket list, just as you would with any other ticket.

Through the main ticket
Open the main ticket, click on Subticket in the left sidebar menu, and click on the listed subticket number.
On the Listing TicketsListagem page, you can view details about:
- Ticket List: Table item details.
- Search Ticket.
- Ticket Sorting.
- Ticket Filters.
- Ticket Information.
- Viewing Subticket through the Main Ticket.
To open, follow the steps below:
Click on the main ticket
In the list of tickets, click on the main ticket. A window with all the ticket information will open.
- In the example below, number 134, with a red circle and the number 2 inside.
- A window will open with all the Ticket information;
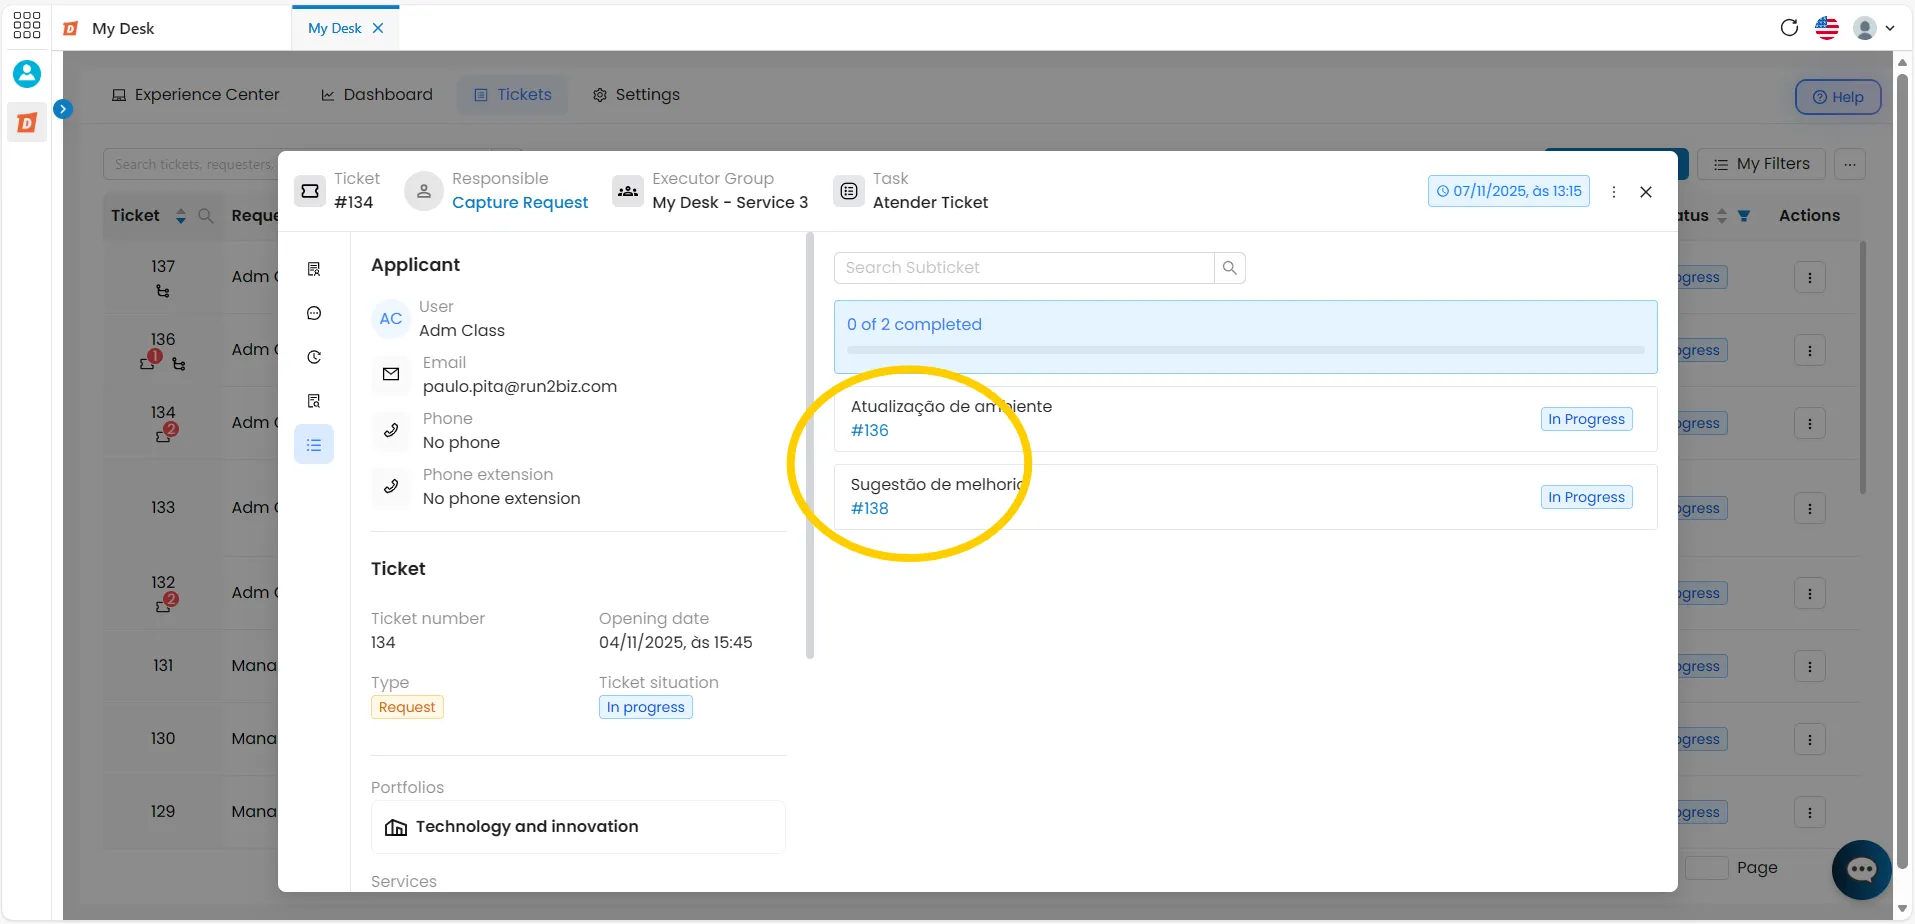
Click on Subticket in the side menu
In the left-hand menu of the window, click on Subticket. The linked subtickets will be listed on the right-hand side of the window.
- In the example below, number #136 e #138;
Click on the subticket number
All subticket information will be displayed. Support can also be provided directly through this channel.
To return to the main ticket
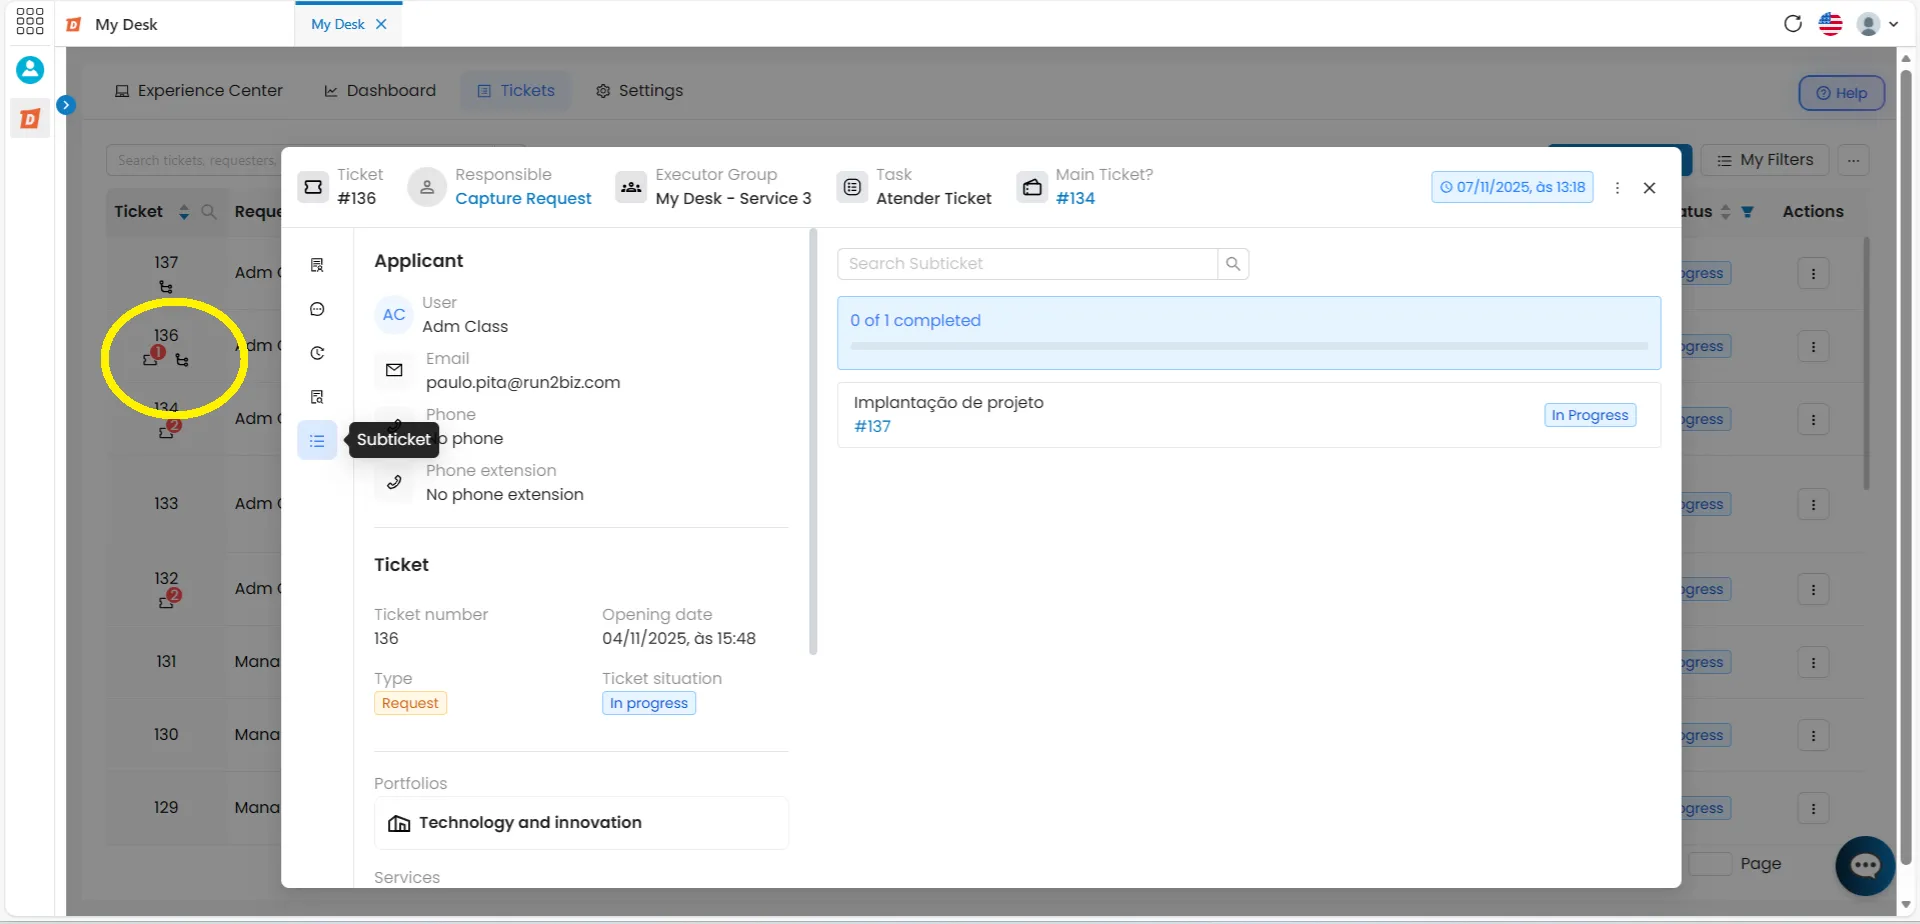
Click on the main ticket number displayed in the window's header bar.
- Identifying a Subticket
There are two ways to identify a Subticket:
Icon
Through an icon, located just below the ticket number.
- See an example in the next item.
Informations
When opening and viewing the information of a Ticket
- To view your Subticket information, you have two options:
- Click directly on it in the ticket list;
- Open via Main Ticket.
- See example in the previous item.
2 - Icons

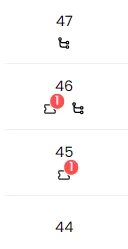
In the Ticket list, the first column of the table refers to the Ticket number. Below this number, an icon may appear identifying the relationship of that ticket to other calls; that is, whether it is a sub-ticket, a main ticket with one or more sub-tickets, or a sub-ticket (being a main ticket) with one or more sub-tickets. See the example in the image below:
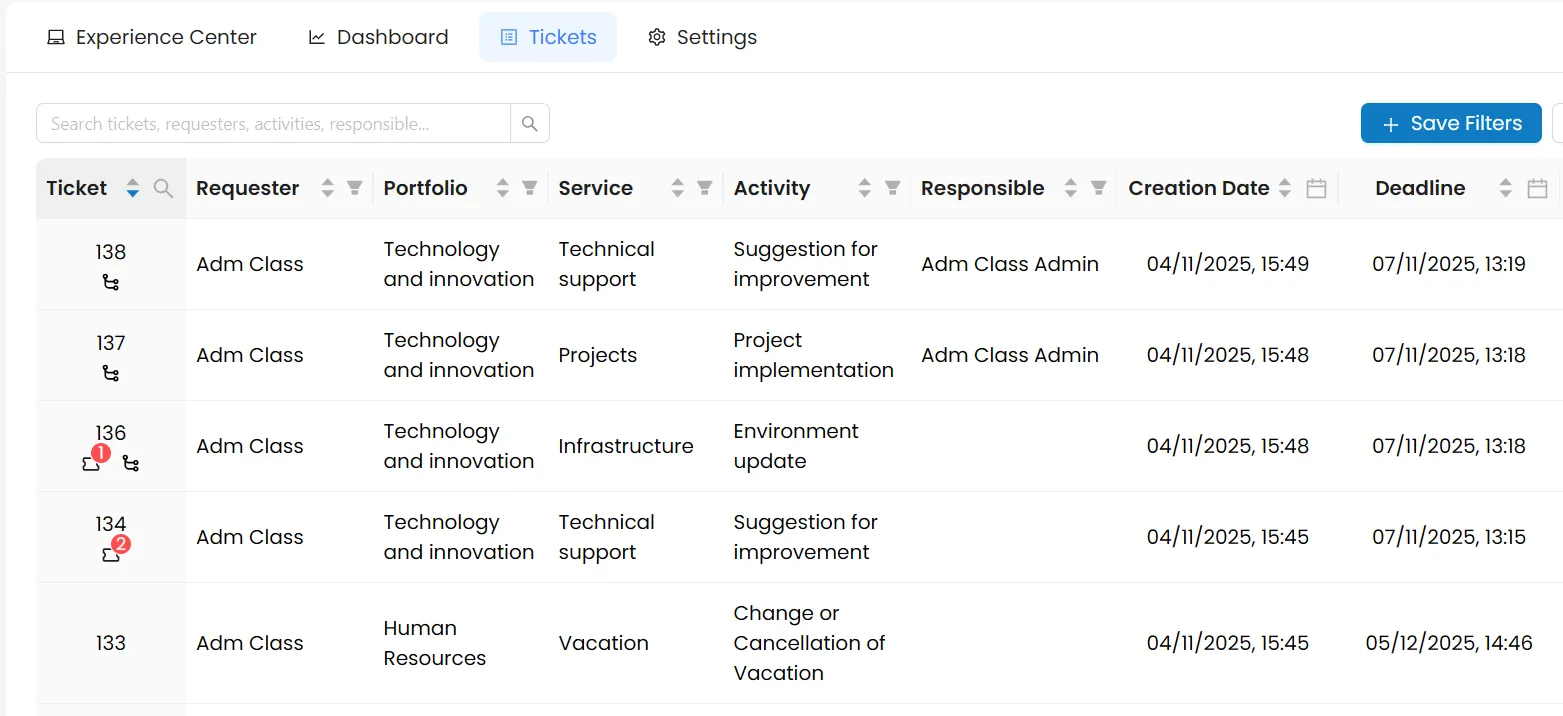
In the image above, we see examples of 4 open tickets/sub-tickets with different icons. See below the meaning of each one, based on their numbers:
3 - Creating a Subticket

There are two ways to create a Subticket:
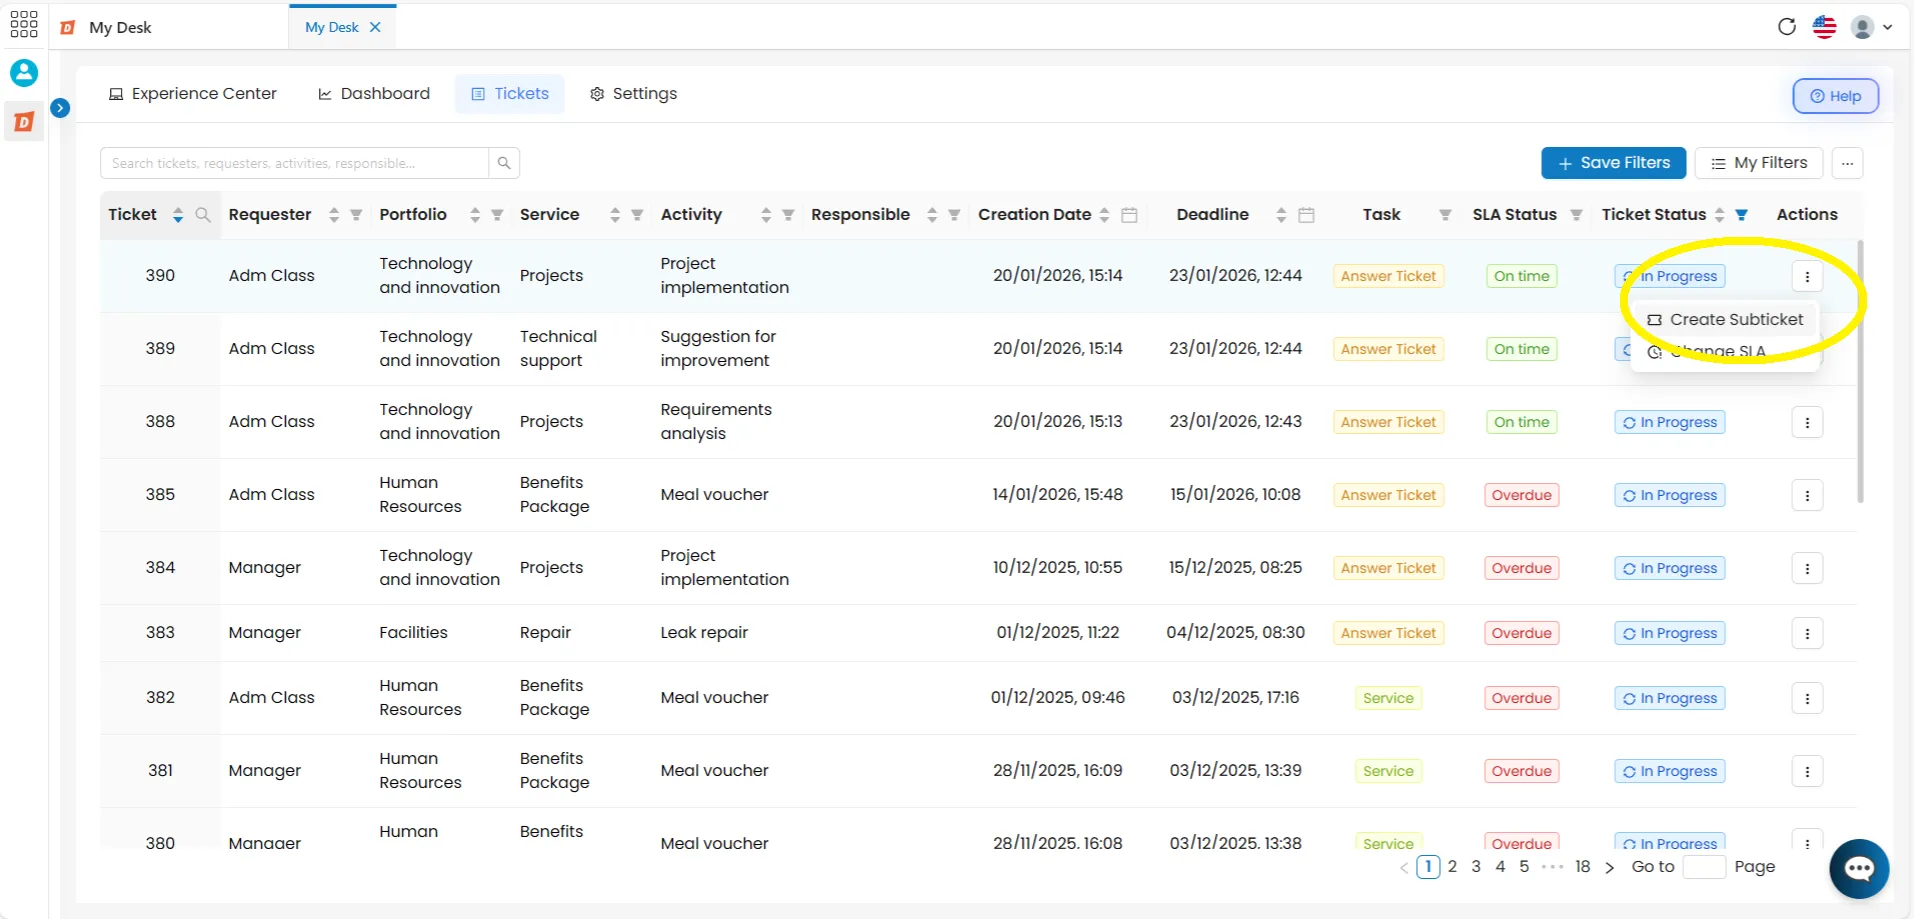
Click the action button in the list
Click the button ( ··· ) in the ticket row and select Create subticket.
Inside the main ticket
Open the ticket, click the (···) button in the upper right corner of the window and select Subticket.
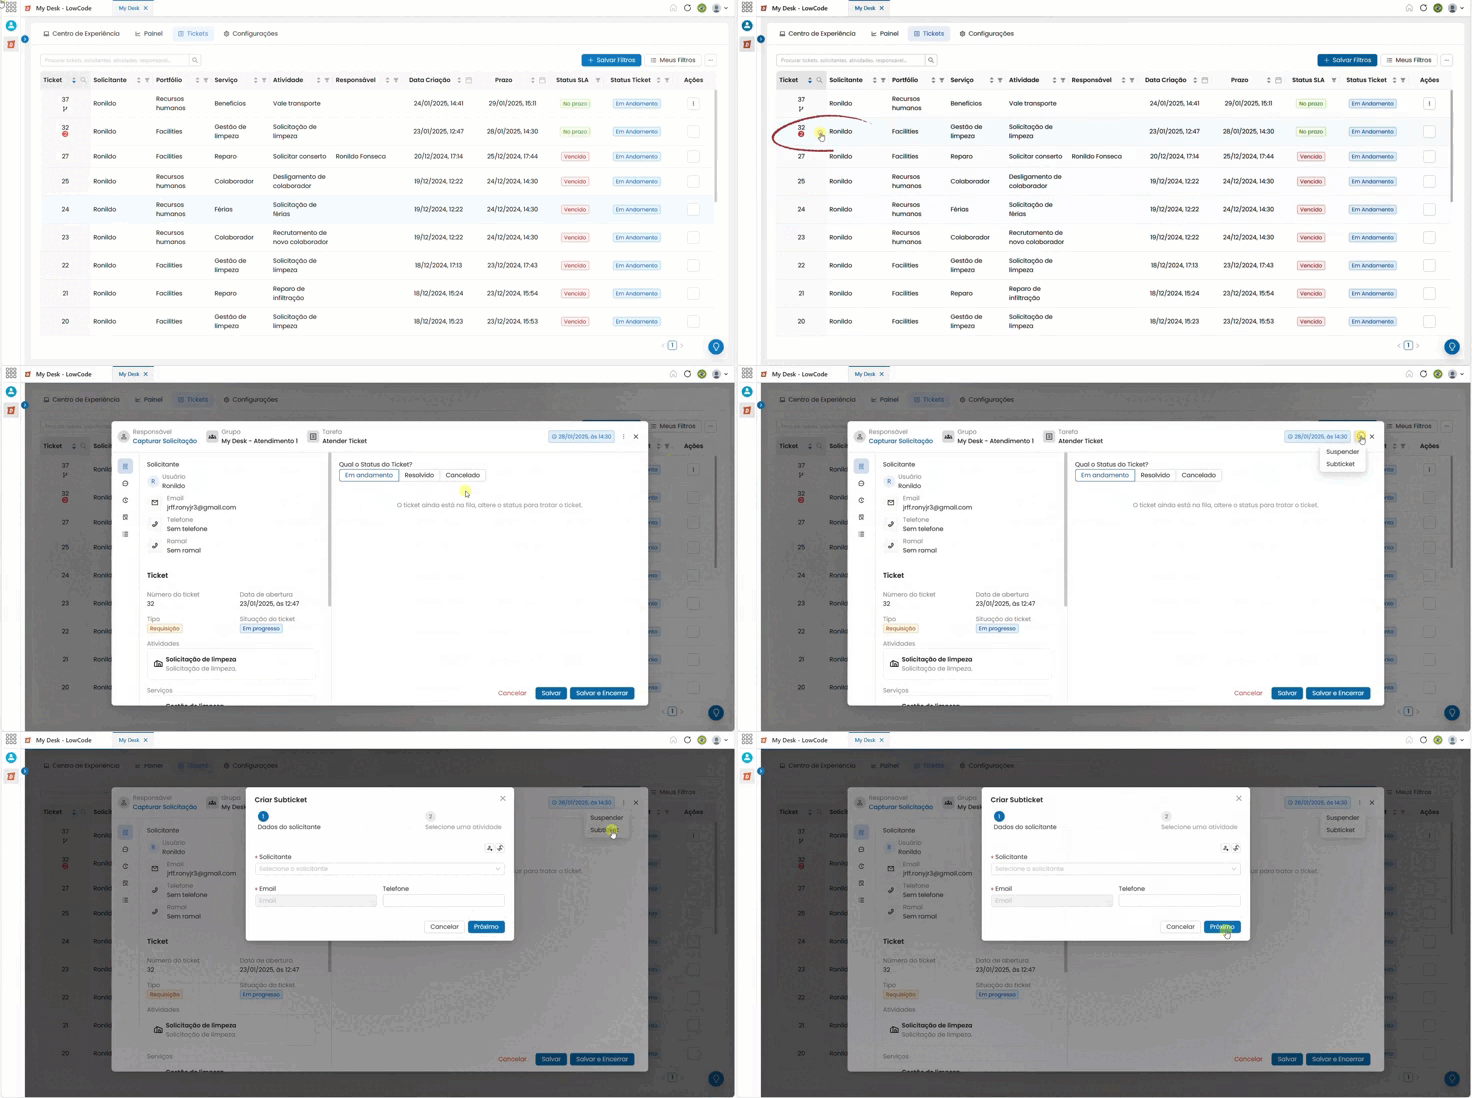
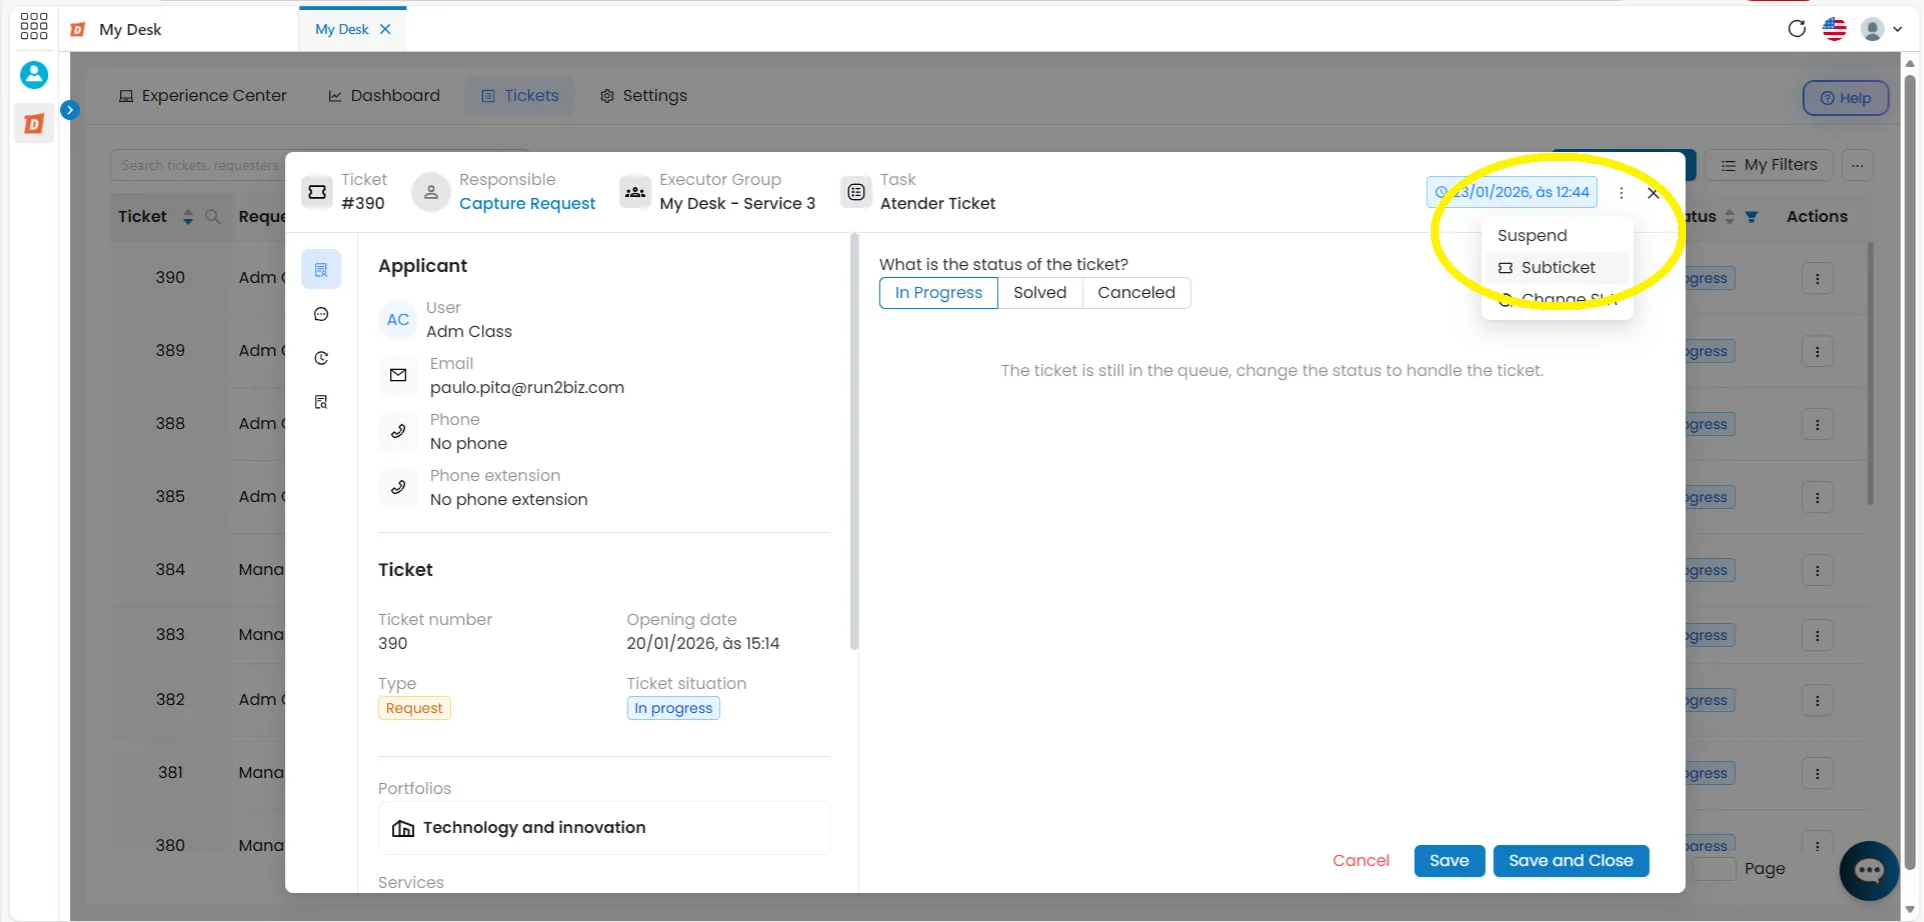
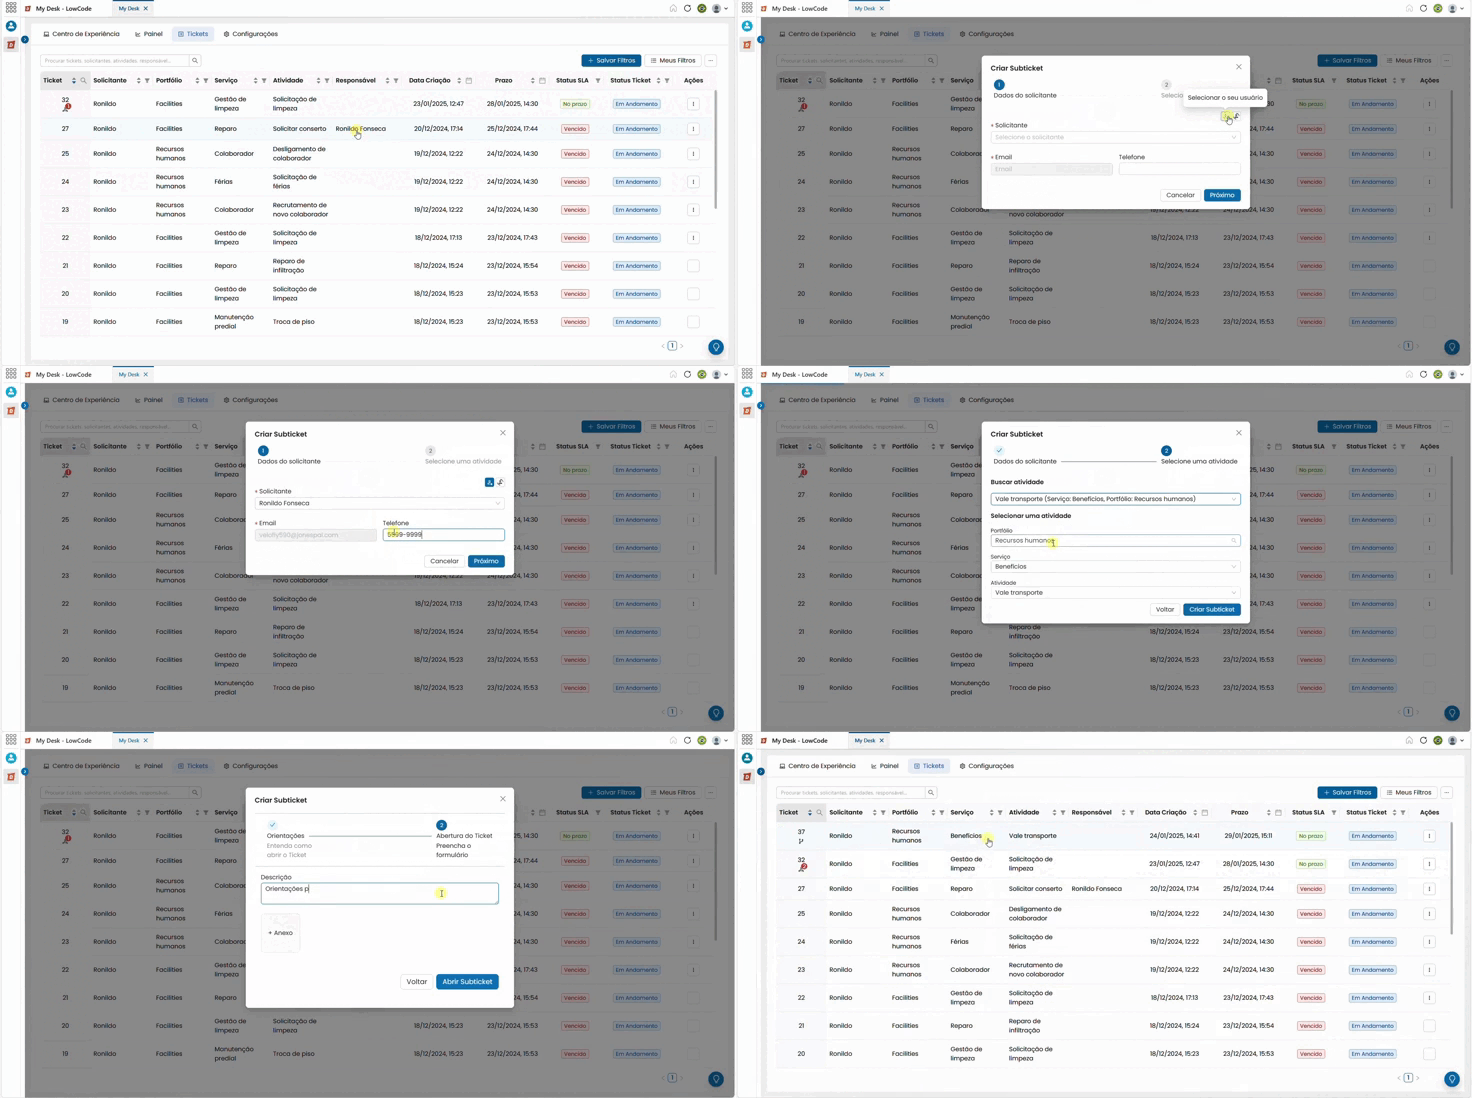
Regardless of the path chosen, a creation window will open in the center of the screen.
The process is divided into 3 stages:
Dados do solicitante
Applicant mandatory
Find the user who requested the subticket in the dropdown list. You can also use the buttons above the field: Select your user — filled with your own name; or Select who opened the ticket — filled with the requester of the main ticket. Clicking either button will automatically fill the field.
Email automatic
Automatically filled with the email address registered when selecting the applicant.
Telephone optional
Please provide a contact phone number, if necessary.
Select an activity
Search for activity
Click on the dropdown list and directly choose one of the available activities. When you select from this field, the portfolio, service, and activity fields below are automatically filled in.
Portfolio / Service / Activity
Alternatively, you can browse manually by first selecting the portfolio, then the service, and finally the desired activity.
After selecting the activity, click the Create subticket button in the bottom right corner of the window to proceed.
 Fill out the form.
Description mandatory
Describe what you want for the opening of the subticket.
+ Attachment opcional
Attach a supplementary file, if necessary.
Click the "Open subticket" button in the bottom right corner to finish creating it.
💡 After creation:
The new subticket will appear on a new line in the ticket list, with a number subsequent to that of the main ticket. To view or process it, simply click on it in the list.
4 - Servicing a Subticket

O atendimento de um subticket segue o mesmo processo do atendimento de um ticket comum.
Follow the steps below:
Open Tickets page
Access the Listing TicketsTicket Listing page.
Locate the subticket
In the ticket list, use the search bar, filters, or browse the list to find the desired subticket. You can also access it via the main ticket, as described in section 1.
Click on the subticket
A window will open in the center of the screen with detailed information about the request.
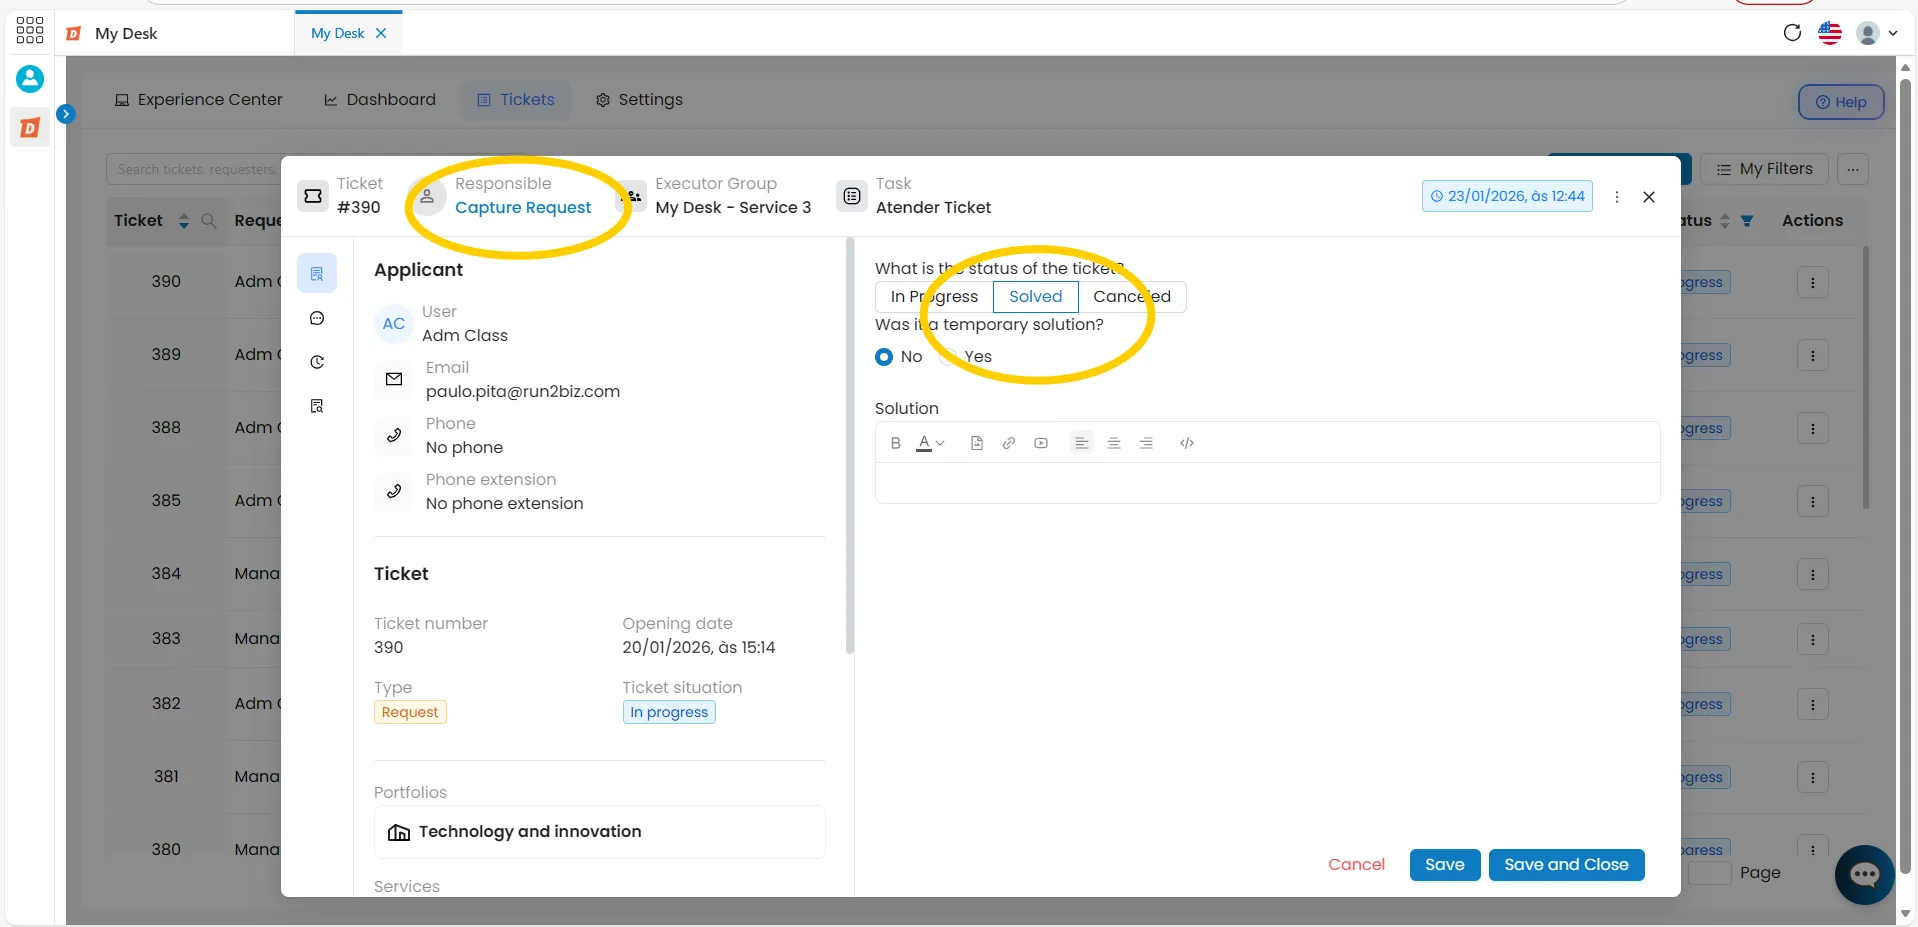
Capture the subticket
Click on Capture request in the upper left corner of the window.
Add attachments if needed
In the ticket description section, you can attach supplementary files to the support request.
Click on Resolved
In the Ticket Status area, click on the Resolved tab.
Fill in the closing fields
Indicate whether it was a temporary solution (Yes or No) and describe your opinion of the solution in the text box.
Click Save to finish
The sub-ticket service will be completed.
5 - Suspending a Subticket

When a subticket is suspended, the SLA timer is paused.
To suspend, follow the steps below.
Capture the subticket
Click on Capture request. The following message will appear at the top of the screen:
✅ Ticket captured successfully.
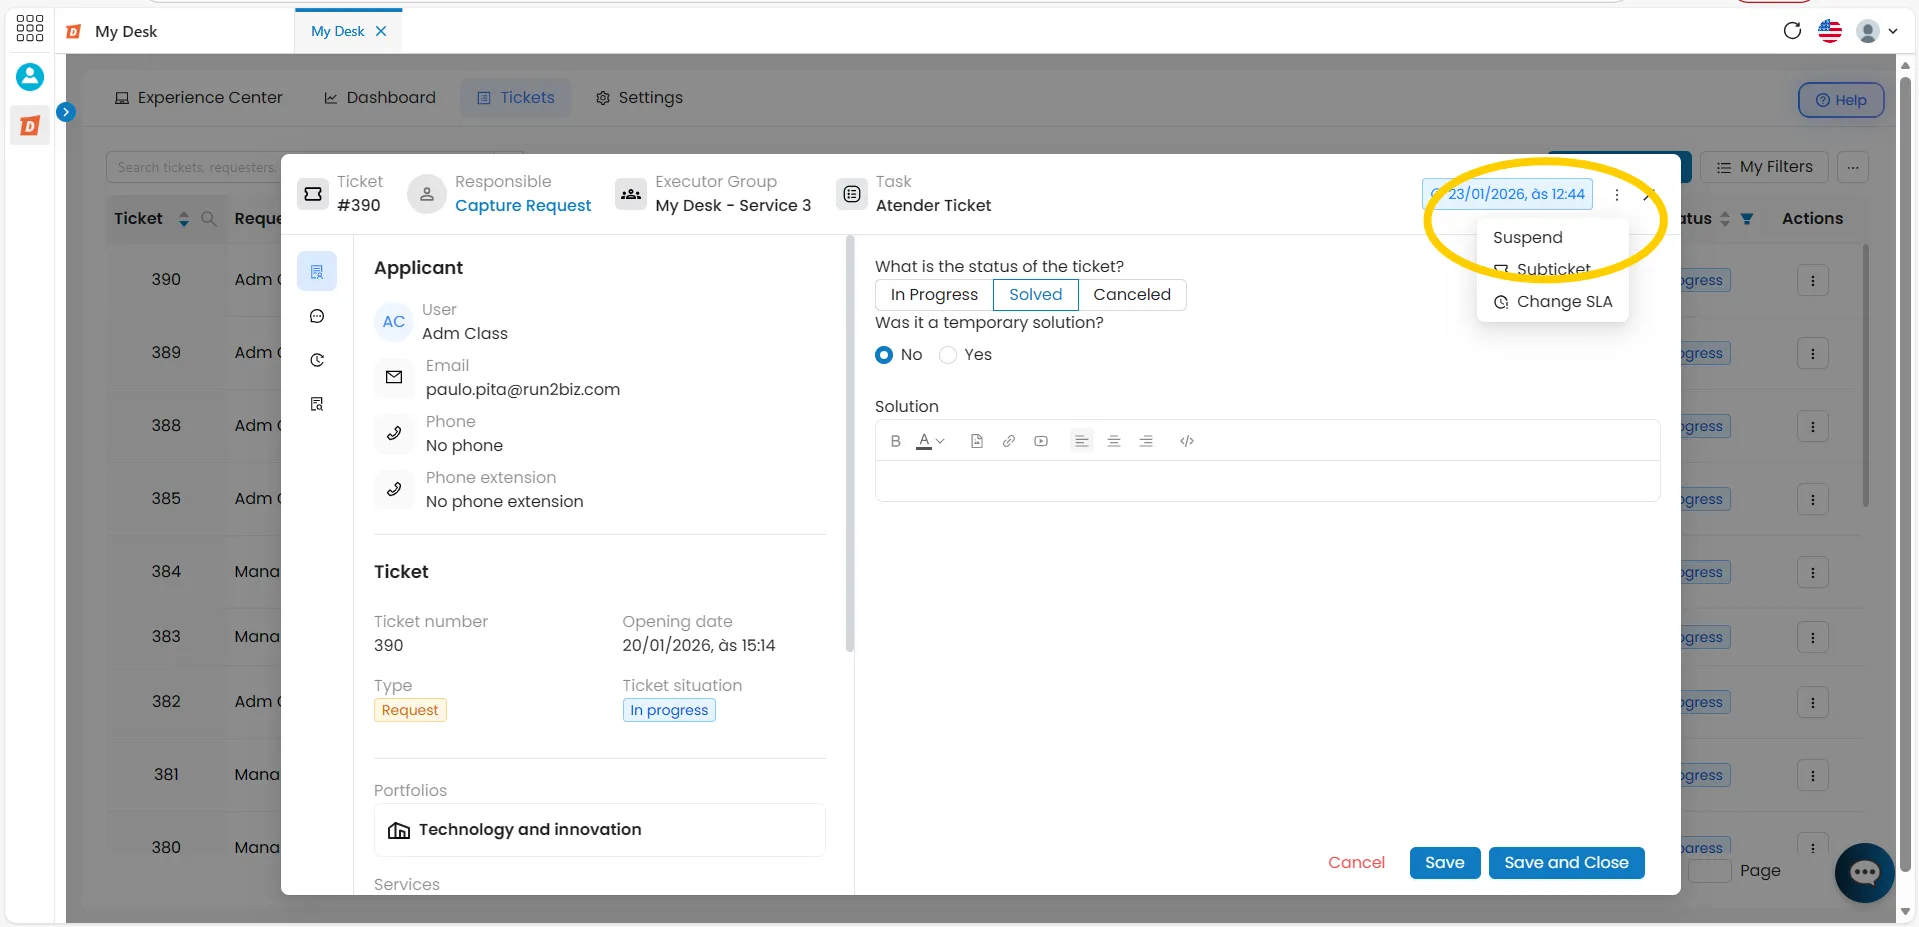
Click the action button ( ··· )
In the upper right corner of the subticket window.
Click on Suspend
A window will open in the center of the screen.
Write a justification
Please state the reason for the subticket suspension.
Click Save
The following message will appear at the top of the screen:
✅ Ticket successfully suspended.
6 - Reactivating a Subticket

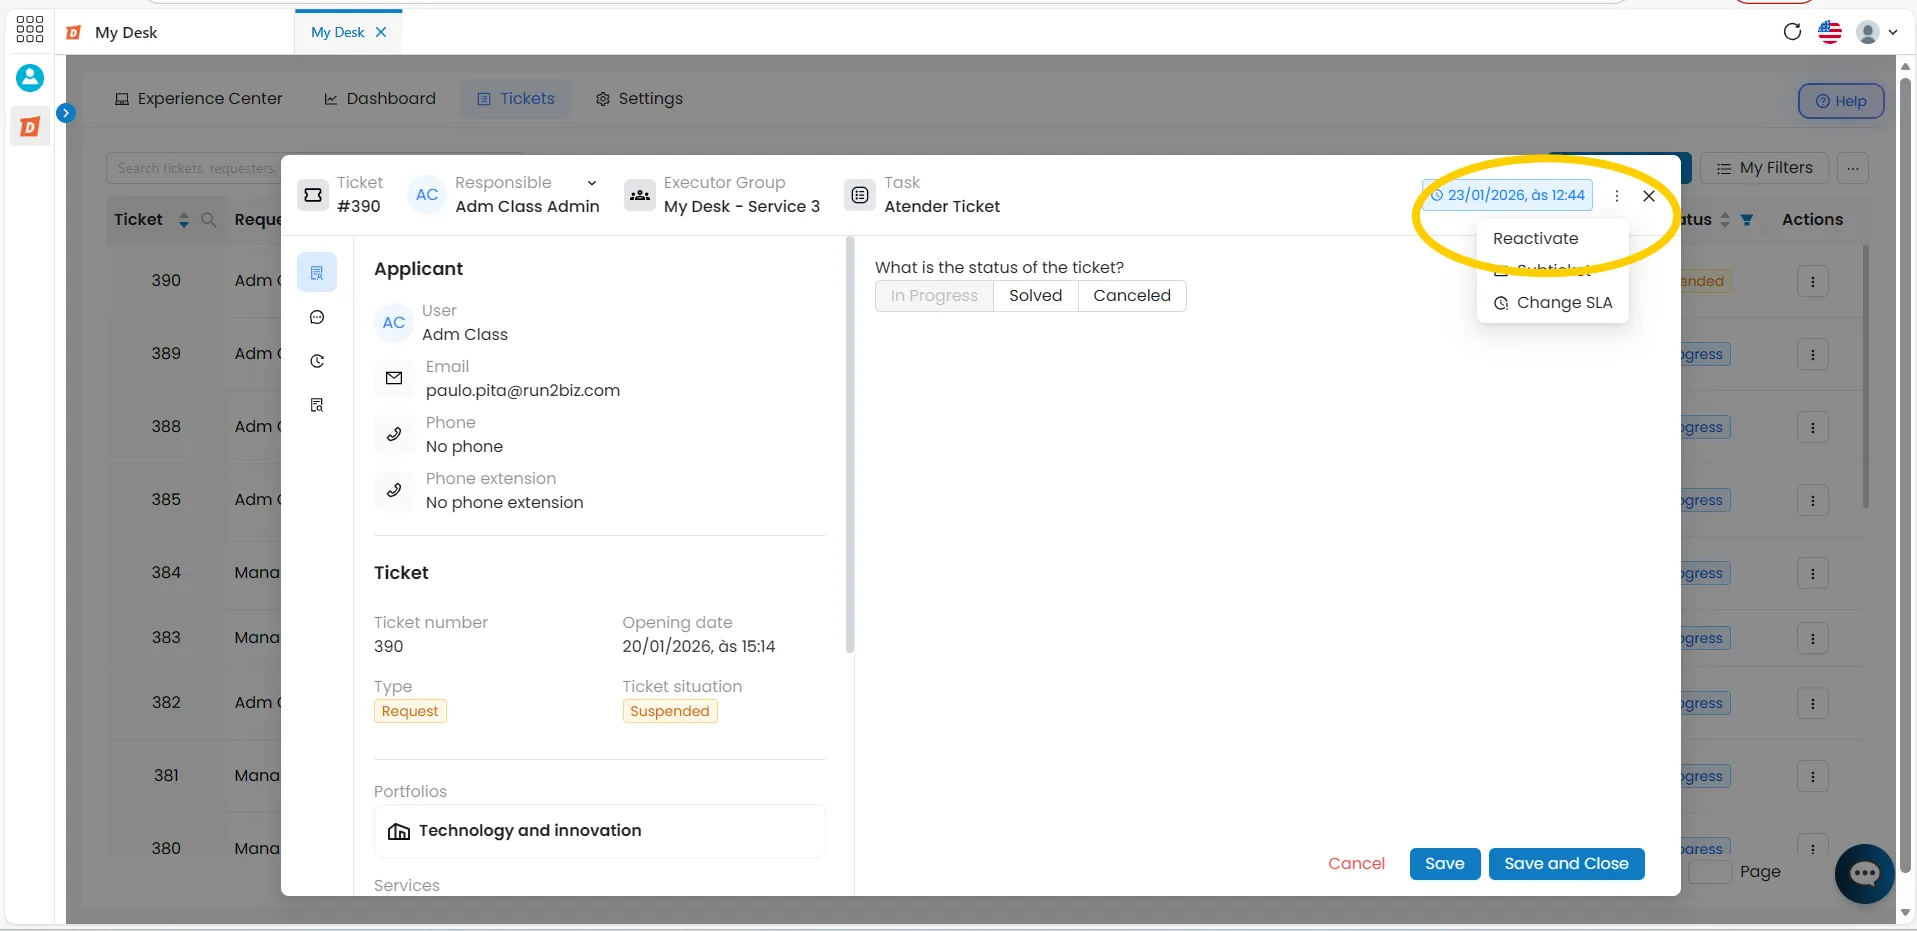
To resume service on a suspended subticket, follow the steps below:
Click on the desired subticket.
In the list of tickets, click on the drop-down subticket to open the editing window.
Click the action button ( ··· )
In the upper right corner of the window, a small confirmation window will appear with the following message:
⚠️ Are you sure you want to reactivate the ticket?
Click the Reactivate button.
The following message will appear at the top of the screen:
✅ Ticket successfully reactivated.
📌 After reactivation:
The SLA counter will resume running normally from the moment of reactivation. Service can be resumed by the same person responsible or delegated to another user.