Groups
Administrator
The groups organize those responsible for customer service into categories, separating roles such as agents, managers, and approvers. Each group can be an executor—responsible for carrying out the service—or an approver—responsible for validating the completion of the calls.
1 - Accessing Groups

To access Groups, follow the steps below:
Access My Desk
Select the My Desk application from the applications menu.
Click on Settings
In the application's top menu.
Click on Groups
In the left sidebar menu.
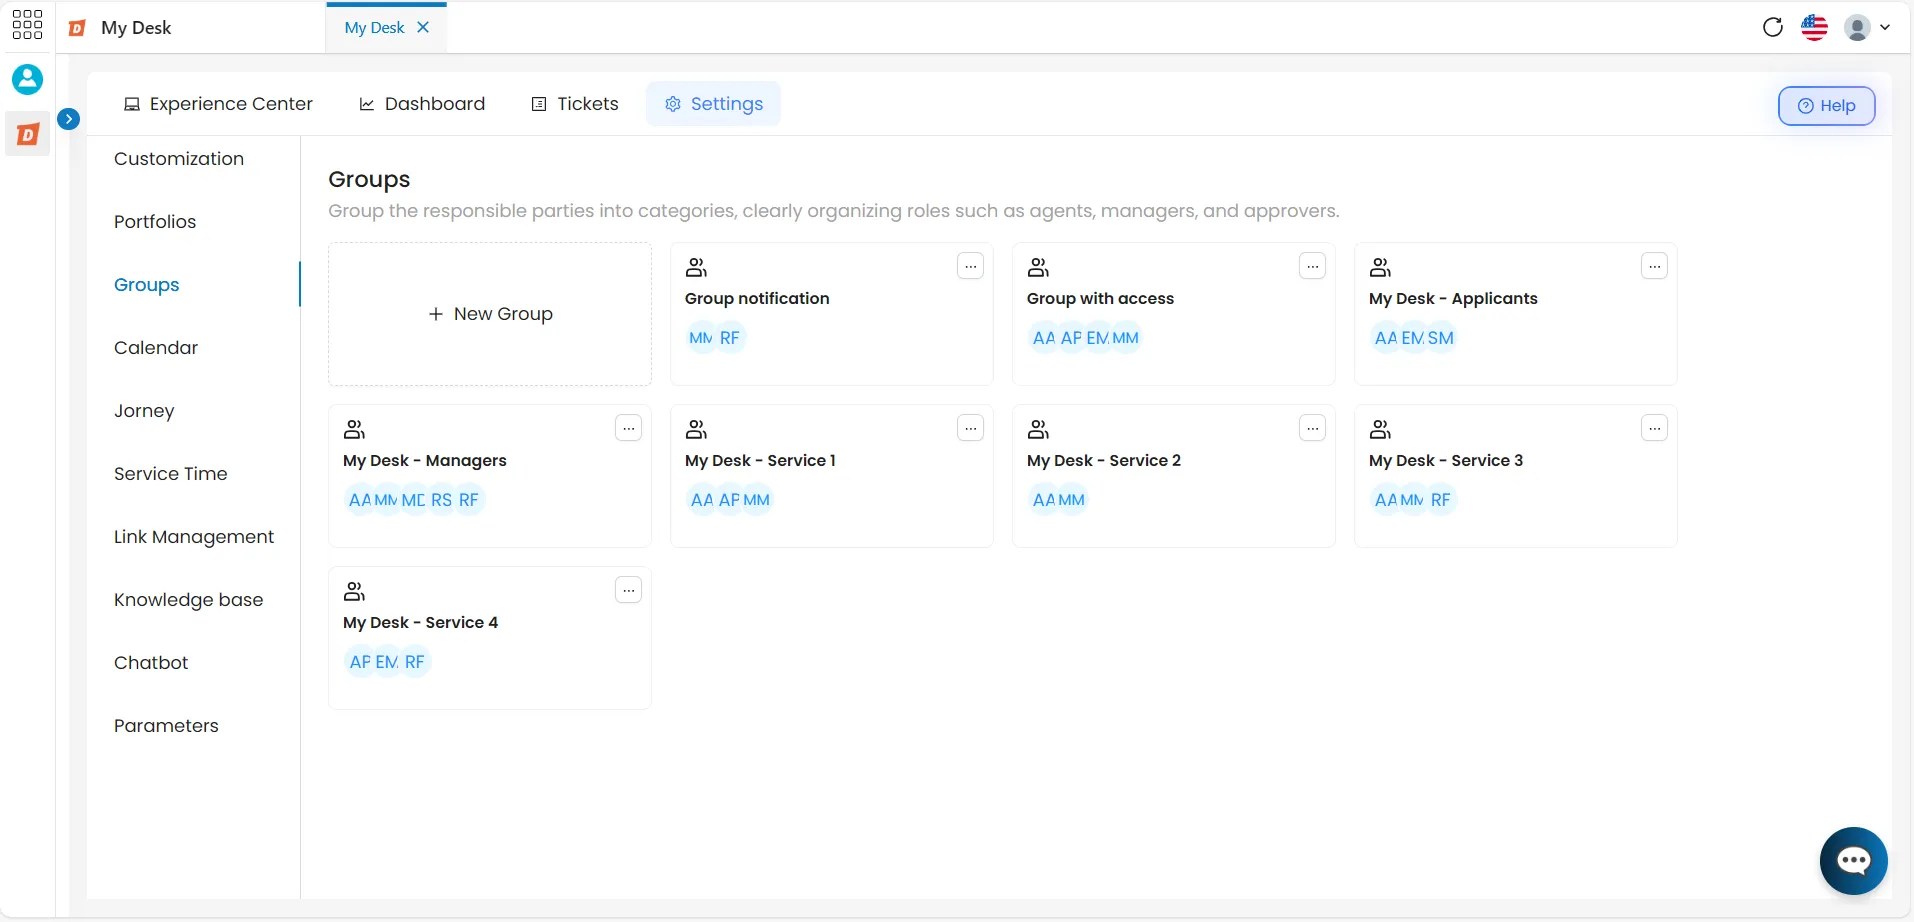
A block list with all created groups will be displayed. Below each group name, the initials of the members are shown.
2 - Creating a New Group

To create a new group, follow the steps below:
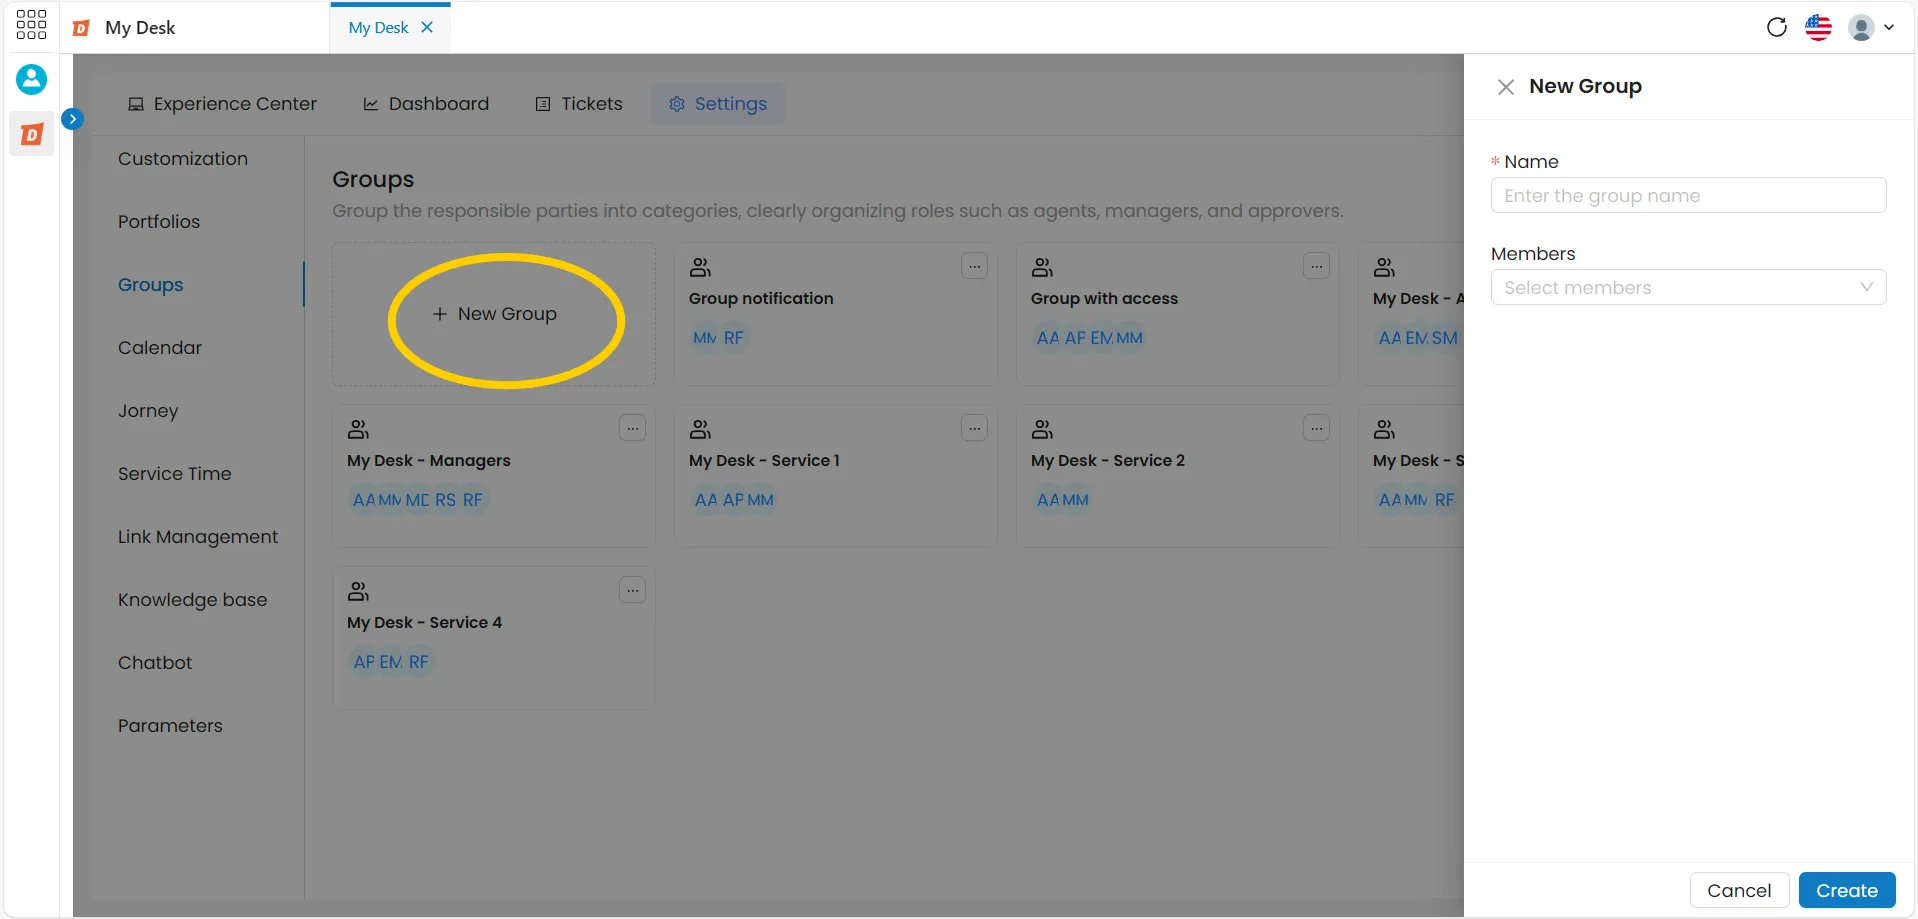
Click on + New group
A creation window will appear in the right corner of the screen.
Fill in the information
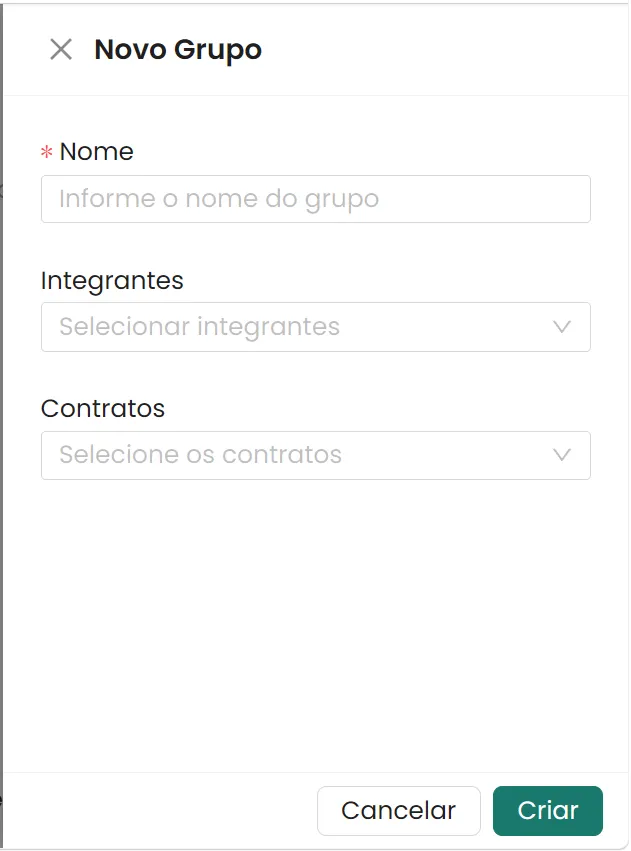
- Name
- Give the group a short, descriptive name. Example: Level 1 Support, IT Support.
- Members
- Choose the users who will be part of the group from the drop-down menu. It is possible to add more than one member.
- Contracts
- Select a contract that will be part of the group. You can add more than one contract to the same group.
Click Save
The group will be created and will appear in the list. Click Cancel to return without saving.
3 - Editing an Group

Para editar um Grupo, siga os passos abaixo:
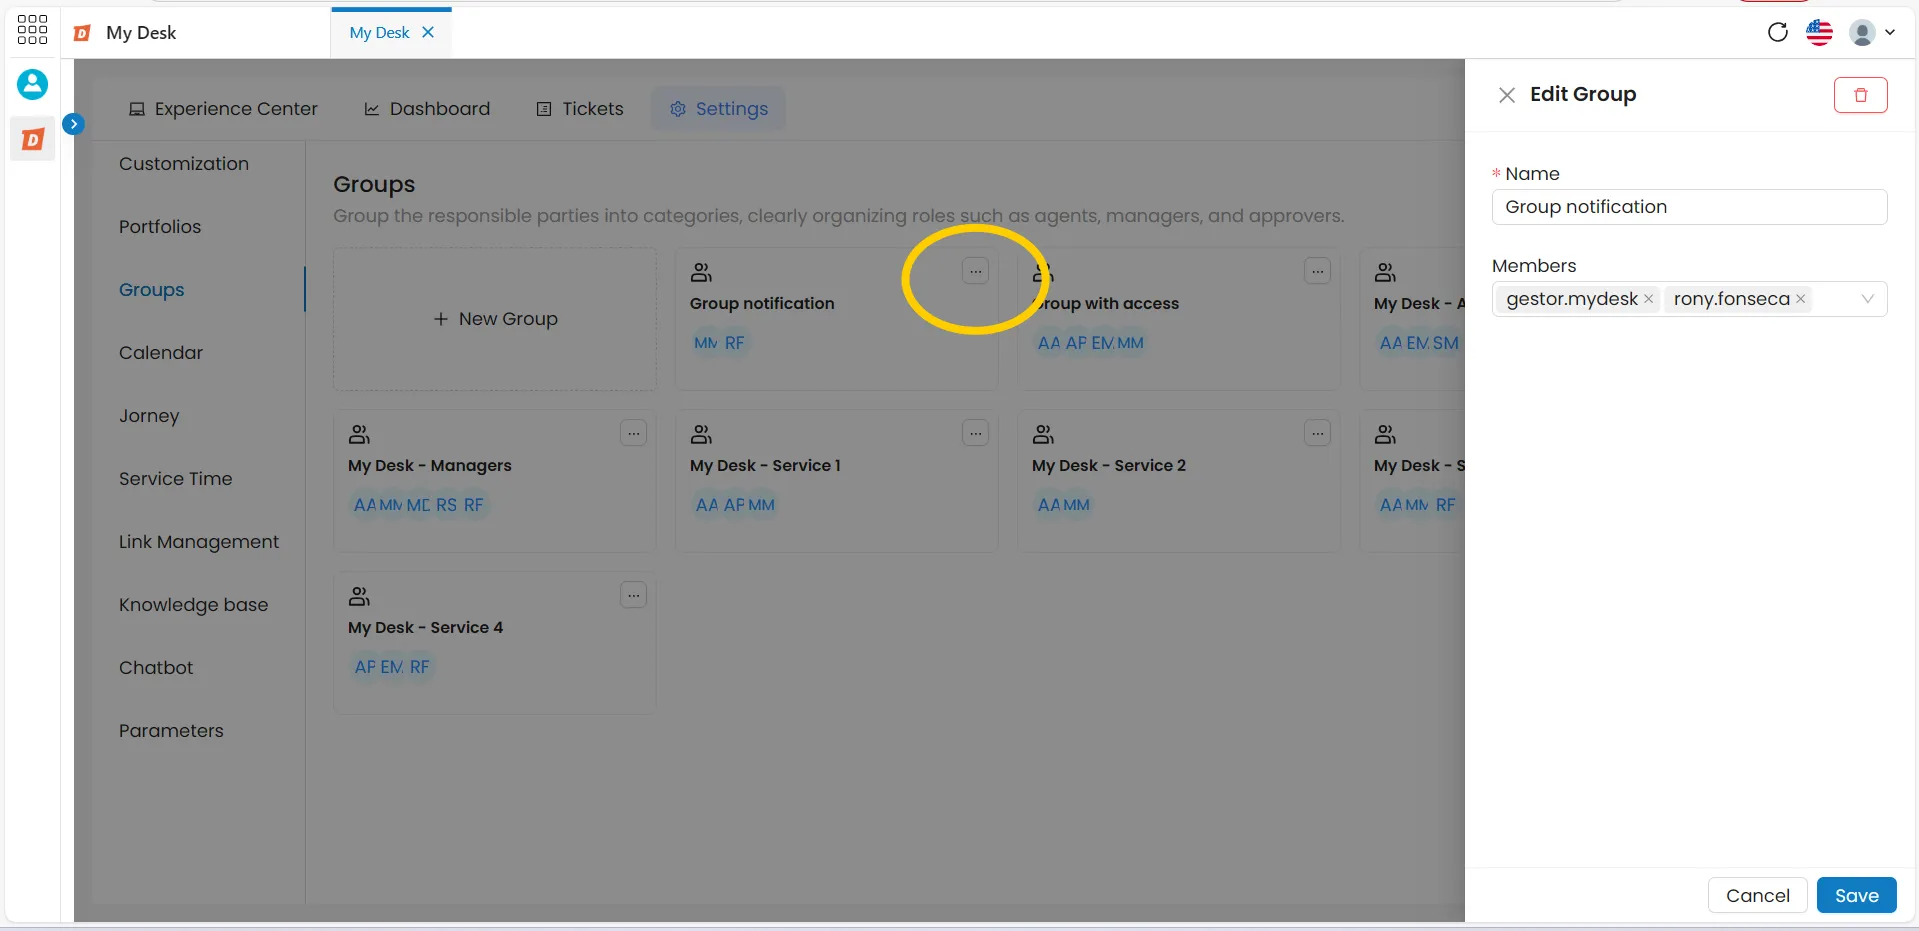
Click on the three dots (···) in the group
The action button is located in the upper right corner of the desired group block.
Click Edit
A window will appear in the right corner of the screen with the group's information.
Make the desired changes
Edit the group's name, members, or contracts.
Click Save
The changes will be applied. Click Cancel to return without saving.
4 - Deleting an Group

To delete a group, follow the steps below:
Click Save
The changes will be applied. Click Cancel to return without saving.
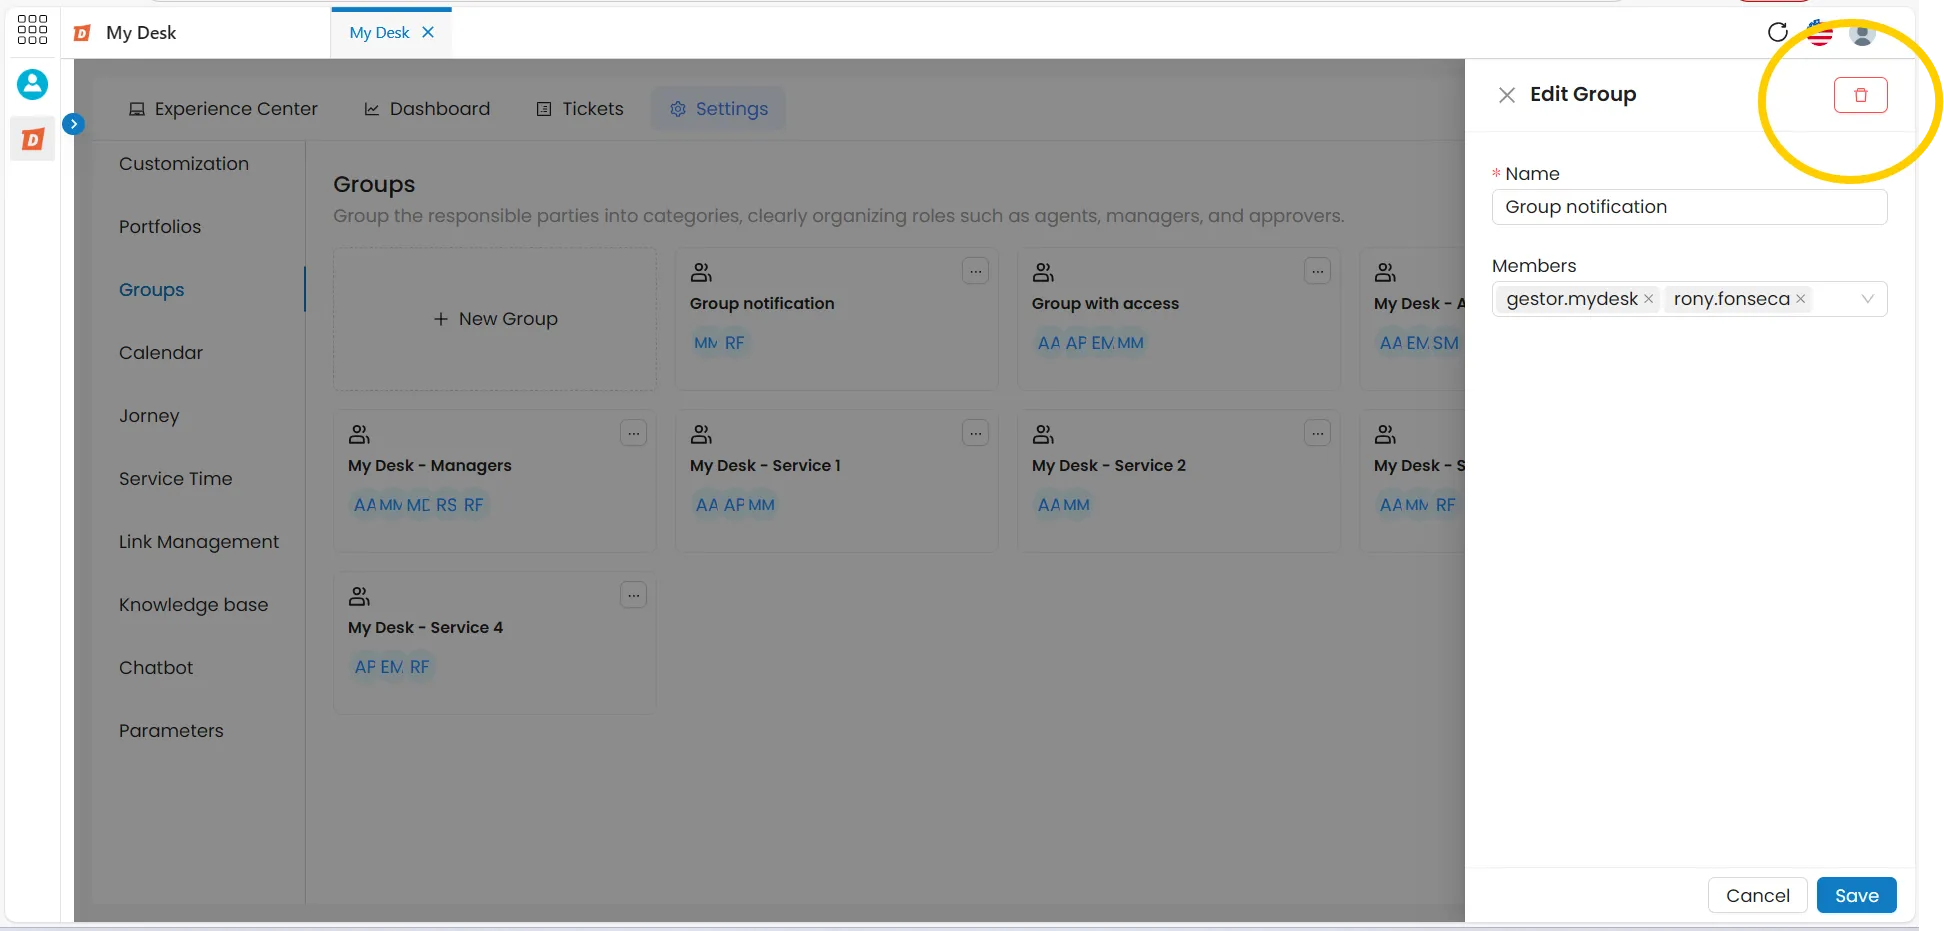
Click Delete
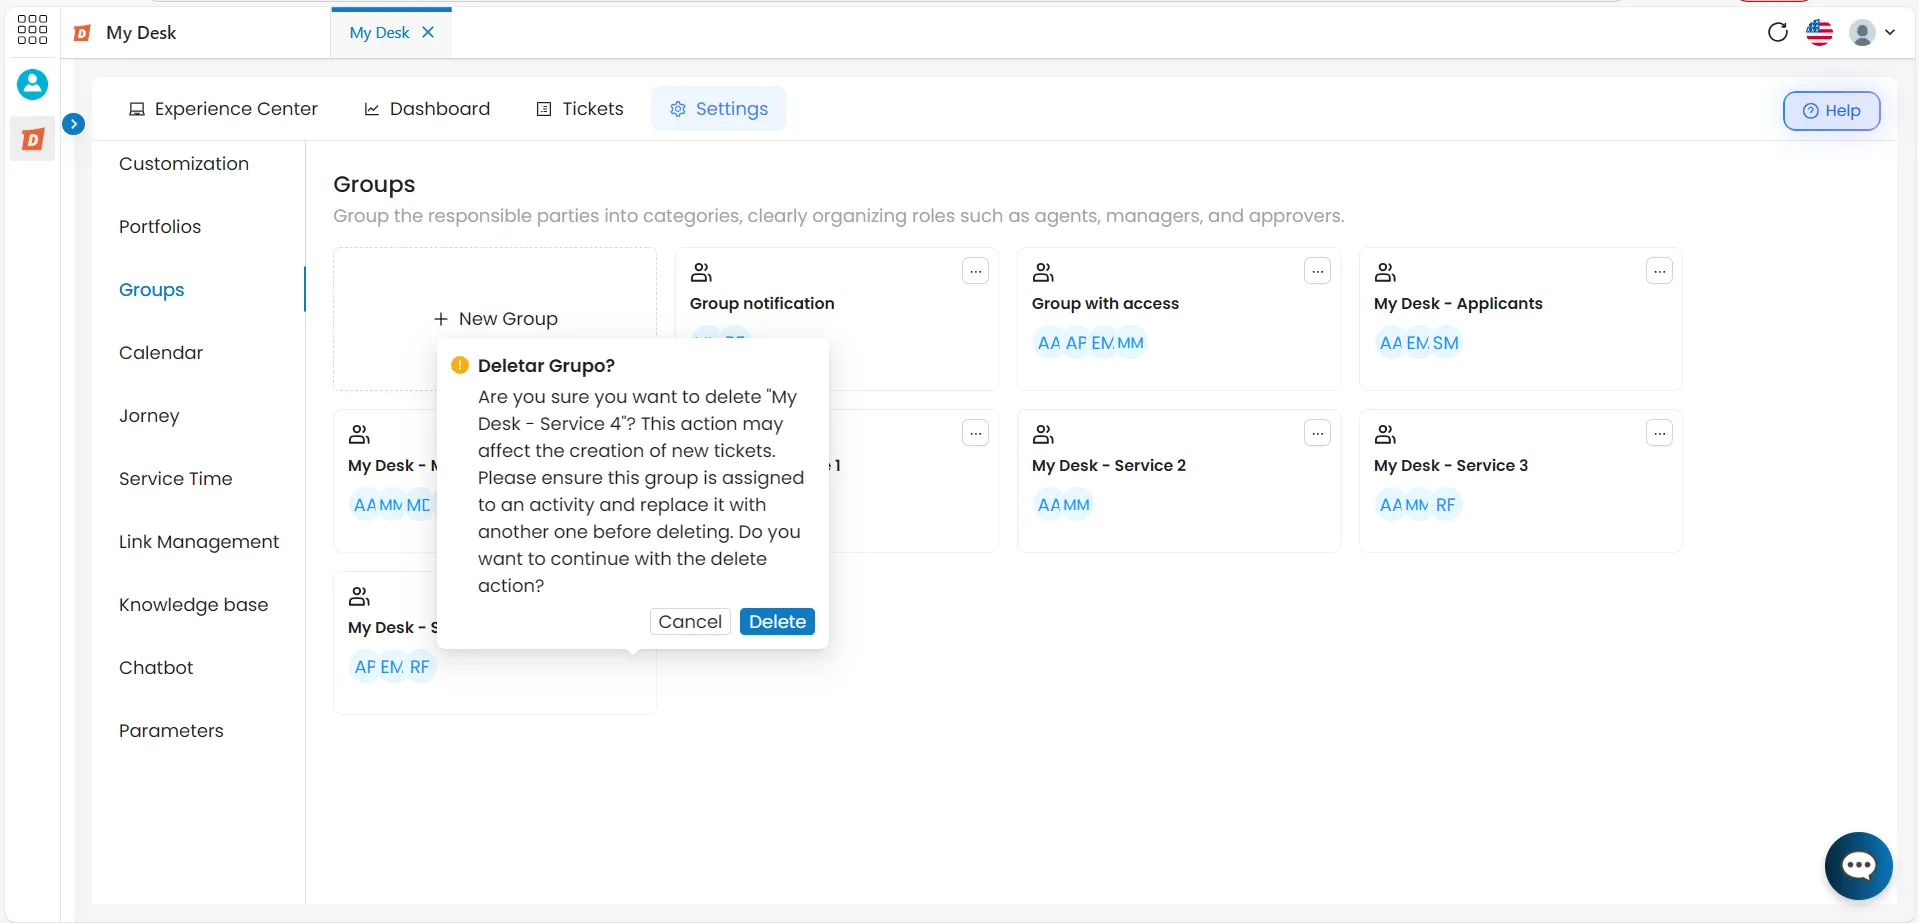
A confirmation window will appear:
Click Delete to confirm
Or click Cancel to return to the list without deleting. The group will be permanently removed.