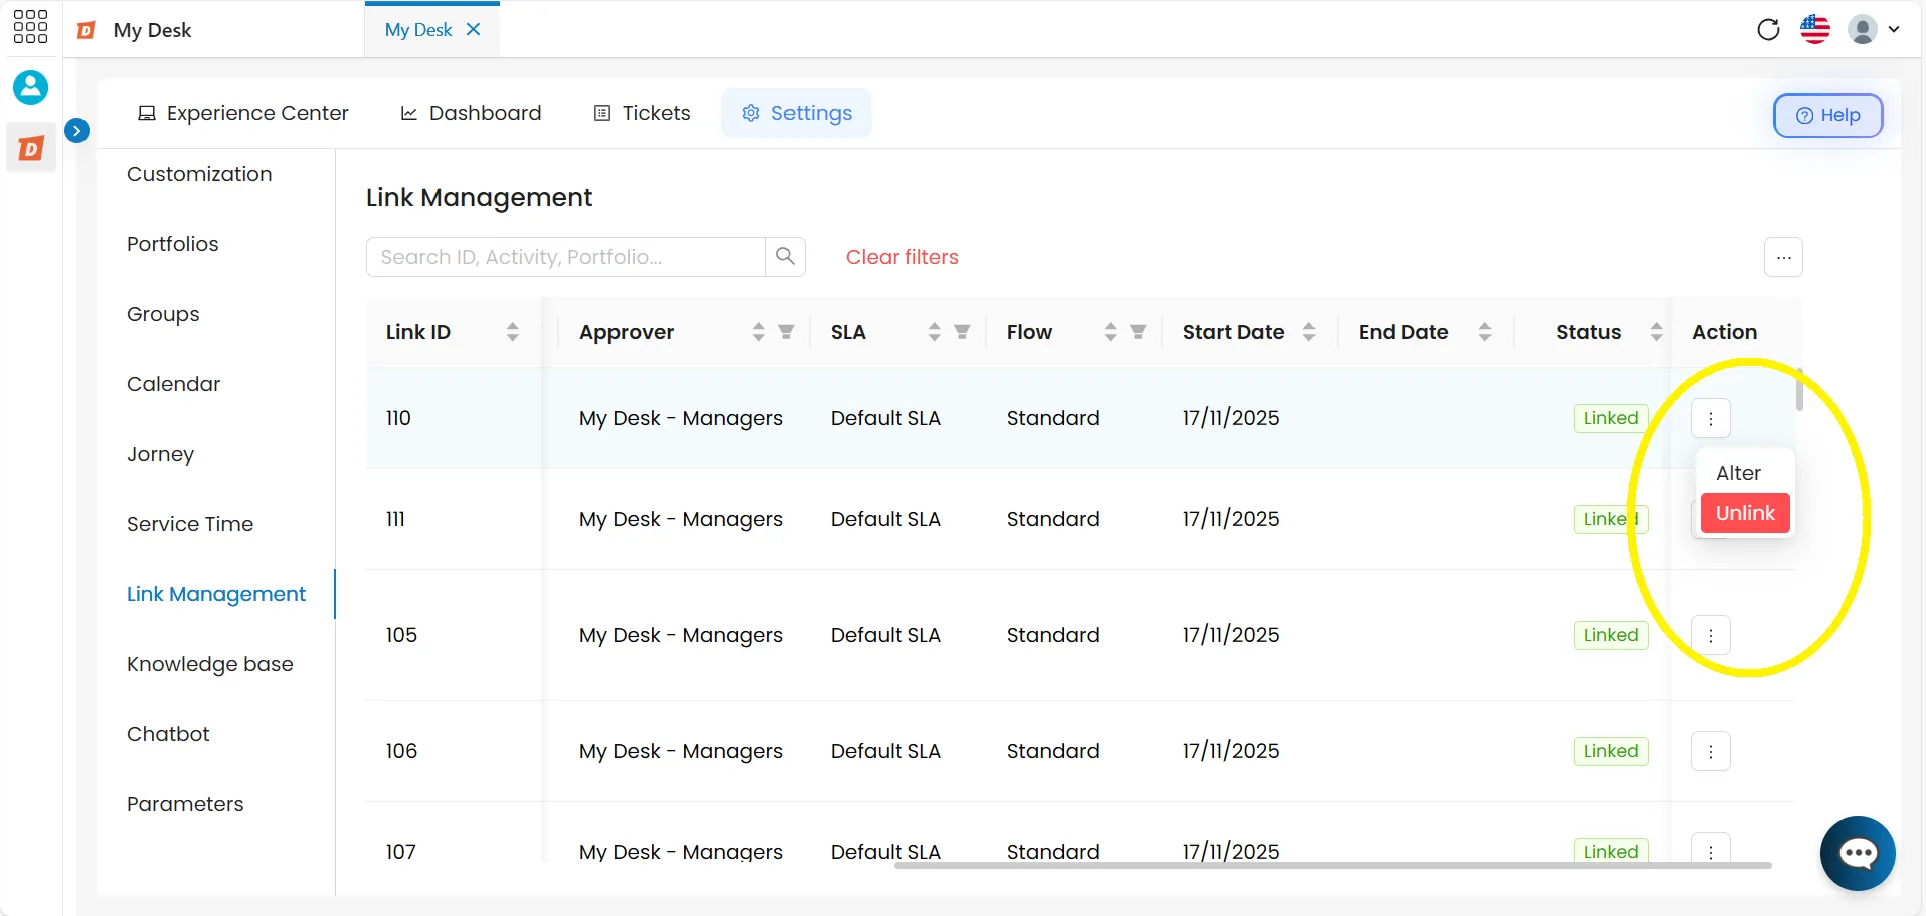
Link Management
Administrator
The Link Management tool provides a consolidated view of all active and inactive links between activities, portfolios, groups, calendars, and SLAs. Here you can analyze which activities are linked and which are not, and link, modify, and unlink them individually.
1 - Accessing Link Management

Para acessar, siga os passos abaixo:
Access My Desk
Select the My Desk application from the applications menu.
Click on Settings ⚙️
In the application's top menu.
Click on Relationship Management
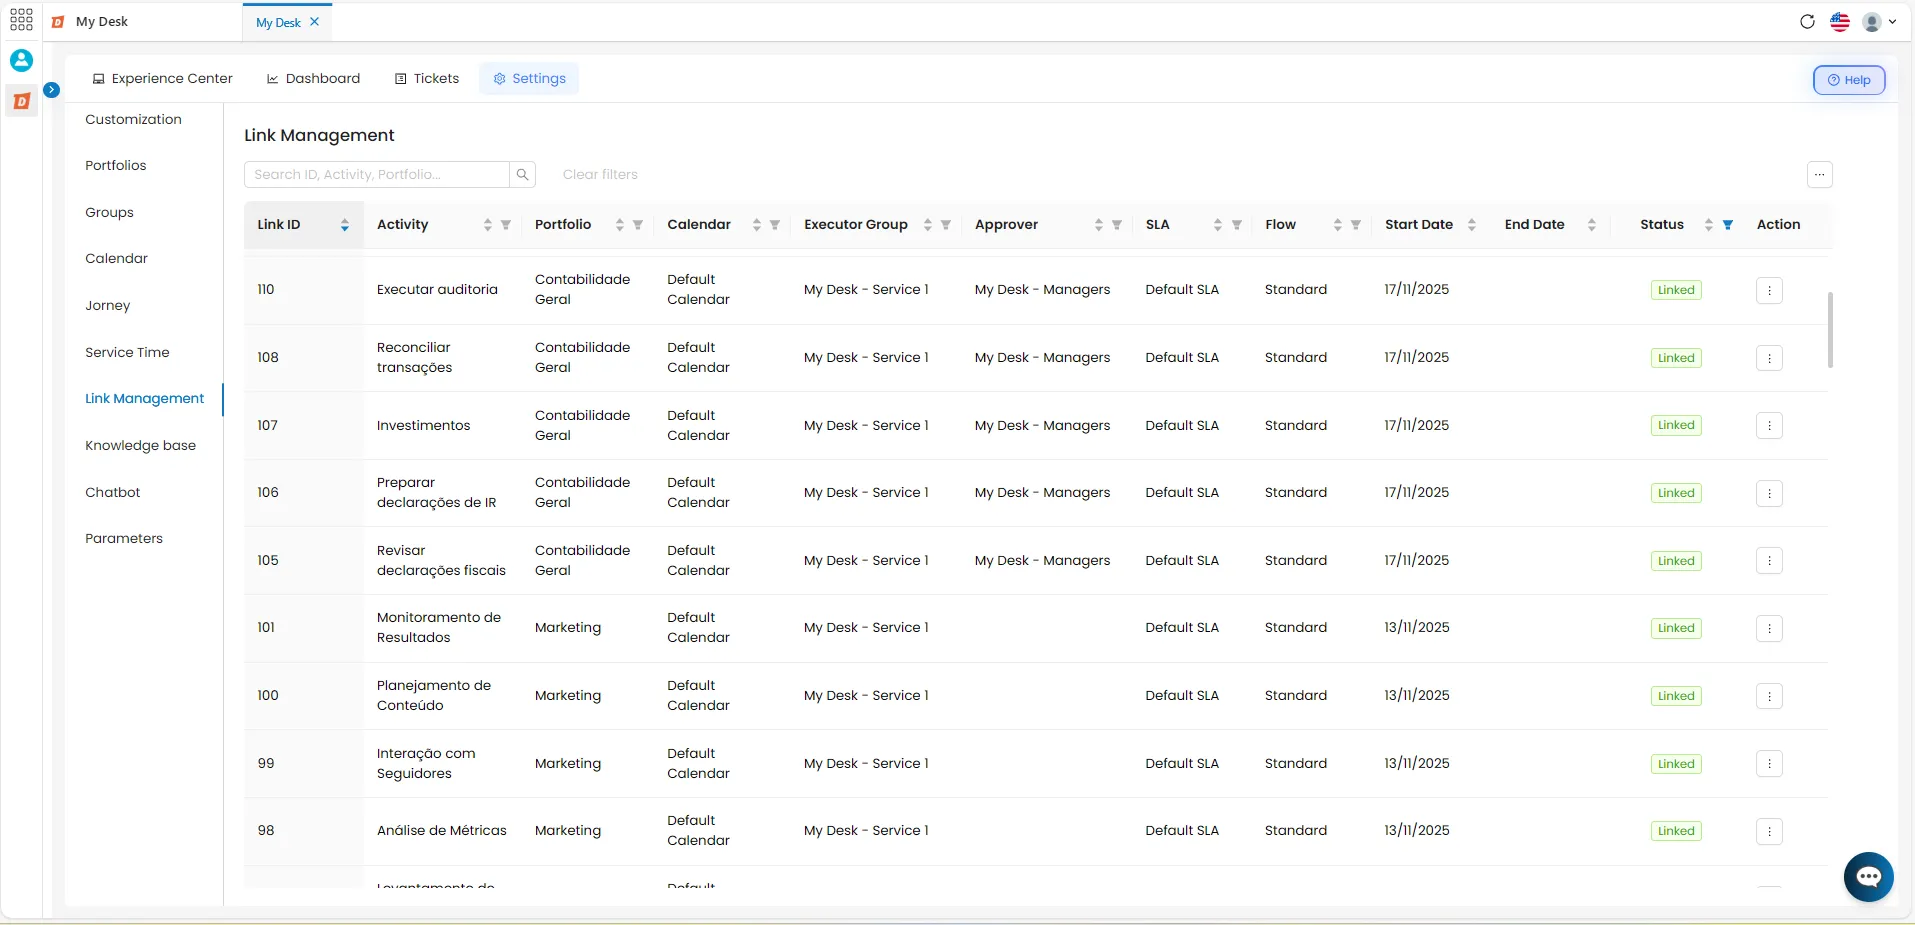
In the left-hand sidebar, a table with all registered links will be displayed.
2 - Table columns
A tabela de vínculos exibe as seguintes colunas:
Link ID
Unique identifier of the link.
Activity
Name of the linked activity.
Portfolio
Portfolio to which the activity belongs.
Contract
It shows which contract it is linked to.
Calendar
Service schedule applied to the employment relationship.
Implementing group
Group responsible for customer service.
Approver
Group responsible for approval, when configured.
SLA
Response time applied to the activity.
Flow
Ticket flow type configured.
Start date
Employment start date.
End date
End date of the employment relationship.
Status
Employment status: Employed, Unemployed, or Inactive.
Action [...]
Action button with the options Link, Change, and Unlink.
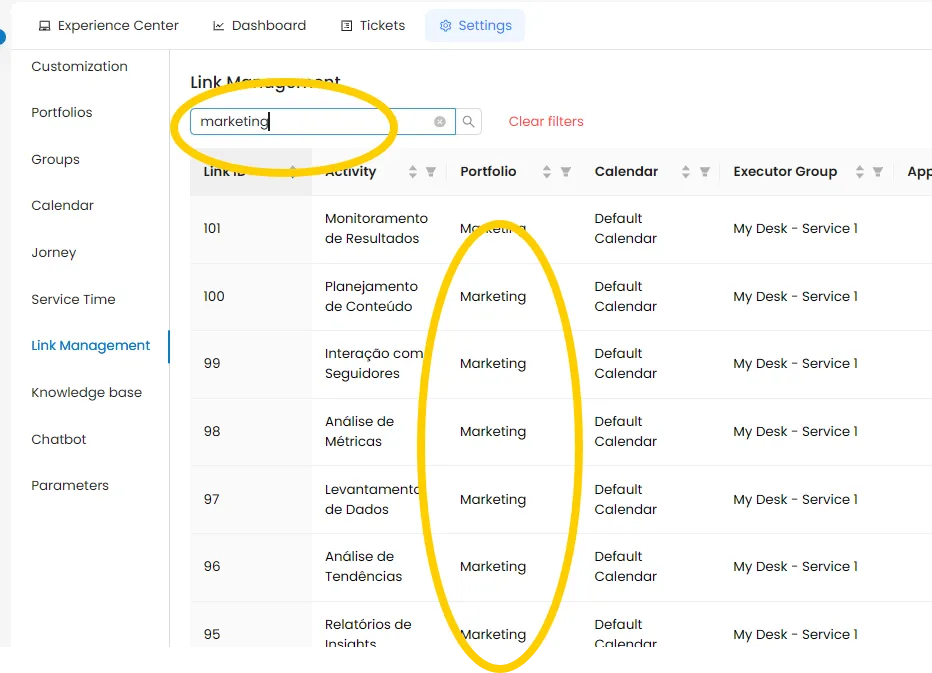
3 - Search

In the upper left corner of the screen there is a search field. Type in any attribute — such as the activity name, SLA type, or link ID — and the table will be automatically filtered as you type.
Limpar a pesquisa
Há três formas de limpar a busca:
Backspace key
Delete the typed text character by character.
X Boton
Click the X at the end of the text box to clear everything at once.
Clean filters
Click the red text "Clear filters" next to the search box. A confirmation message will appear.
⚠️ Are you sure you want to clear all filters? Click Yes to confirm.
4 - Sorting

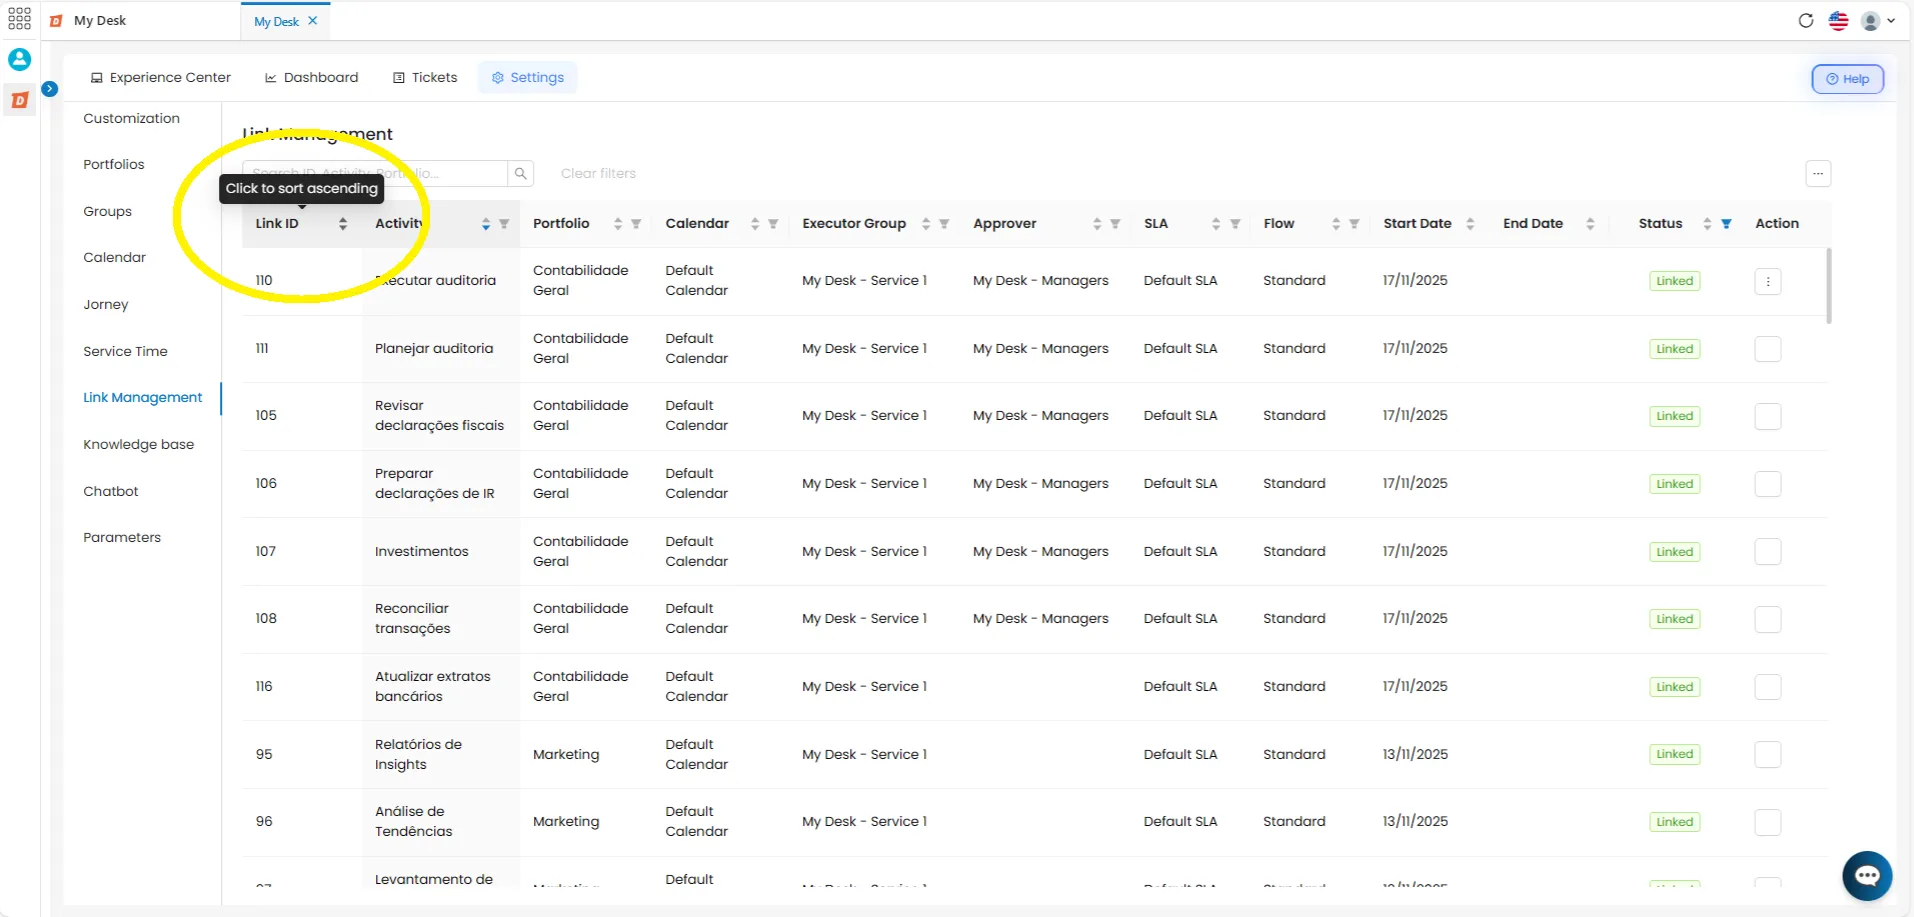
A ordenação poderá ser utilizada diretamente no cabeçalho da tabela de Vínculos.
Click the icon to sort in ascending or descending order, thus changing the display of the desired item based on the change made in the selected column. You can change the sorting of all items in a column.
5 - Filtering Links

You can filter the Links table by a specific attribute directly in the desired column.
With the exception of the columns: Link ID, Dates, and Action, all other columns have a filtering option, which are:
- Activity: Filter by one or more available activity types.
- Portfolio: Filter by one or more available portfolio types.
- Contract: Filters by available contracts in the database.
- Calendar: Filter by one or more available calendar types.
- Executor Group: Filter by one or more available groups.
- SLA: Filter by one or more available SLA types.
- Flow: Filter by one of the two available flow types.
- Status: Filter by one or more available status types.
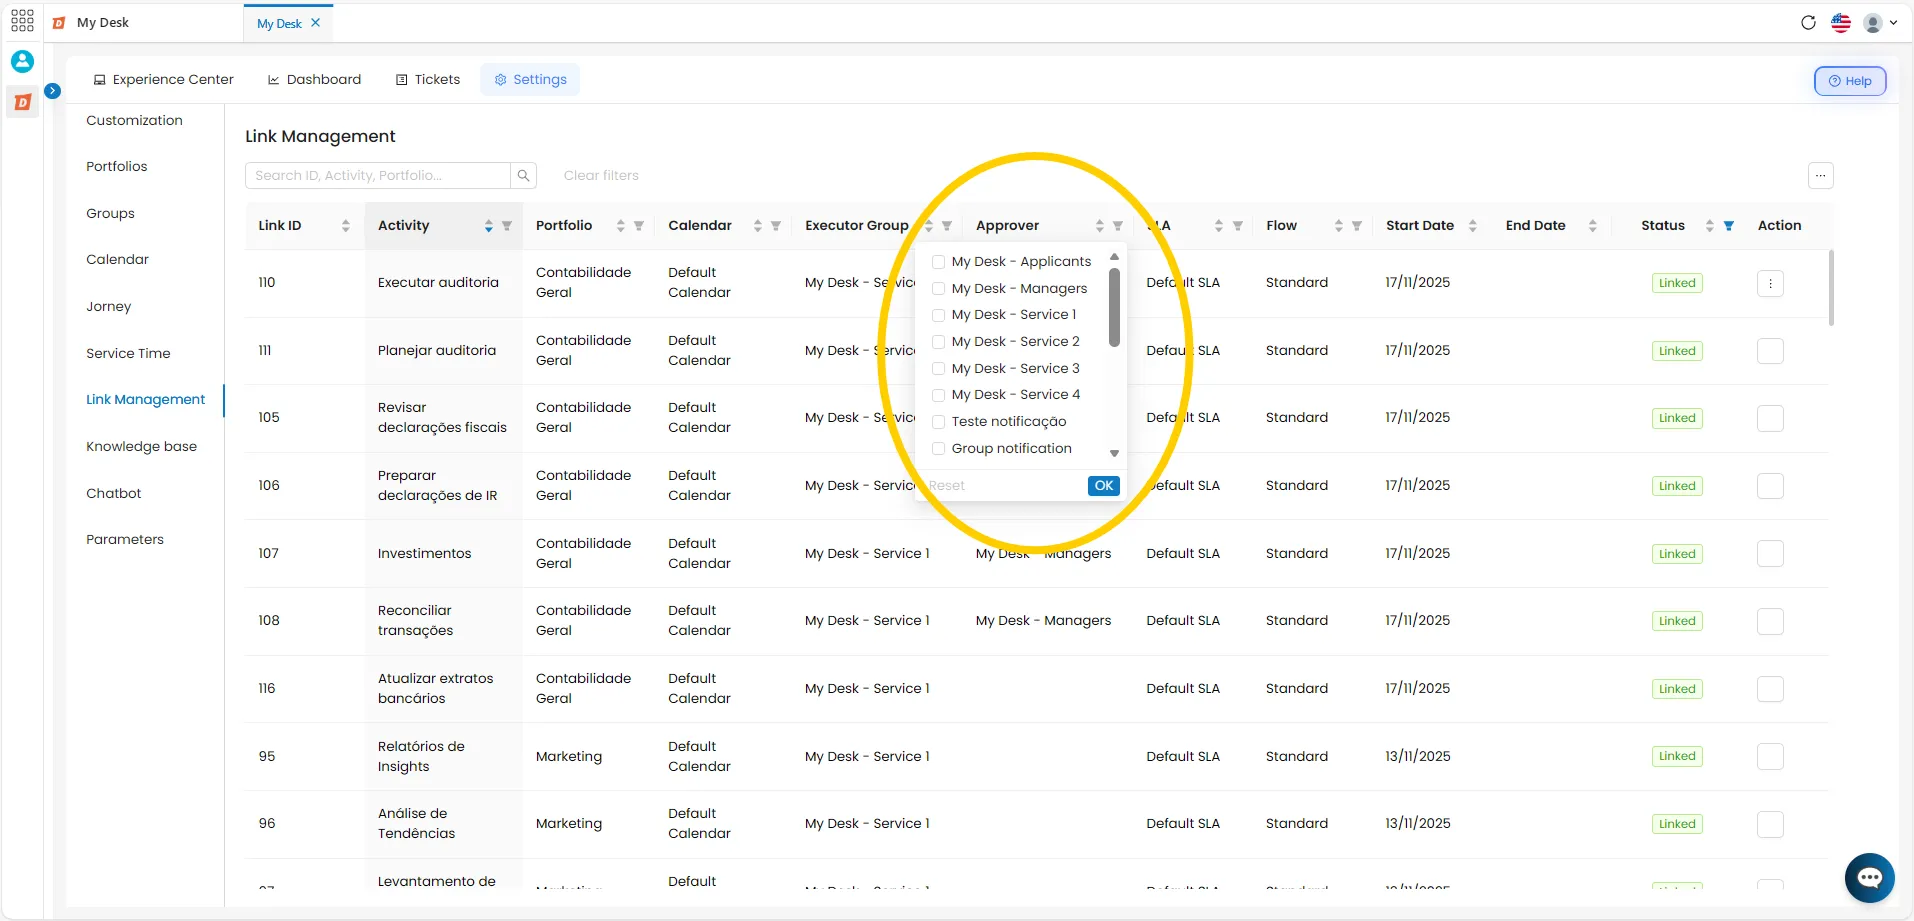
🔘 To apply a filter to a specific column:
Click the filter icon for the desired column.
The icon is located next to the name of each filterable column.
Select one or more attributes
Select the options you want to apply as a filter.
Click OK
The table will be filtered by the selected attributes.
🔘 To remove an individual filter:
Click the filter icon for the desired column
Click Reset
Click OK
The filter for that column will be removed.
🔘 To remove multiple filters at once:
Clique em Limpar filtros
Texto em vermelho ao lado da caixa de busca. Uma mensagem de confirmação surgirá.
⚠️Tem certeza que deseja limpar todos os filtros?
Clique em Sim
A seguinte mensagem de confirmação surgirá no topo da tela:
✅ Filtros limpos
6 - Bction Button

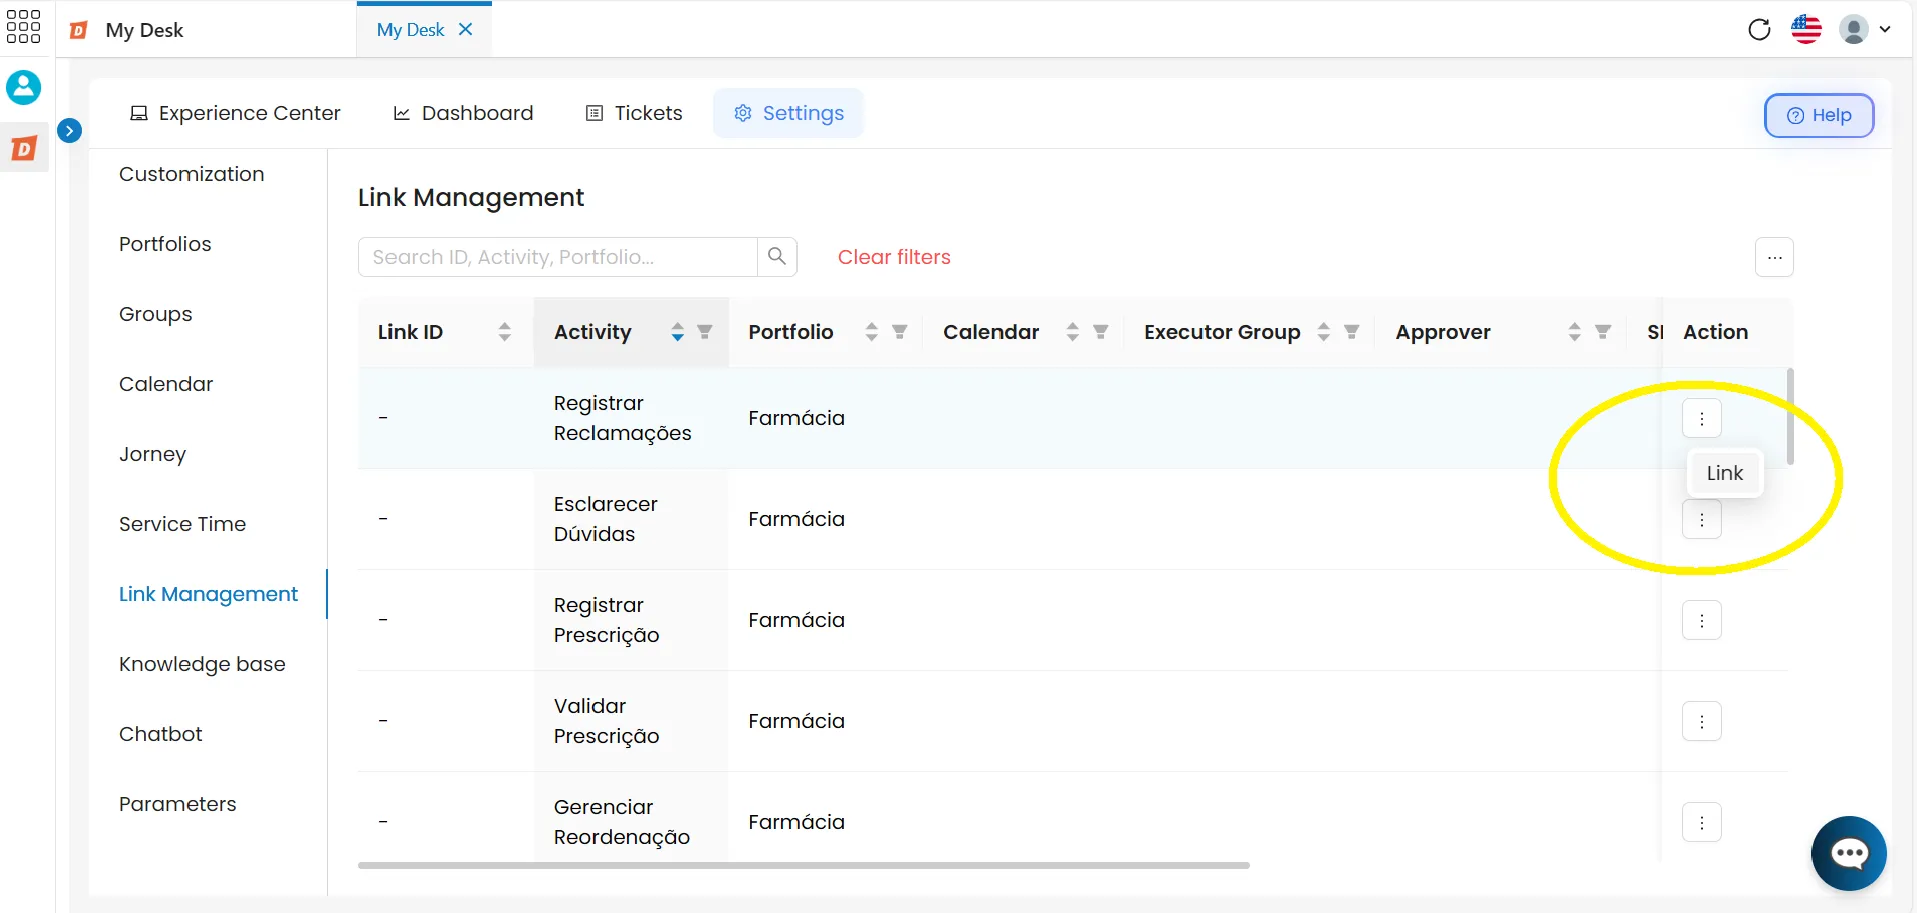
No final de cada linha da tabela há um botão de ação individual com três opções. As opções disponíveis variam conforme a situação do vínculo.
As opções do botão são: Vincular, Alterar, Desvincular.
6.1 - Link
When an activity has no links, only this option is available in the action button. To link an activity, follow the steps below:
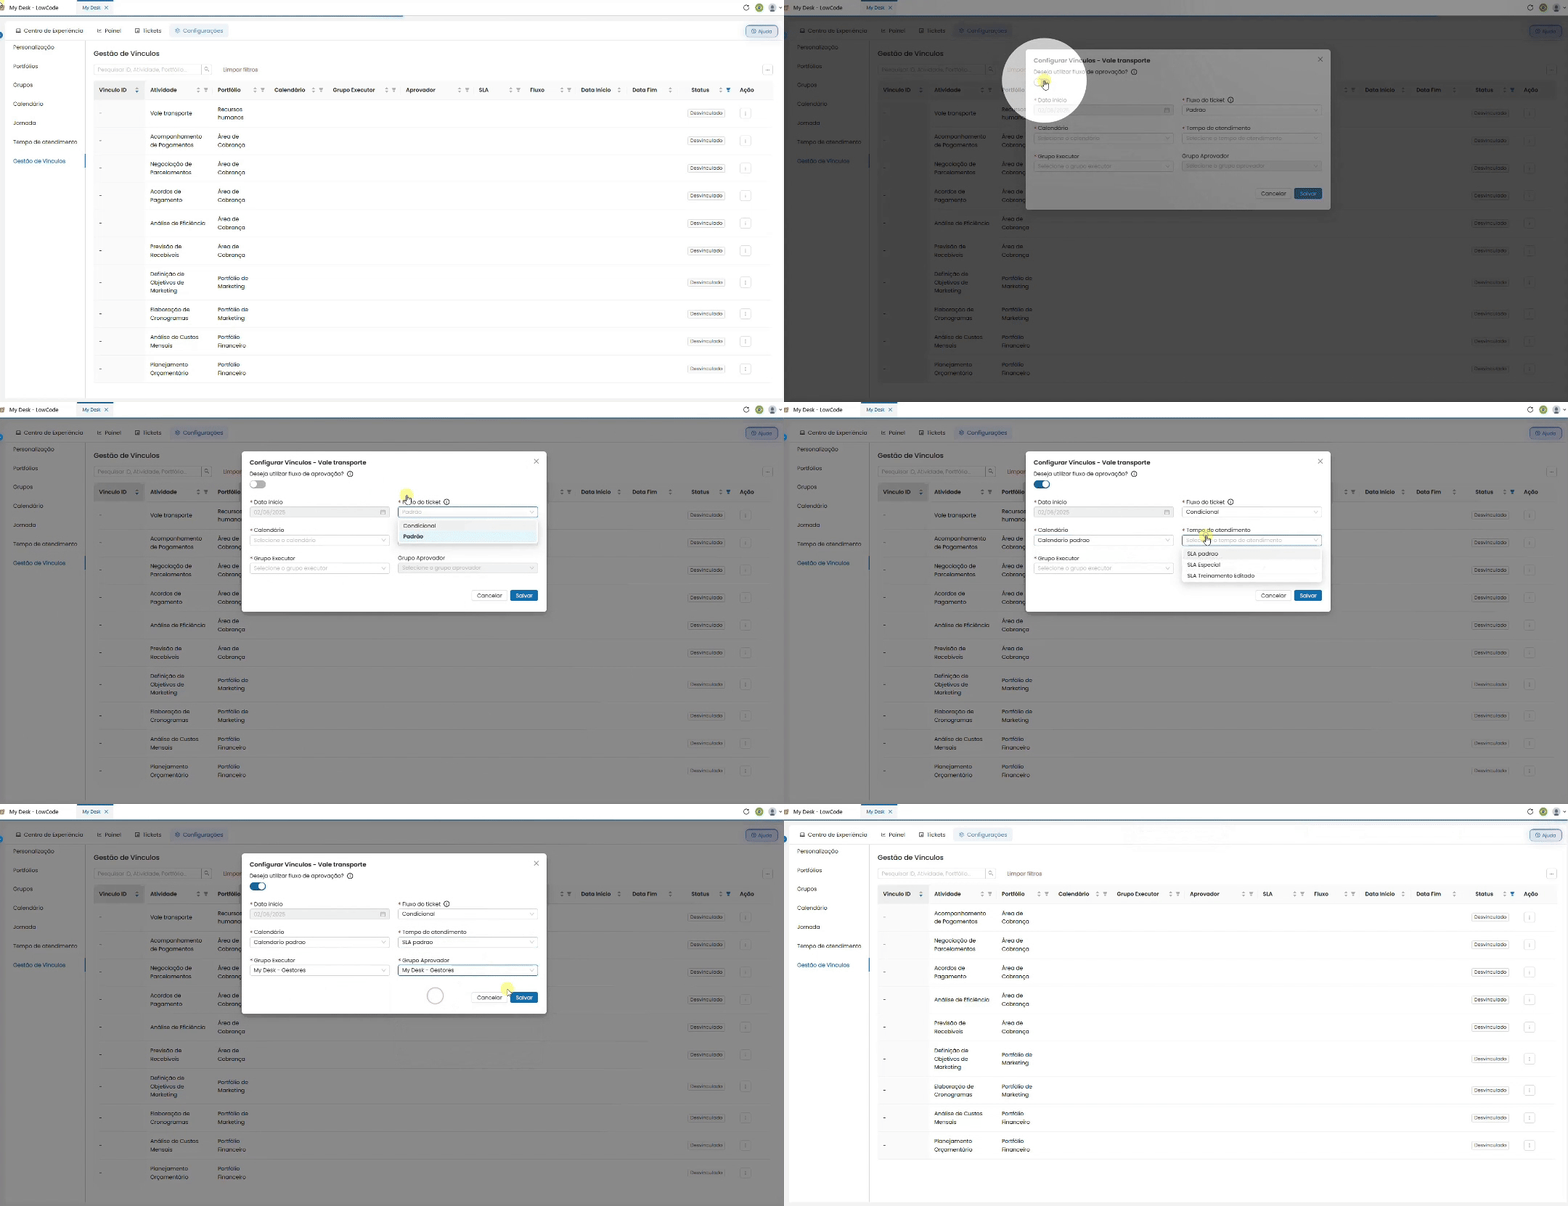
Click the Action button [...] and select Link
A window will appear in the center of the screen.
Select the contract
The first step is to choose the contract to which the activity will be linked.
Fill in the remaining fields
- Approval workflow;
- Ticket flow;
- Calendar;
- Response time;
- Implementing group;
- Approval group.
Click Save
The link will be created and the table will be updated.
6.2 - Change Links
This button allows you to edit all attributes except for the Contract and Start Date.
Click Save after you have finished making changes.
6.3 - Unlink
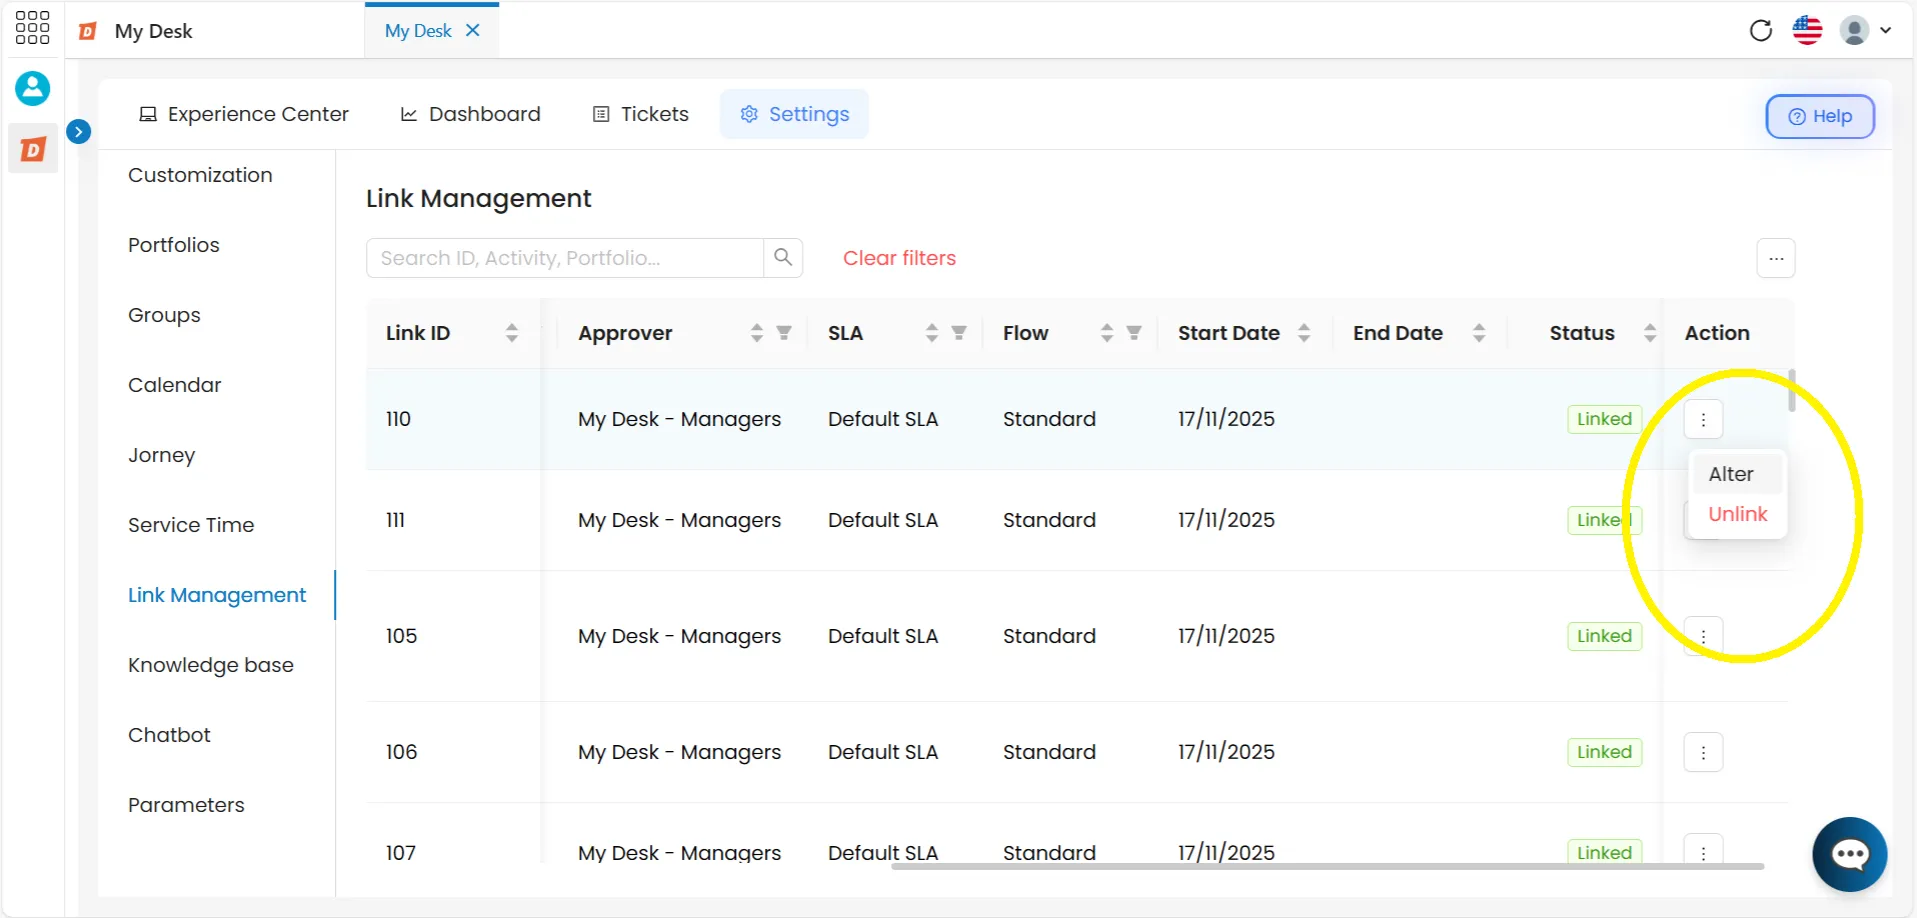
To unlink an activity from a service, follow the steps below:
Click the action button [...] and select Unlink
A confirmation message will appear at the top of the screen:
⚠️ Are you sure you want to undo the links for the activity "activity name"?
Click the red Unlink button
The following confirmation message will appear at the top of the screen:
✅ Activity successfully disconnected!