Activity Link
Administrator
The function of activity links is to connect each activity to a portfolio, defining the service settings — such as calendar, SLA, executing group, and approval workflow. For an activity to appear in the Experience Center and be ready for ticket opening, it needs to be linked.
1 - Como acessar

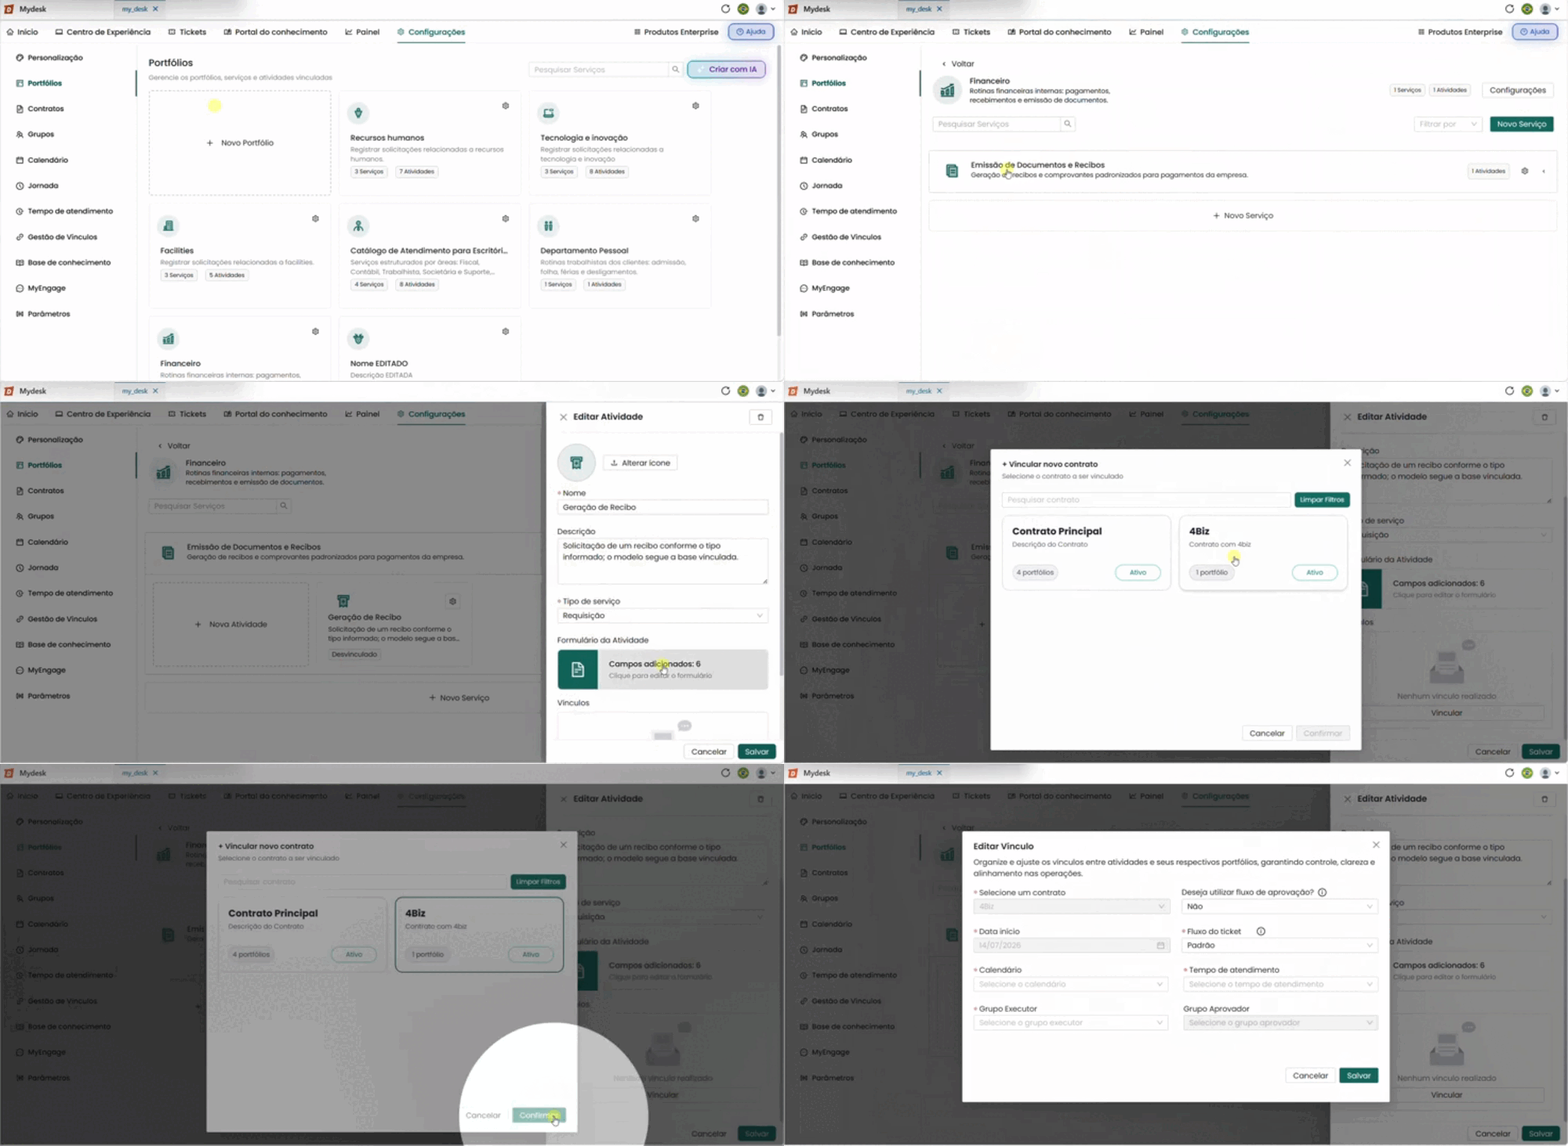
To access the activity links, follow the steps below:
Go to Settings → Portfolios
In the top menu and then in the side menu.
Click on the desired portfolio
The related services will be displayed below.
Click on the desired service
The service's activities will be displayed.
Click on the activity you wish to link
A window will open in the right corner of the screen.
Click on Link
A window will open in the center of the screen to configure the link. The first step is to select the contract.
2 - Linking an Activity

2.1 - Select the contract
Before configuring the other fields of the link, it is necessary to select the contract to which this activity will be linked. The window displays the message "Select a contract to manage the links" and lists all available contracts in cards:
Main Contract — Level 1 Support
Handling incidents and requests for all users in the organization.
1 portfolio Active
Click on the desired contract to select it. The link configuration window will open with the contract already pre-selected in the first field.
📌 Multiple contracts:
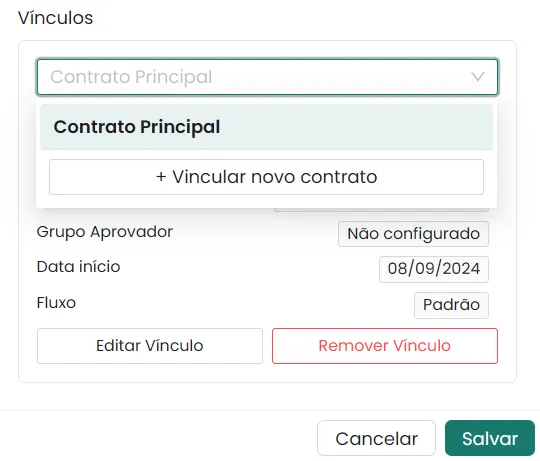
The same activity can be linked to more than one contract, with different settings for each. To do this, complete the linking with the first contract and repeat the process for the others, as shown below:
- Click on the name of the linked contract;
- A drop-down list will open;
- Click on + Link new contract;
- Click on the contract to be linked;
- Proceed with editing the link.
2.2 - Link to approval workflow
The approval workflow is the process by which requests undergo review and authorization before or after handling—ensuring control and compliance in service delivery.
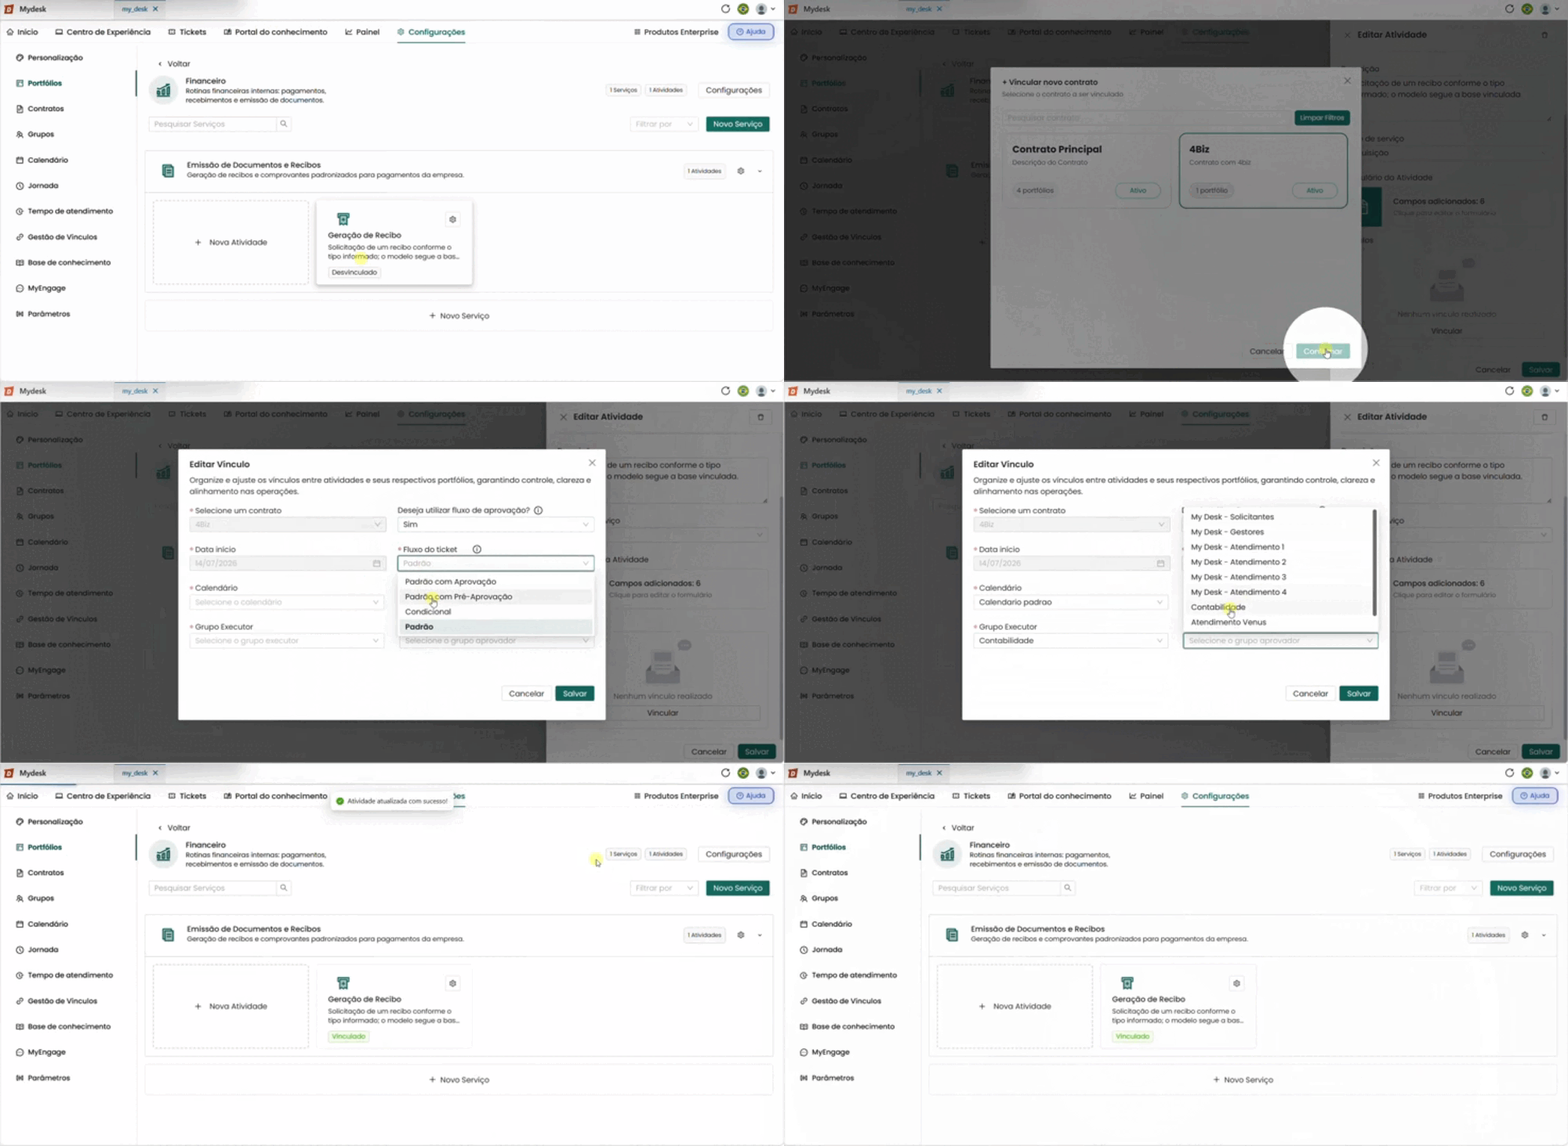
To link the activity to an approval workflow, follow the steps below:
Select the contract
As described in section 2.1 above.
Click on confirm.
Select the fields to link.
Contract pre-selected
It already comes pre-selected with the contract chosen in the previous step.
Do you want to use an approval workflow?
Select the Yes option.
Start date automatic
Filled with the current date.
It cannot be modified.
Ticket flow
Choose from:
- Standard, Conditional, Standard with pre-approval, Standard with approval.
With an active approval workflow, all four options are available. See section 2.4 for details on each type.
Calendar
Select the service schedule that will be applied to this activity.
Response time
Select the SLA that will be applied to this activity.
Implementing group
Selecione o grupo responsável por atender os chamados desta atividade.
Approval group
Select the group responsible for approving tickets. Available only with an active approval workflow.
Click Save twice
First, click on the central linking window, and then again on Save in the side activity editing window to complete the configuration.
2.3 - Link without approval workflow
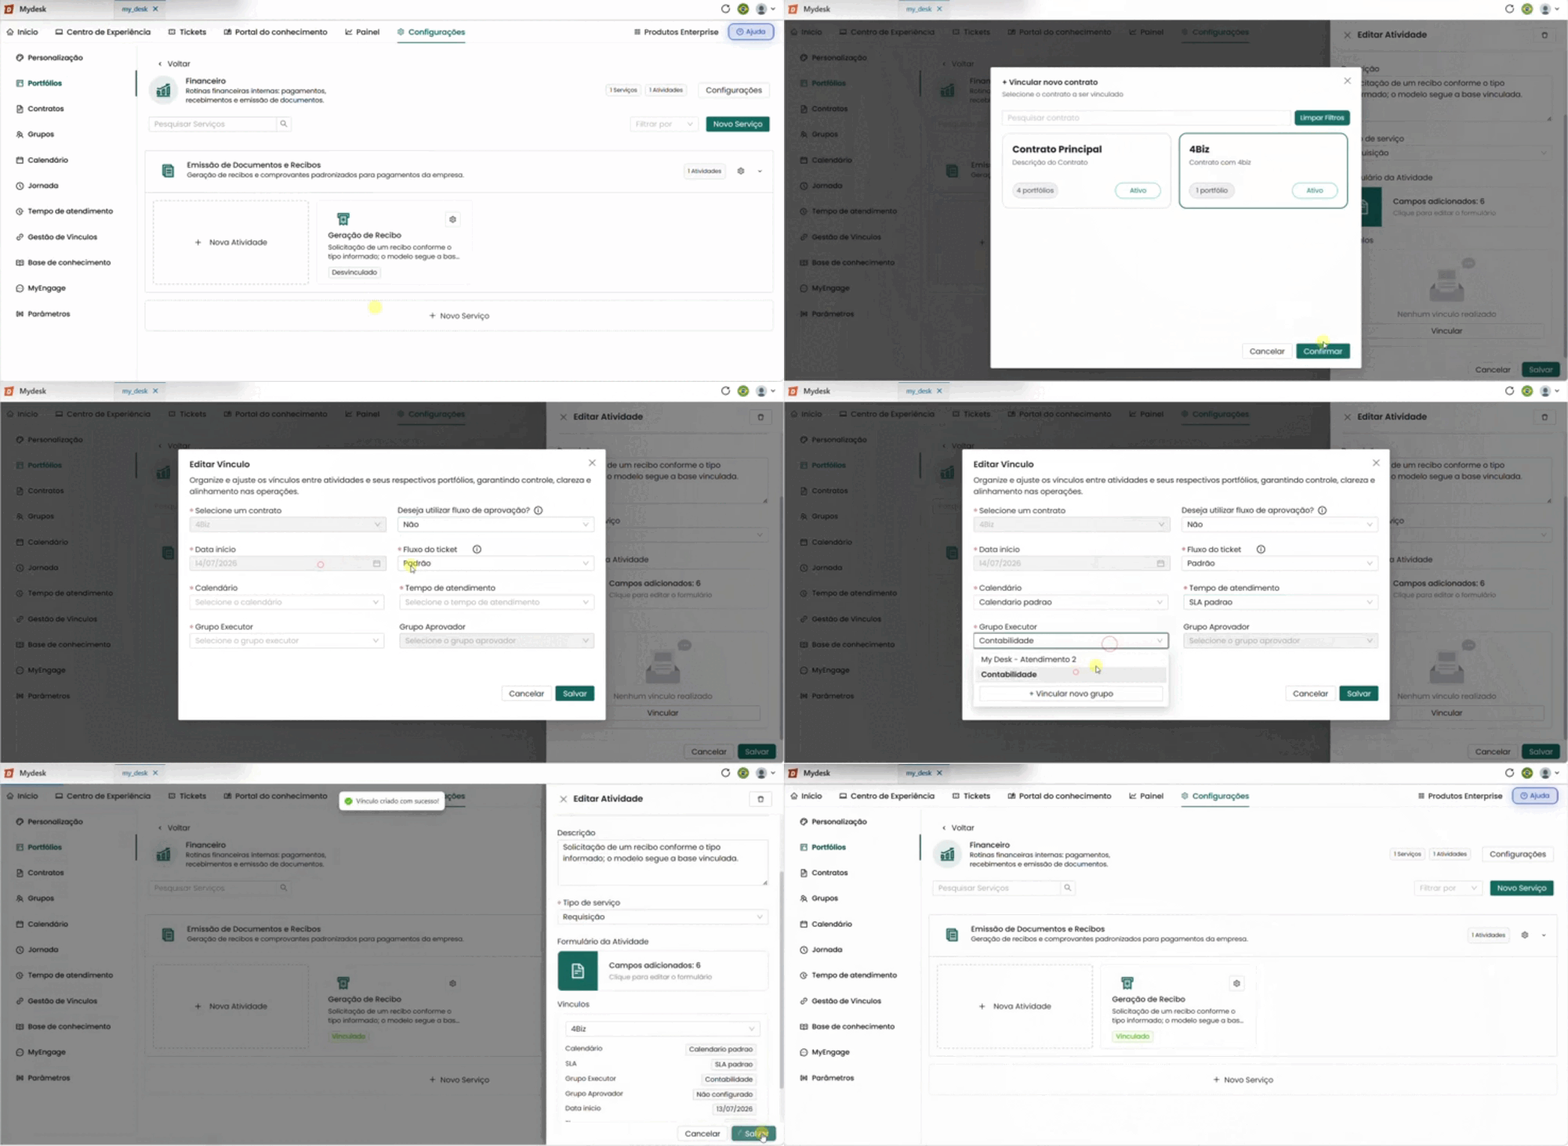
Select No for the Approval Flow option. In this case, only two flow types will be available — Standard and Conditional — and the Approver Group field will not be available.
To link the activity to an approval workflow, follow the steps below:
Select the contract
As described in section 2.1 above.
Click on confirm.
Select the fields to link
Contract pre-selected
It already comes pre-selected with the contract chosen in the previous step.
Do you want to use an approval workflow?
Choose the No option.
Start date automatic
Filled with the current date.
It cannot be modified.
Ticket flow
Choose from:
- Standard and Conditional.
With the approval workflow inactive, only two options are available. See section 2.4 for details on each type.
Calendar
Select the service schedule that will be applied to this activity.
Response time
Select the SLA that will be applied to this activity.
Executor Group
Select the group responsible for handling requests for this activity.
Approval group not available
Select the group responsible for approving tickets. Available only with an active approval workflow.
Click Save twice
First, click on the central linking window, and then again on Save in the side activity editing window to complete the configuration.
2.4 - Ticket flow types
Veja abaixo detalhadamente sobre cada tipo de fluxo do ticket:
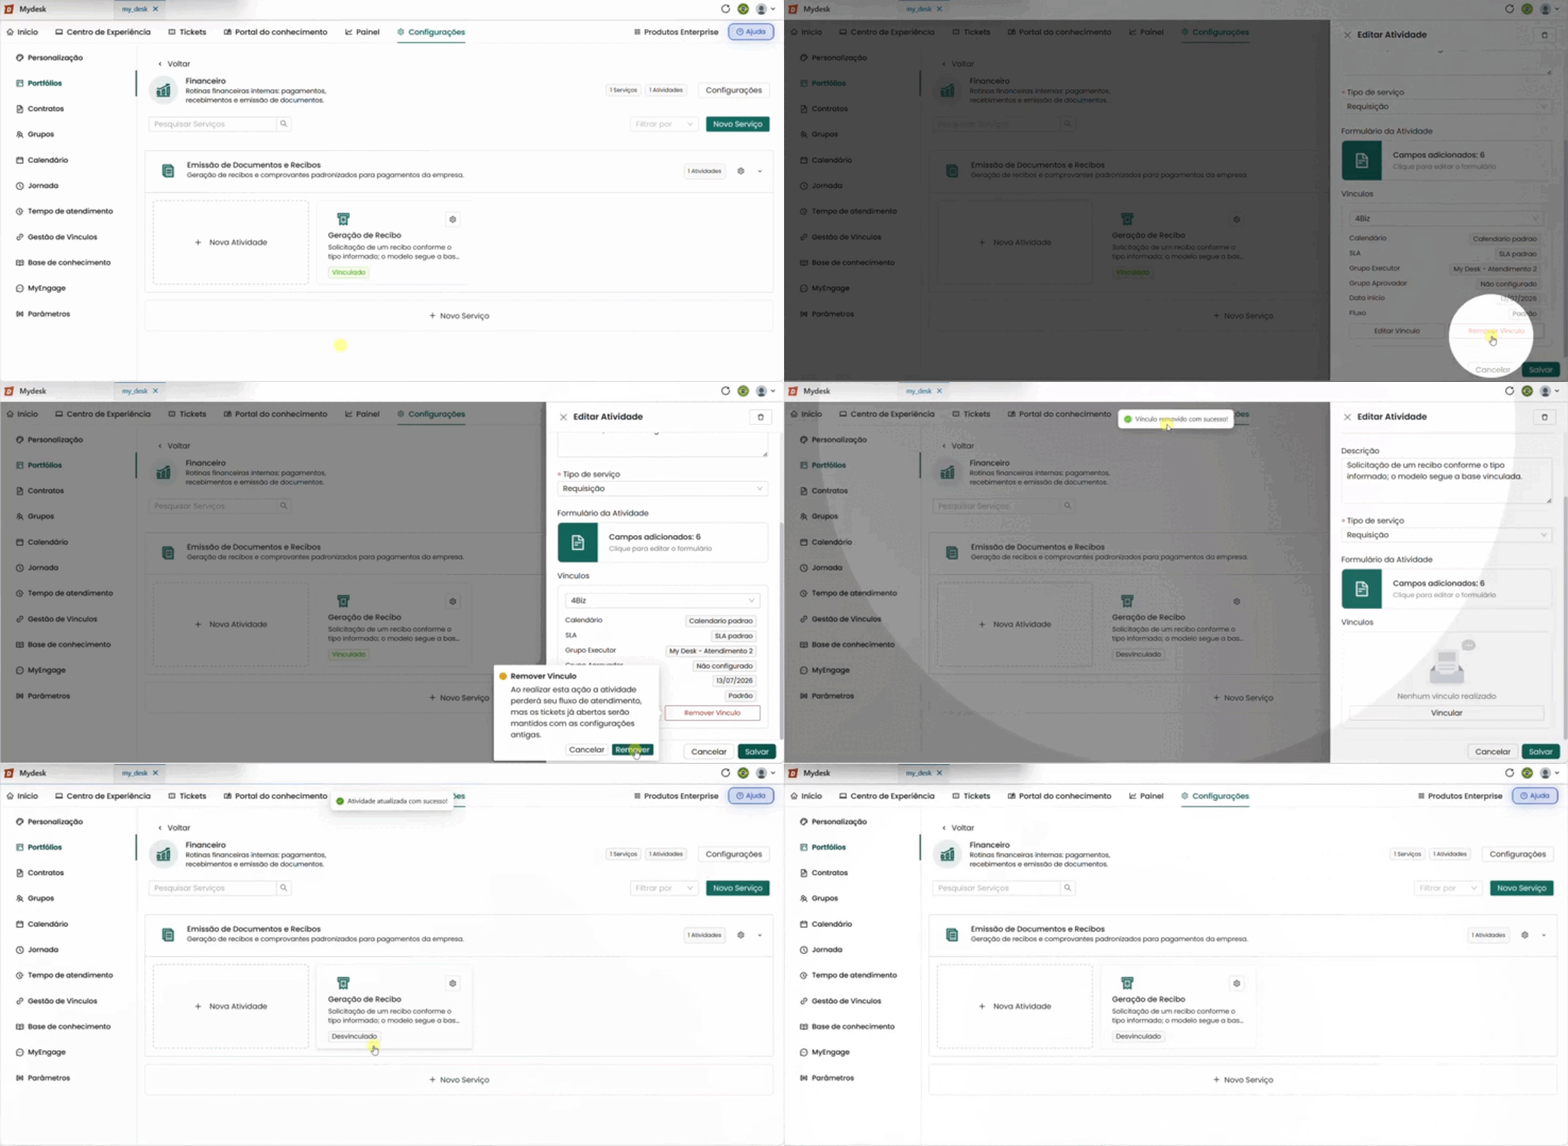
3 - Unlinking an Activity

To unlink an activity, follow the steps below.
Click on the desired activity
A window will open in the right corner of the screen.
Click on Remove link
The button appears in red. A confirmation message will appear with the following warning:
⚠️ Performing this action will cause the activity to lose its service flow. Tickets already open will be maintained with the old settings.
Click Remove to confirm
Or click Cancel to return without unlinking. The following message will appear at the top of the screen:
✅ Link successfully removed.
Click Save twice
First, click on the central linking window, and then again on Save in the side activity editing window to complete the configuration. The following message will appear at the top of the screen:
✅ Activity updated successfully.
⚠️ Atention:
When an activity is unlinked, it no longer appears in the Experience Center and can no longer be used to open new tickets. Tickets that are already open are not affected.
4 - Edit an Activity Link

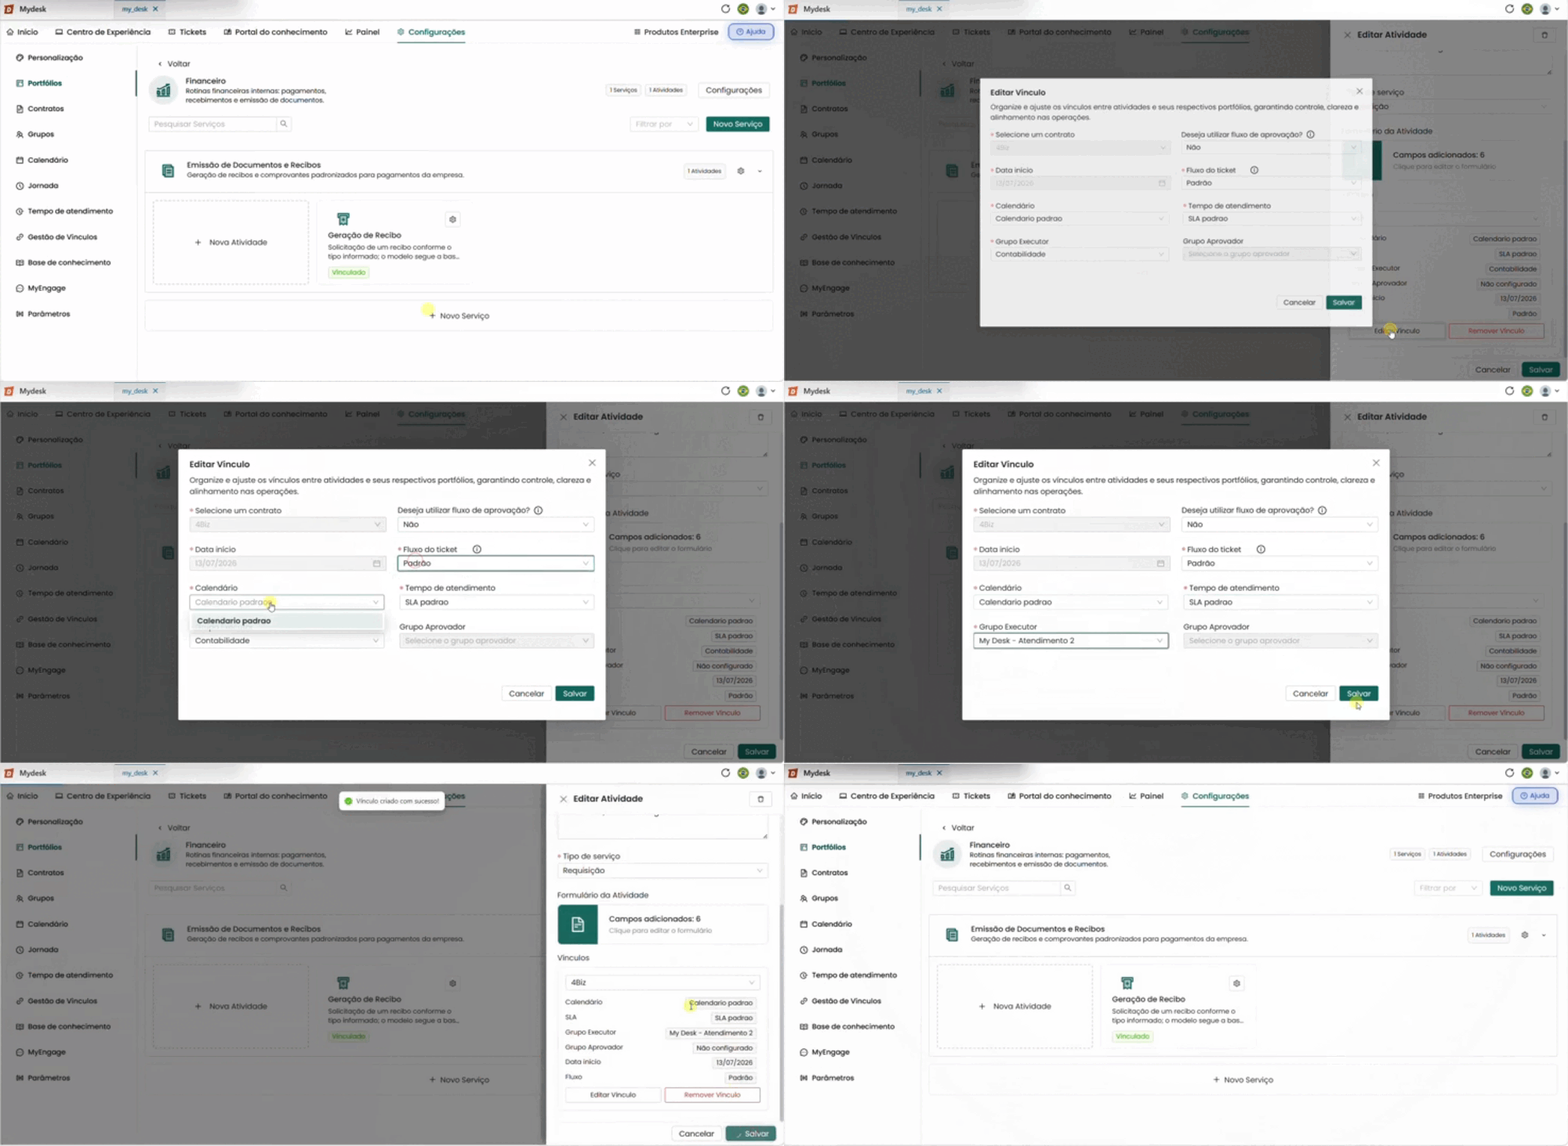
To unlink an activity, follow the steps below.
Click on the desired activity
A window will open in the right corner of the screen.
Click on Edit Link
A window will open in the center of the screen with all the link information.
Edit the information:
Select a contract
It's not possible to change the contract. To do that, add a new link.
Do you want to use an approval workflow?
Change to Yes or No, or leave it the same.
Start date
It cannot be changed. The date the link was created is already fixed.
Ticket flow
It will change according to what you chose in the approval workflow. Change to your desired workflow or leave it as is.
Calendar
Change to your desired calendar or leave it as is.
Response time
Change to your desired SLA or leave it as is.
Executor Group
Change to the desired group or leave it as is.
Approval Group
Change to the desired group or leave it as is.
This option is inactive if you select "No" during the approval process.
Click Save twice
First, click on the central linking window, and then again on Save in the side activity editing window to complete the configuration.
💡 Other ways to manage relationships:
You can link activities in bulk when editing a portfolio — see the PortfolioPortfolio page.
To edit existing links, go to Link Management.