Portfolio
Portfolio
Administrator

A portfolio is a collection of services, and a service is a collection of activities. Depending on your organization's needs, you can create different services and activities to offer to users in the Experience Center.
📌 Mandatory hierarchy:
To register a service, it must belong to a portfolio. To register an activity, it must belong to a service.
Accessing Portfolios

To access the list of Portfolios, follow the steps below:
Access My Desk
Select the My Desk application from the applications menu.
Click on Settings
In the application's top menu.
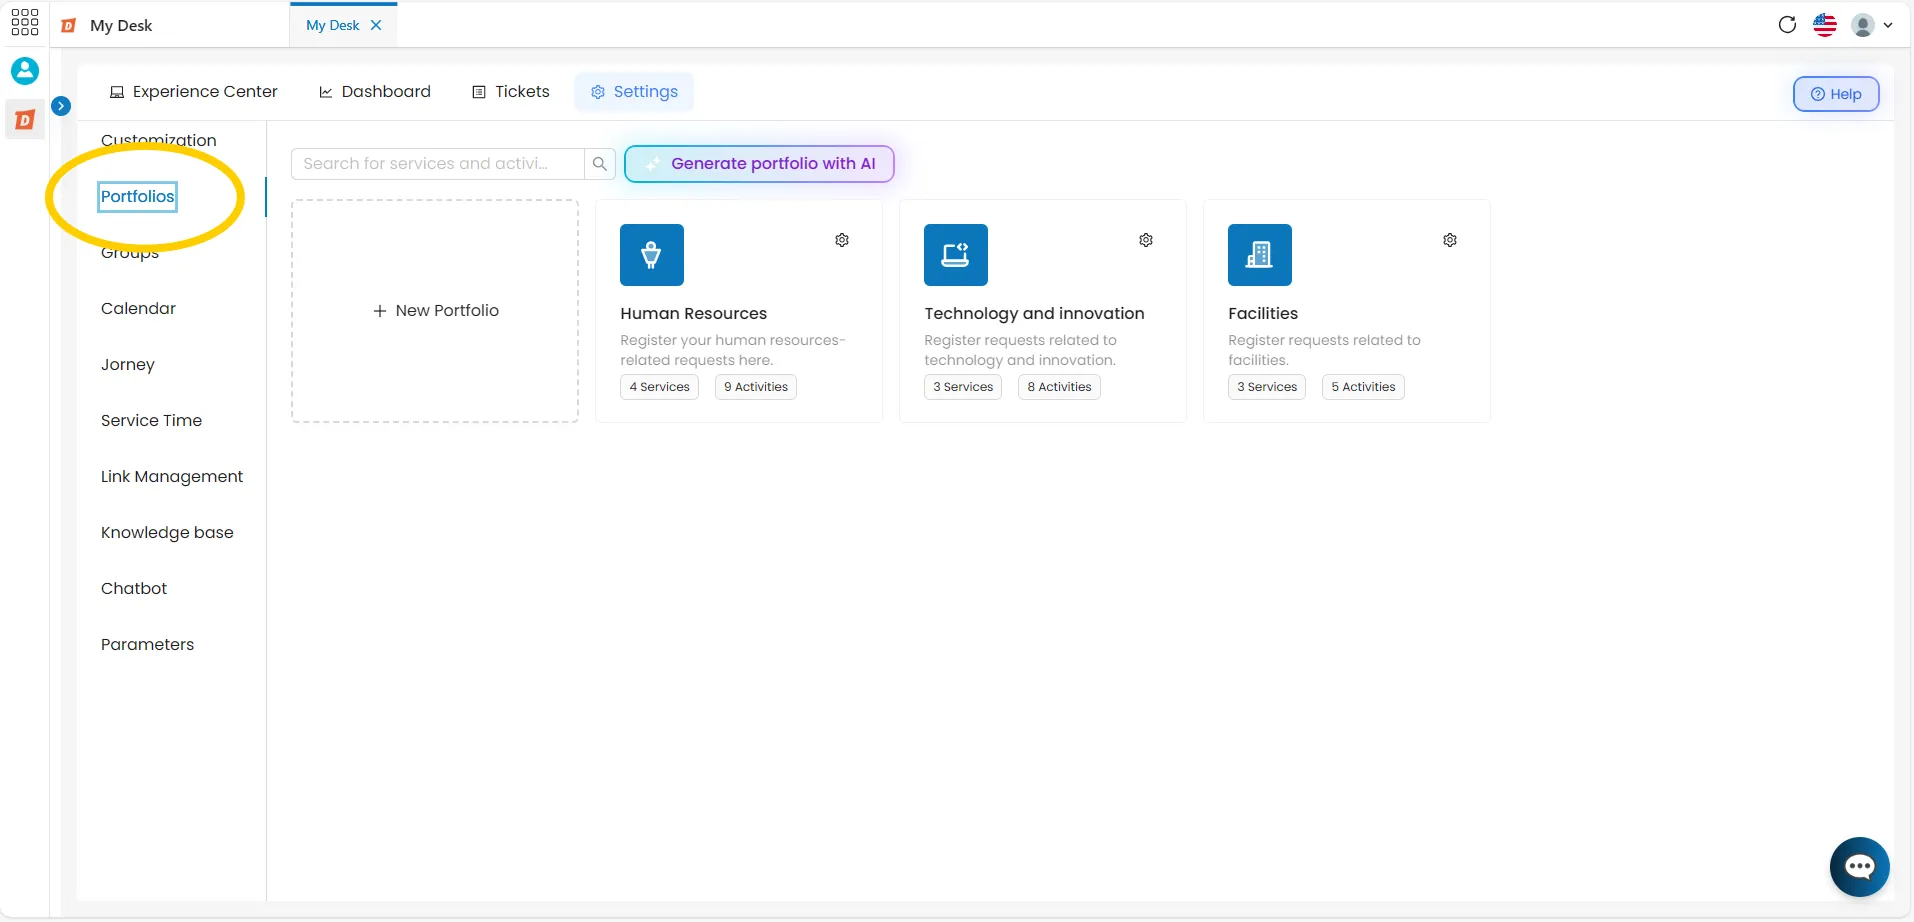
Click on Portfolios
In the left-hand sidebar, the screen will display a block list of all created portfolios. Each portfolio is identified by an icon, its name, the number of services, the number of registered activities, and a gear icon .
List of Services and Activities

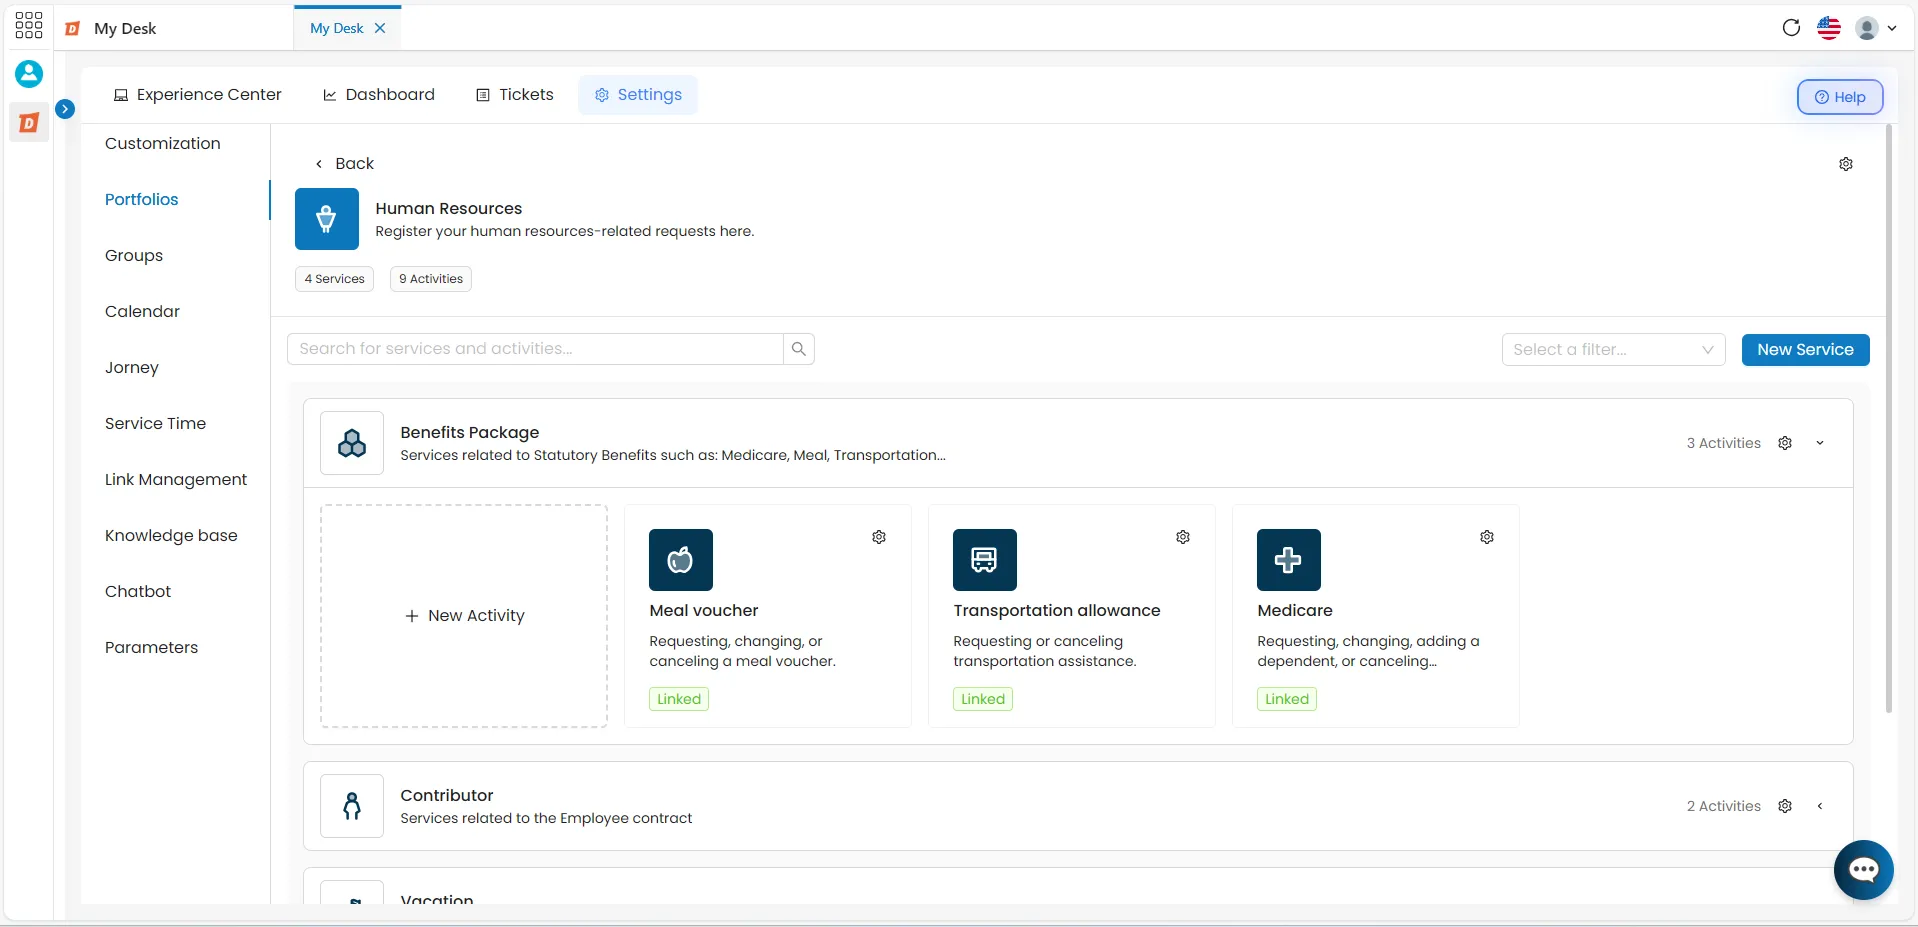
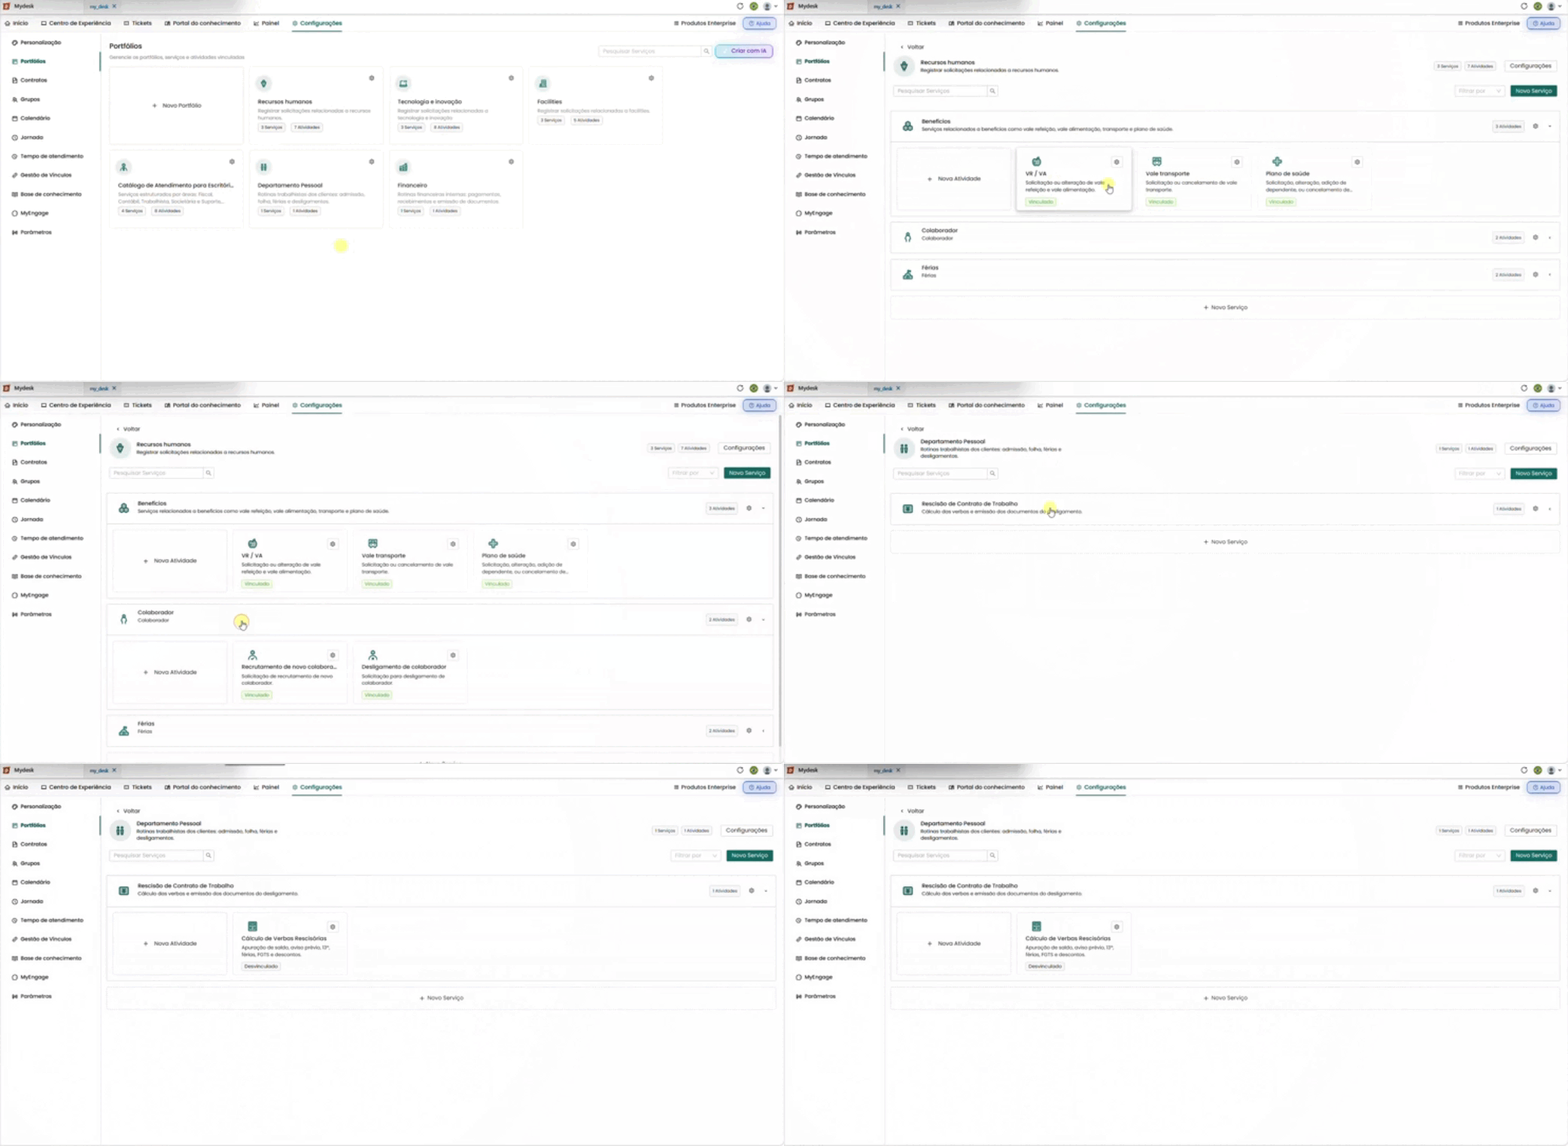
To view the services and activities of a portfolio, follow the steps below:
Click on the desired portfolio
For example: Human Resources. A list of all registered services will appear below.
Find services and activities
You can scroll down the page to view all options, use the search bar to find both services and activities, or use the filter — divided into Linked and Unlinked.
Create a New Portfolio

To create a new Portfolio, follow the steps below:
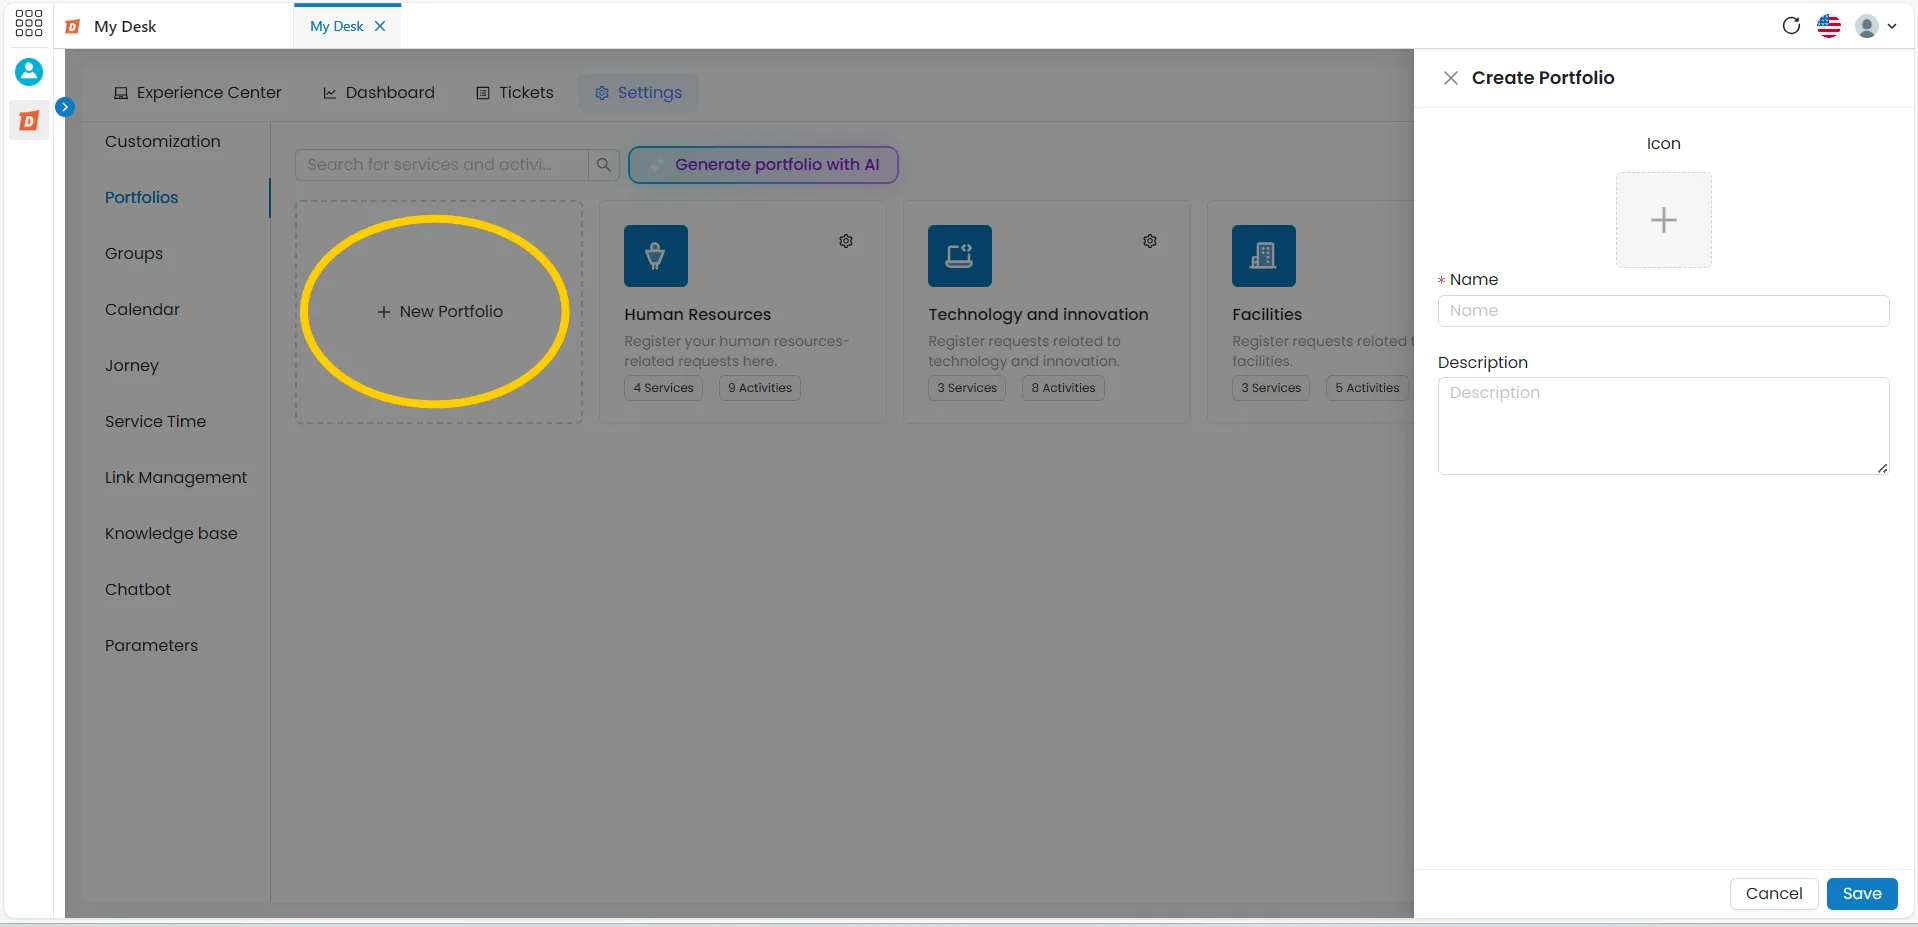
Click on + New portfolio
A new window will appear on the right side of the screen with the necessary fields for creation.
Fill in the information
See the available fields below:
Icon
Choose an icon from the database. You can browse by category or use the search field by typing the icon's name.
Name
Give the portfolio a short and descriptive name.
Description
Describe the function and purpose of the portfolio.
Click Save
The new portfolio will be created and will appear in the list.
Or click Cancel to return to the portfolio list without saving.
Creating a Portfolio with AI

My Desk offers artificial intelligence (AI) for portfolio generation. The AI generates portfolios, services, and activities based on the theme and details you provide. The more details you provide, the more accurate the results will be.
To create with AI, follow the steps below:
Go to Settings → Portfolios
In the top menu and then in the side menu.
Click on Generate portfolio with AI
The button is located next to the search bar. A small window will open in the center of the screen.
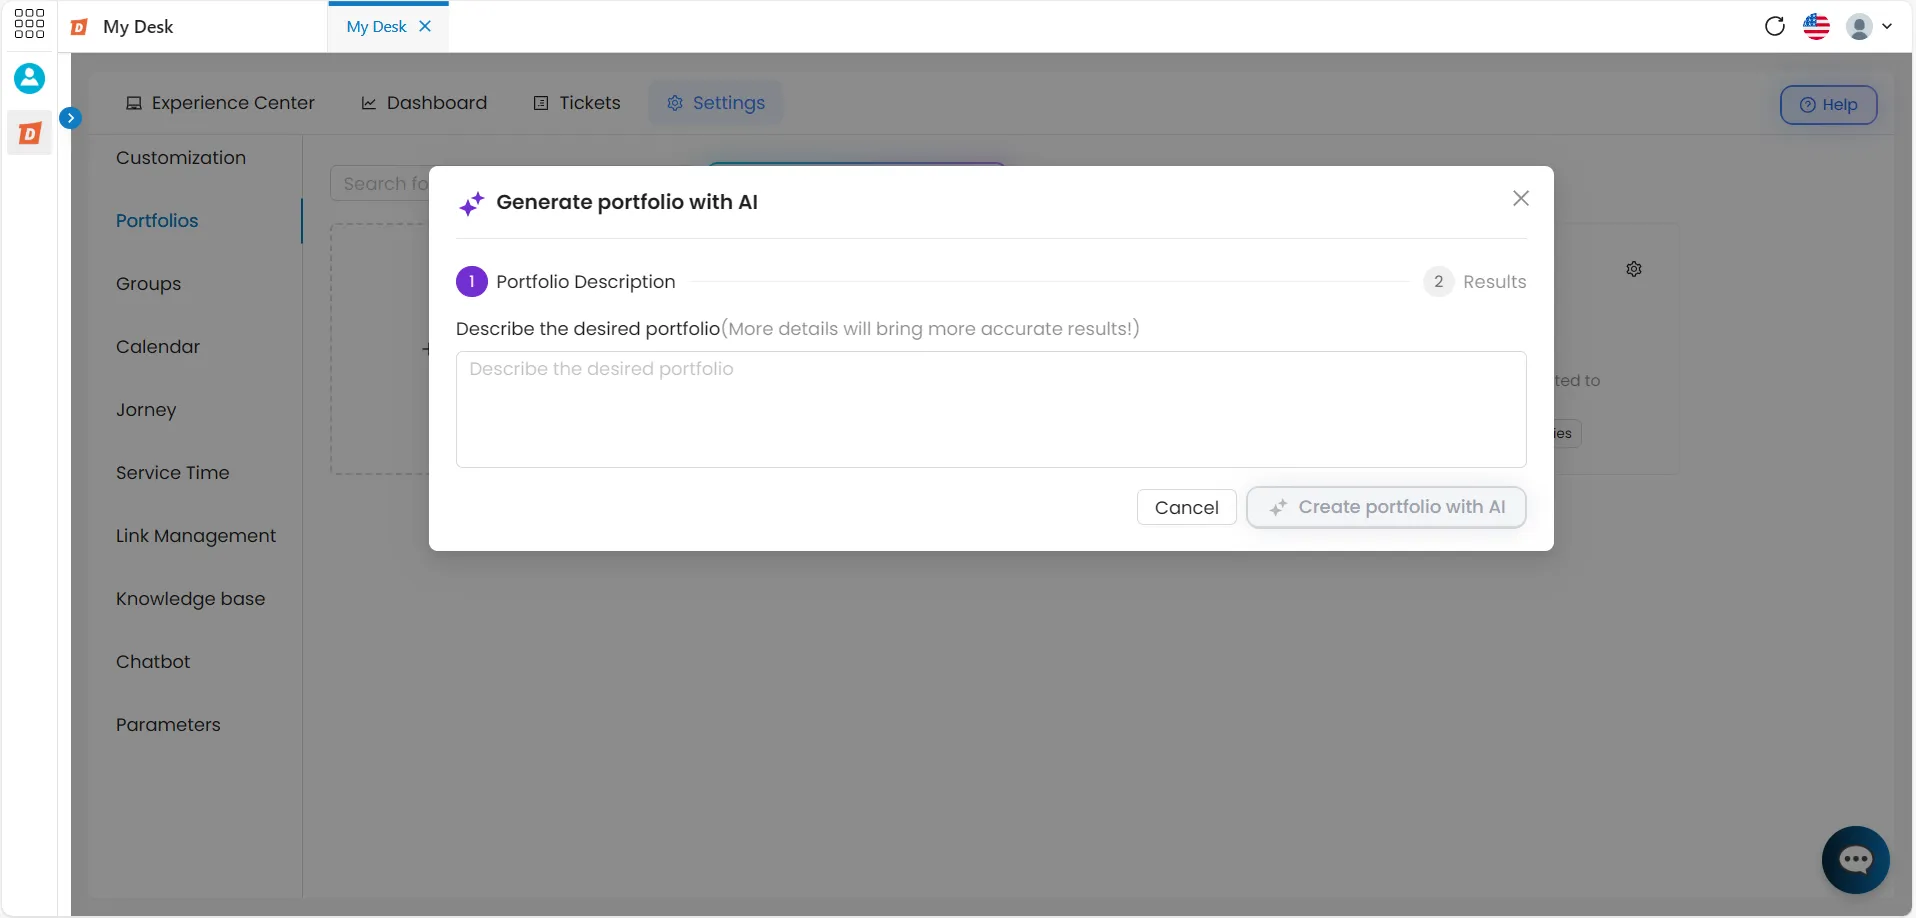
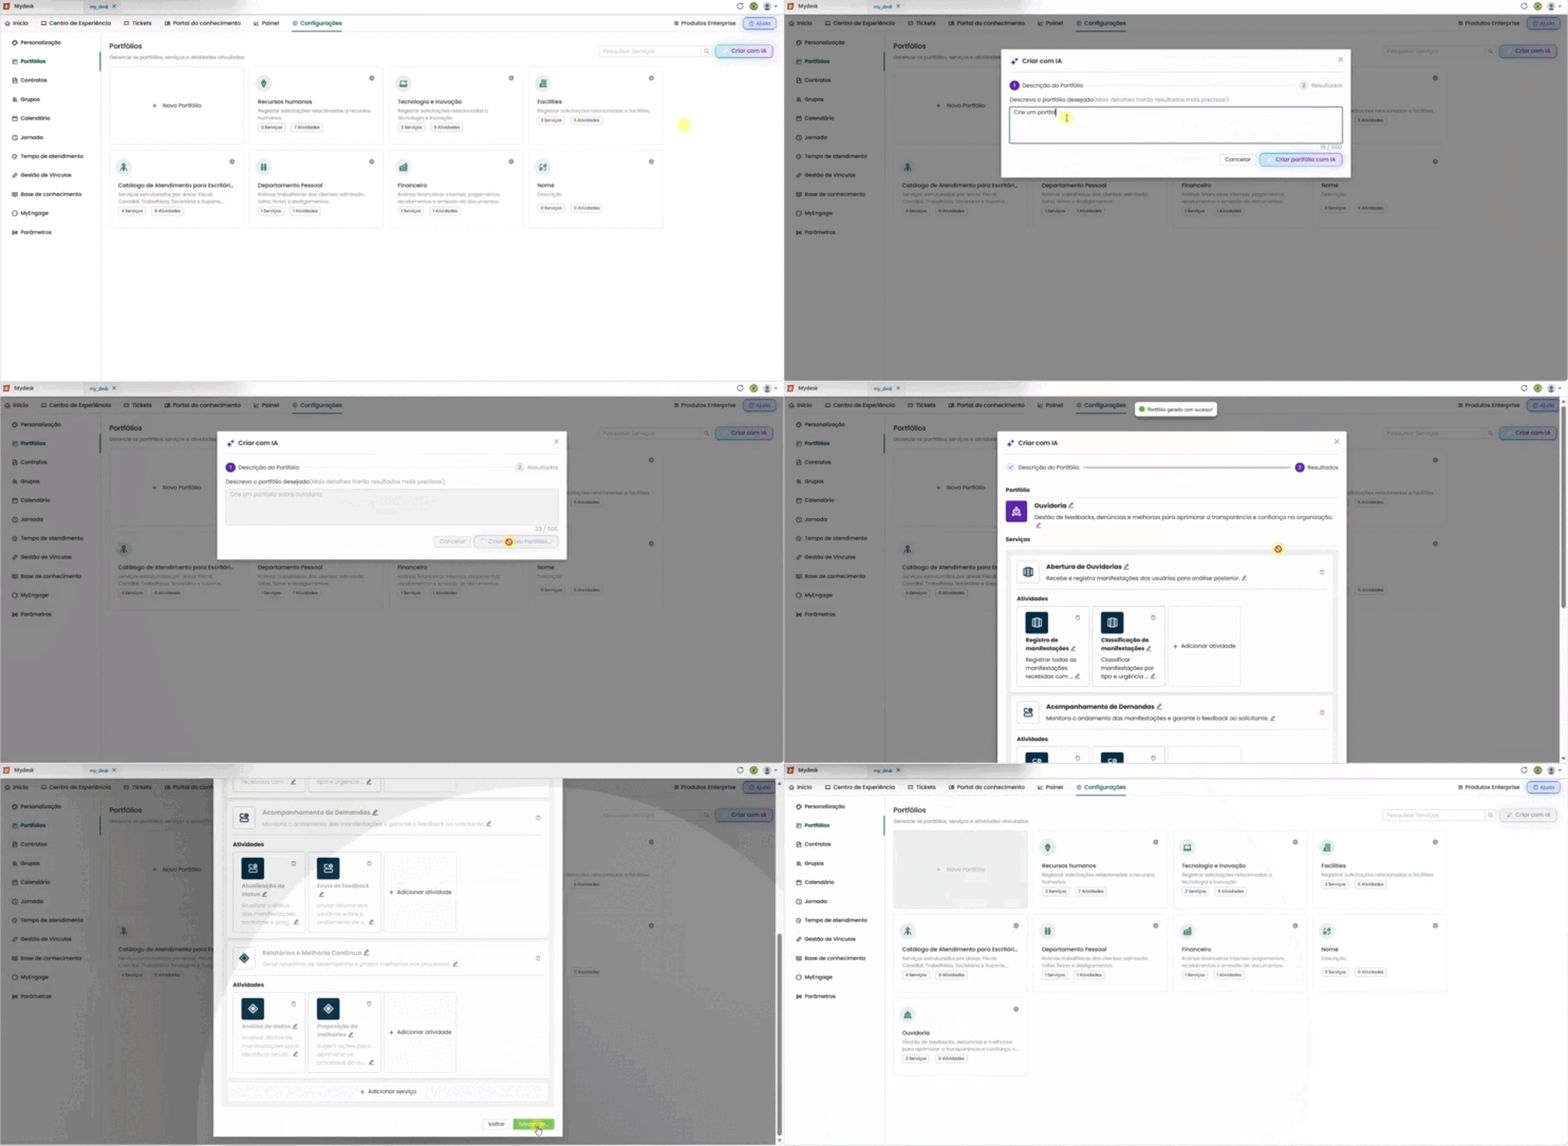
Describe the type of portfolio you are looking for
The more details you include in the description, the more accurate the results generated by the AI will be.
Click on Create portfolio with AI
Please wait a few seconds while the AI processes your request.
Review the generated suggestion
A new window will appear with suggested portfolios, services, and activities. Edit or add services if desired.
Save or discard
Click Save portfolio to accept the suggestion and create the new portfolio, or Back to discard and try again.
Activity Link

Linking activities makes the activity appear in the Experience Center and allows you to open a ticket through the portfolio. You can link activities generally (without a contract) or by specific contract — useful when different clients have distinct contracts with their own service configurations.
💡 Other ways to manage relationships:
To link individually by activity, go to the Activity LinkLinks page. To edit existing links, go to Link ManagementLink Management.
1 - How to access the link management
Go to Settings → Portfolios
In the top menu and then in the side menu.
Click the gear icon next to the desired portfolio
The portfolio editing window will open on the right side of the screen.
Choose the type of link
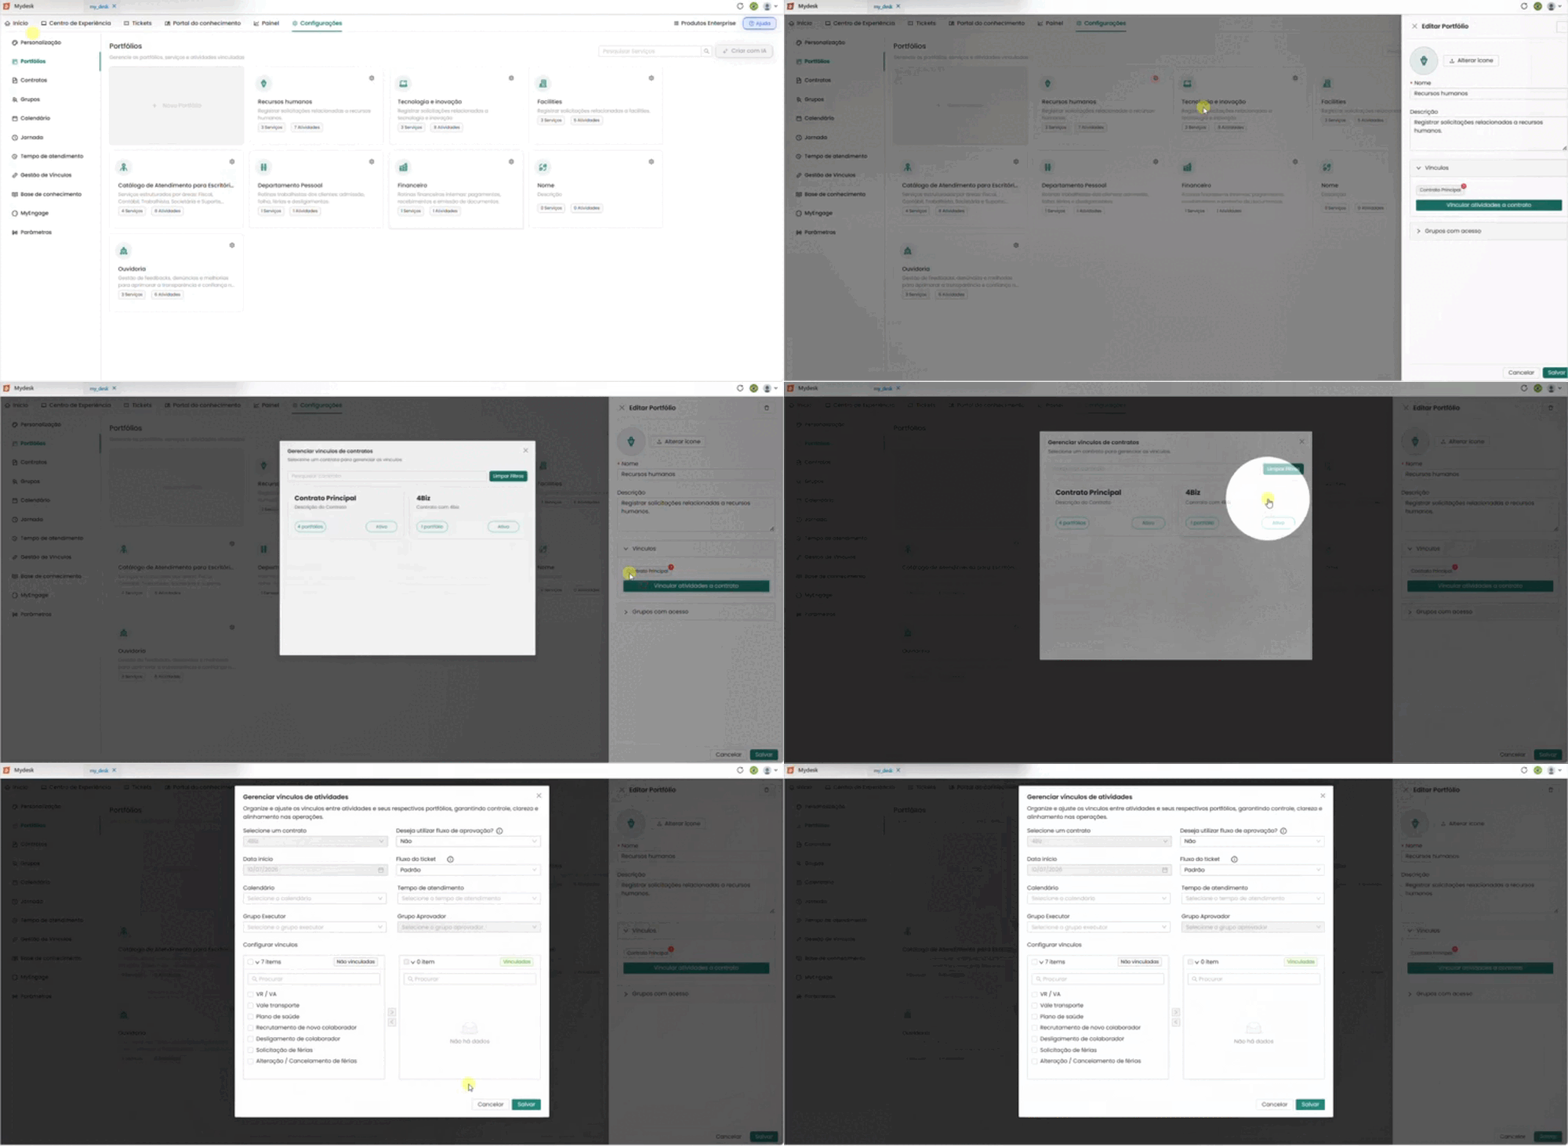
Click on Link activities to contract to link contracts and activities.
2 - Linking Contracts
When you click on "Link activities to contract," a window will open in the center of the screen with the message "Select a contract to manage the links." Below there is a search bar and a "Clear filters" button.
The available contracts are displayed on cards, as in the examples below:
Main Contract
Handling incidents and requests for all users in the organization.
.
3 portfolios Active
Southern Branch Contract
Exclusive service for the Southern unit, with a differentiated SLA.
.
0 portfolio Inactive
Click on the desired contract to select it and proceed to the next step.
3 - Manage activity links
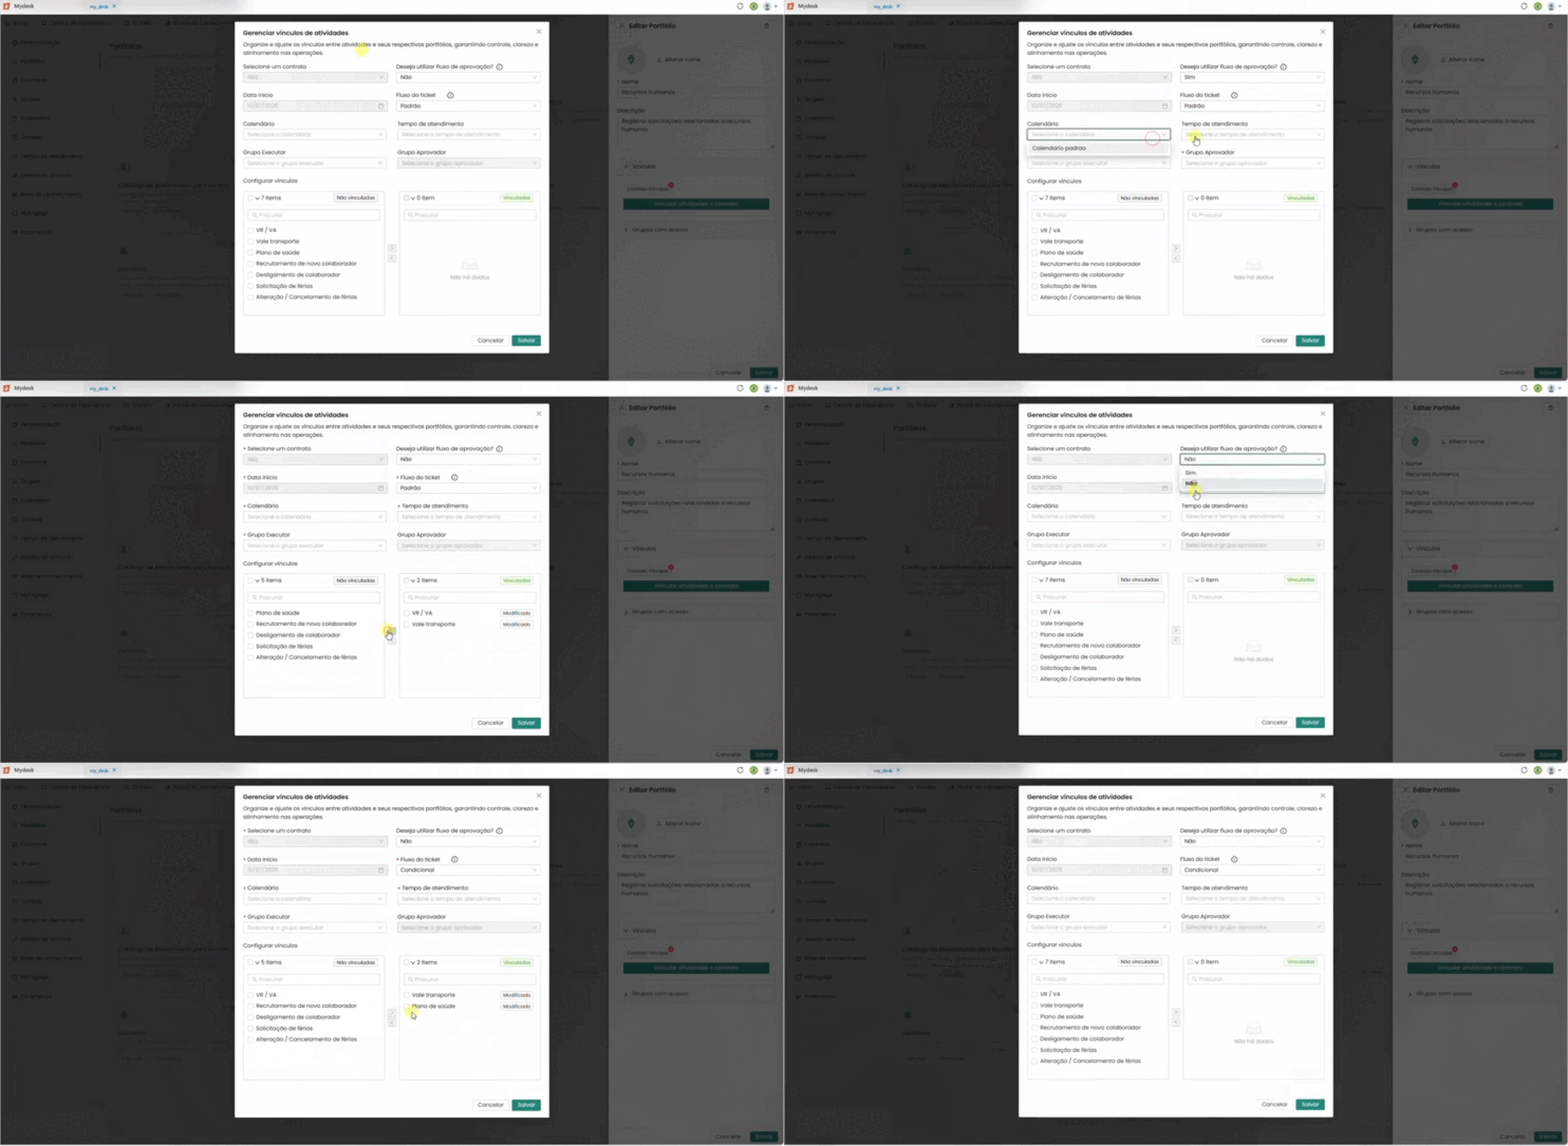
After selecting the contract, the Manage Activity Links window opens.
The selected Contract is already selected and cannot be changed at this stage.
In the next item, you will need to choose whether you want to use an approval workflow.
The approval workflow is the process by which requests undergo review and authorization before or after they are handled. This ensures that important actions are approved by the responsible parties, maintaining control and compliance in service delivery.
3.1 - Link to approval workflow
To configure the Approval Workflow, follow the steps below:
Activate the approval workflow.
The second option in the window asks: Do you want to use an approval workflow?
Click on the drop-down list and select the Yes option.
Start date
Automatically filled with the current date. Cannot be modified.
Ticket flow
Choose the type of flow. See the options below.
Standard
The call will be closed as soon as the negotiation is completed, without depending on additional conditions or external approvals.
Conditional
The ticket can only be closed based on certain predefined conditions — for example, all sub-tickets linked to it must have been processed.
Standard with pre-approval
The processing of the request will only begin after approval or rejection by at least one of the approvers.
Standard with approval
After the request is processed, it will be necessary to submit the service for approval. The request will only be closed after receiving a response—approval or rejection—from at least one approver.
Calendar
Select one of the registered service calendars.
Response time
Select the SLA that will be applied to the linked activities.
Executor Group
Select the group responsible for handling requests for this activity.
Approval Group
Select the user group responsible for approving the activity. Available only when the approval workflow is active.
Configure activity links
The link configuration area is divided into two parts: Linked and Unlinked. See the demonstration in the table below:
To unlink
- In the selection box, check the linked activities; Click the left arrow <; The activities will be moved to the unlinked box; Click Save and then Save again in the Edit Activity window to complete the configuration.
To link
- In the selection box, check the linked activities; Click the left arrow <; The activities will be moved to the unlinked box; Click Save and then Save again in the Edit Activity window to complete the configuration
3.2 - Link without approval workflow
In this case, only two flow fields will be available — Default and Conditional — and the Approver Group field will not be available.
To link the activity without an approval workflow, follow the steps below:
Do not activate the approval workflow.
The second option in the window asks: Do you want to use an approval workflow?
Click on the drop-down list and select the "No" option.
Start date
Automatically filled with the current date. Cannot be modified.
Ticket flow
Choose the type of flow. See the options below.
Standard
The call will be closed as soon as the negotiation is completed, without depending on additional conditions or external approvals.
Conditional
The ticket can only be closed based on certain predefined conditions — for example, all sub-tickets linked to it must have been processed.
Calendar
Select one of the registered service calendars
Response time
Select the SLA that will be applied to the linked activities.
Executor Group
Select the group responsible for handling requests for this activity.
Approval group
This field is disabled.
Configure Links
Configure the links in the activities as shown in the table from the previous item.
Groups with access

This section aims to create access control for one or more Portfolios in the Experience Center through user groups. It defines the groups with access to the Portfolio in the Experience Center. This is only valid if group restrictions are enabled on the Parameters page.
To learn how to enable or disable Parameters, go to the ParametersParameters page.
Managing Groups
You can restrict access to a Portfolio in the Experience Center to one or more user groups.
The first step is to enable the parameter on the ParametersSettings page.
- With it enabled, all portfolios and activities will no longer appear in the Experience Center. To view them again, you need to configure the groups that can access each one.
To do this, follow the steps below:
- Click on the Settings tab;
- Click on Portfolio in the side menu;
- Click on the gear action button in the upper right corner of the desired portfolio.
- The Edit Portfolio window will open in the right corner of the screen;
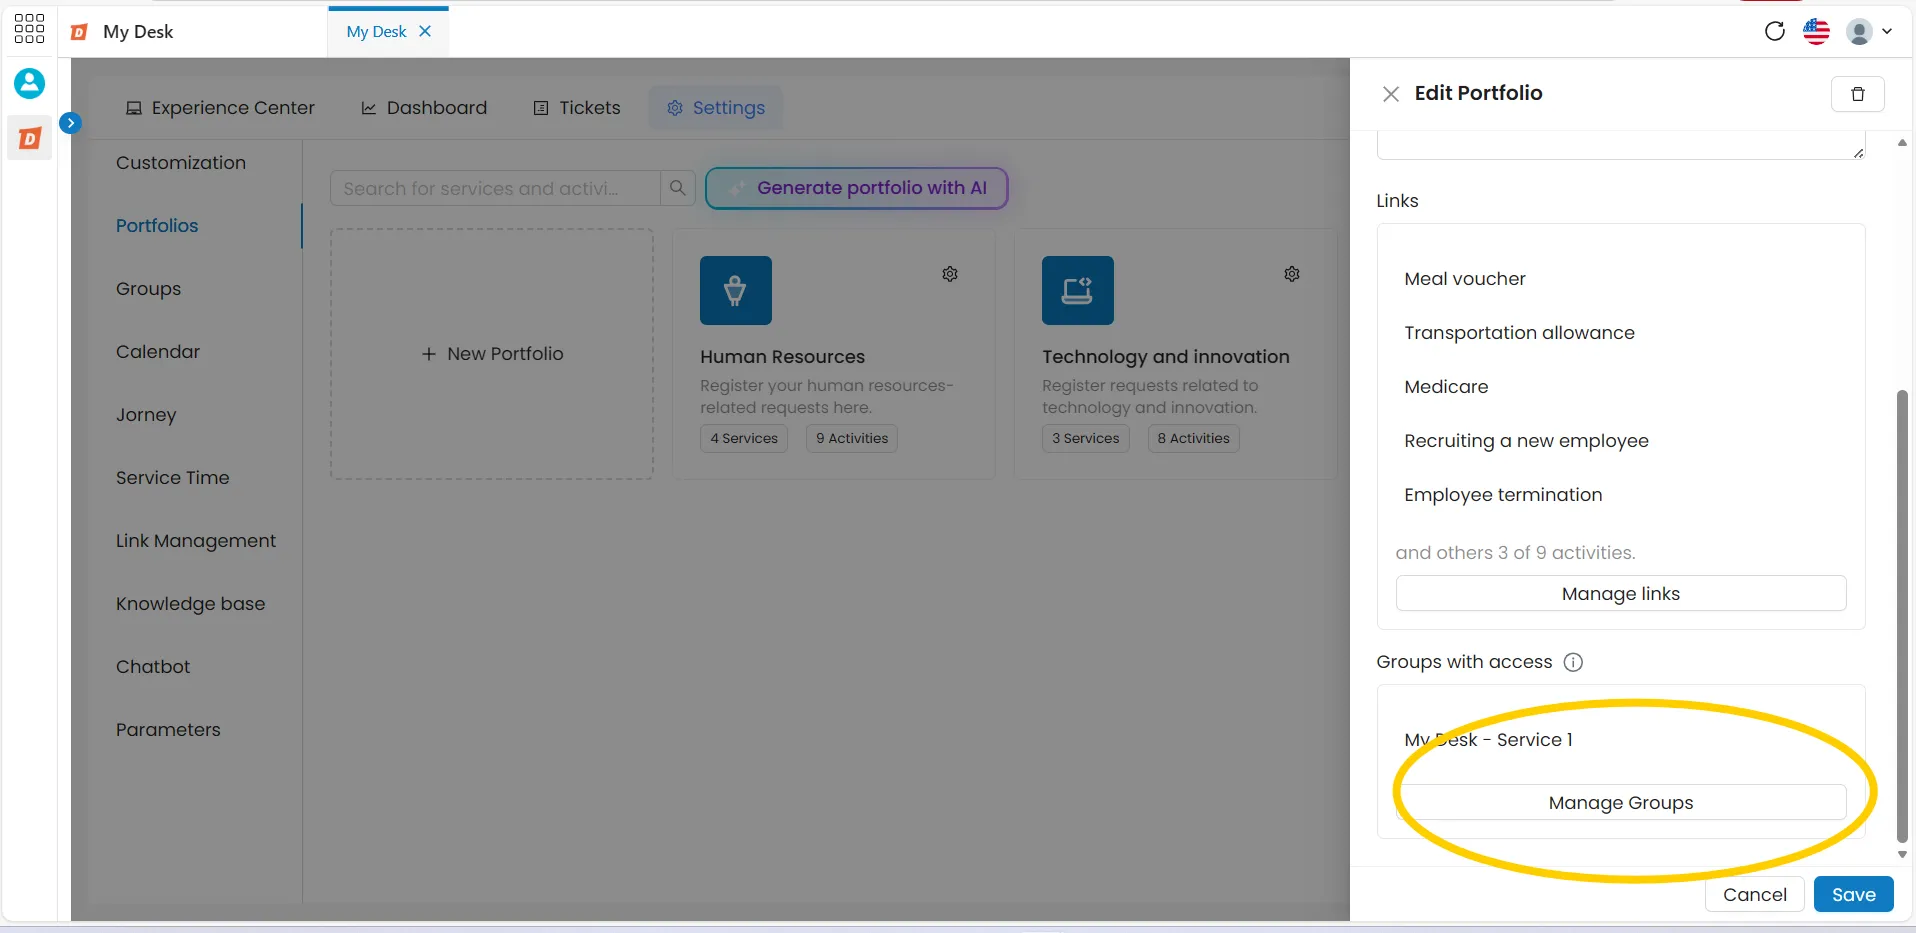
- Scroll to the bottom of the window and you will find the Groups with access section;
- This section defines the groups with access to the Portfolio in the Experience Center, valid only if it is enabled on the Settings page.
- Click on the Manage Groups button;
- A small window will open in the center of the screen;
- Select one or more groups that will have access to this Portfolio;
- Click the Save button in the window in the center of the screen;
- Click the Save button in the bottom right corner of the right-hand side window;
- Check now in the Experience Center that the Portfolio is now visible to the chosen group.
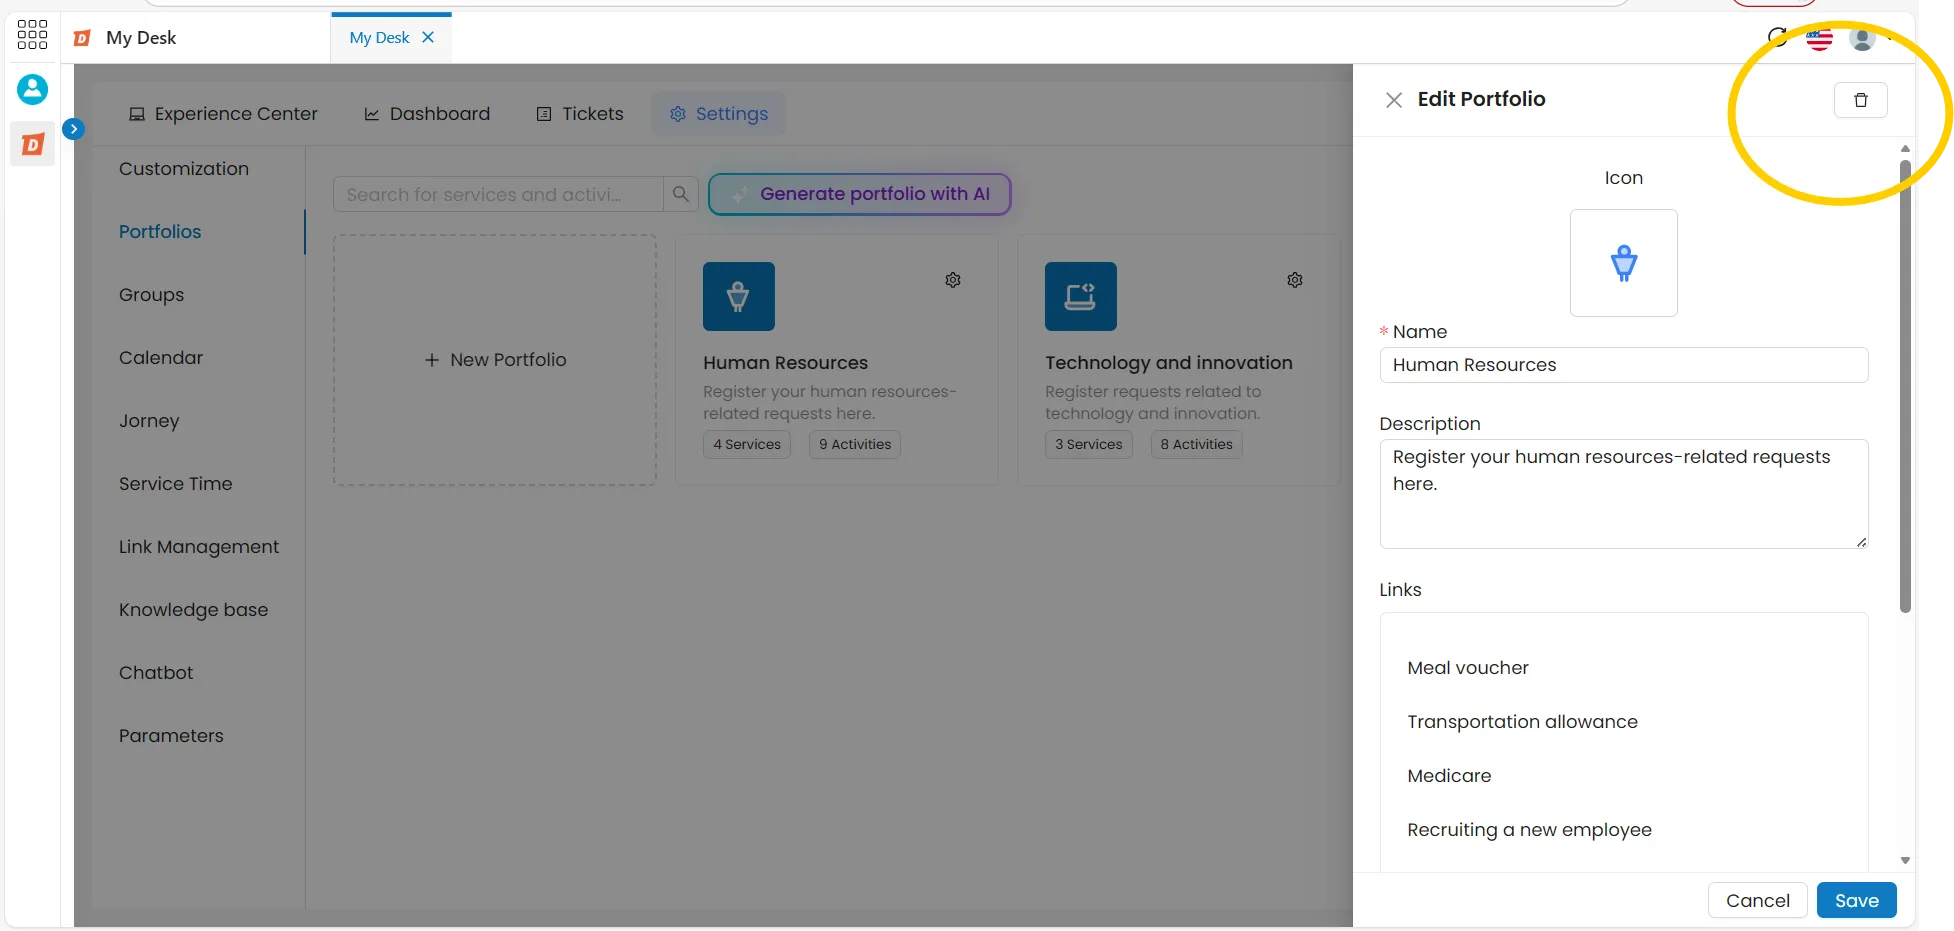
Edit Portfolio

To edit a Portfolio, follow the steps below:
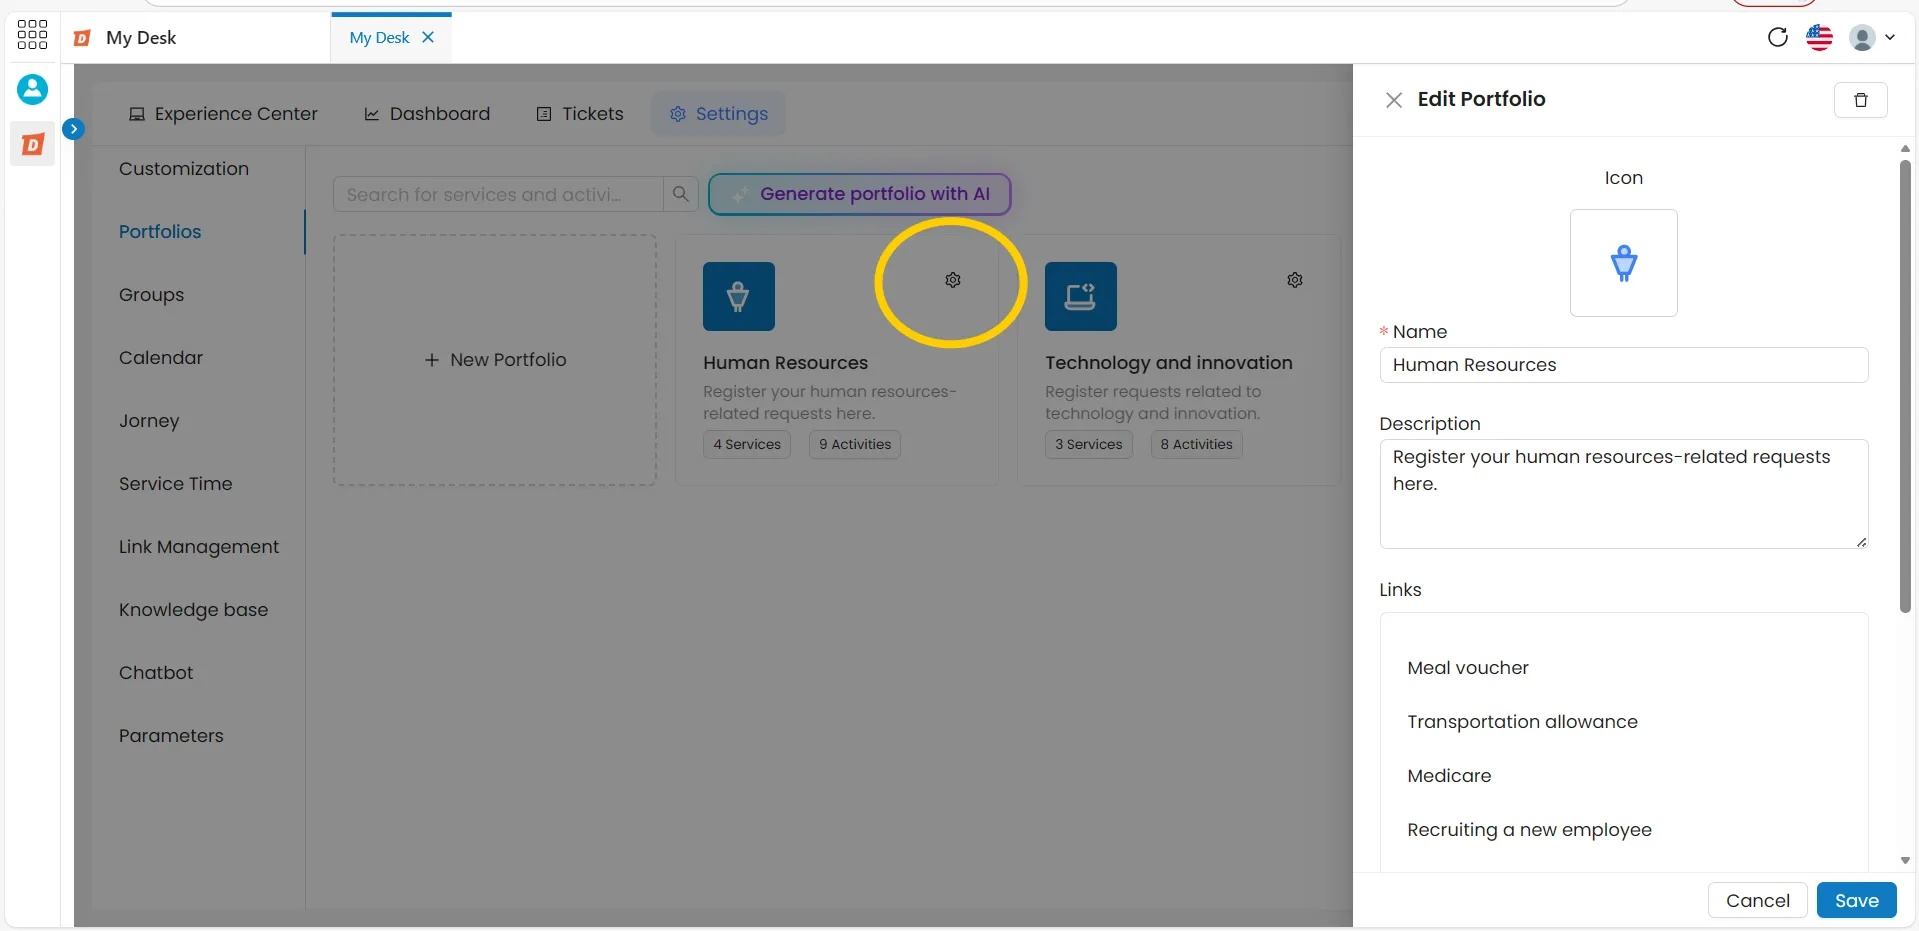
- Click on the gear icon of the Portfolio you want to edit;
- The editing window opens in the right corner of the screen;
- Make the edits you want;
- Click Save to finish.
Delete Portfolio

To delete a Portfolio, follow the steps below:
- Click on the gear icon of the Portfolio you want to delete;
- The editing window opens in the right corner of the screen;
- Click on the trash can icon , located in the upper right corner of the window;
- A small window appears with a message asking if you are sure about deleting, as this action cannot be undone;
- Click on Delete to complete the deletion;
- A confirmation message will appear at the top of the screen.